Summary of RGB Box Clock
This project features a clock and decorative RGB LED matrix controlled by a Colorduino Shield and NodeMCU v3 Board via I2C communication. Users can set alarms and customize colors using the Blynk app. The enclosure is 3D printed with PLA, with specific printing instructions provided. Wiring follows a simple schematic, and the boards are programmed using Arduino IDE with various libraries. The NodeMCU handles WiFi and app communication, while the Colorduino manages the LED matrix. The total cost is approximately €20.
Parts used in the RGB Box Clock:
- LoLin V3 NodeMcu Lua CH340G ESP8266 Board
- Colorduino V2.0 + 2088RGB-5 8x8 Matrix
- Touch Button
- Active Buzzer
- PLA Printer Plastic
This is a clock and decorative RGB Led Matrix
It’s controlled by a Colorduino Shield and NodeMCU v3 Board using i2C communication.
With Blynk app you can setup the alarm,change colors and other things.
Parts list is:
LoLin V3 NodeMcu Lua CH340G ESP8266 Board 6€ Link
Colorduino V2.0 + 2088RGB-5 8×8 Matrix 10€ Link
Touch Button 1€ Link
Active Buzzer 1€ Link
PLA Printer Plastic 2€
Total price is about 20€
Step 1: Print the Box
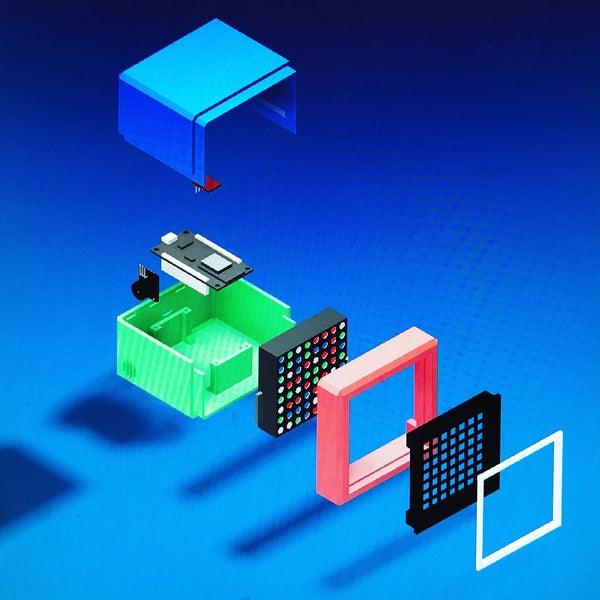
Parts available on Thingiverse
Printing setup:
- layer resolution 0.15
- infill of 25%
- 1.75mm PLA plastic
Supports, depend the part:
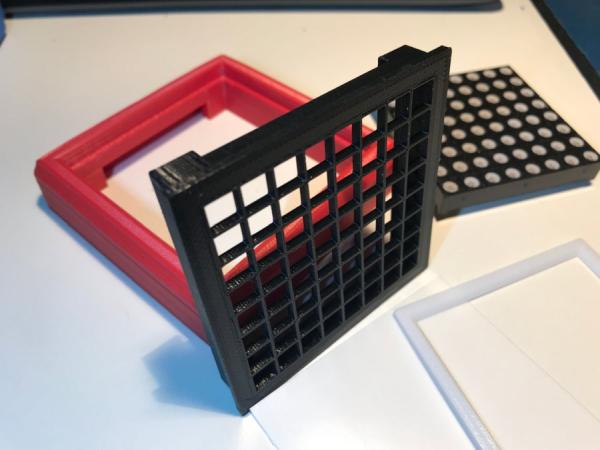
- Frontal.stl > Use supports
- Trasera_Superior.stl > Designed with part, don’t use support generation.
- Trasera_Inferior.stl > Designed with part, don’t use support generation.
- Frontal_Marc.stl > Don’t use supports
- Frontal_Matriu.stl > Don’t use supports
Once printed, remove gently the supports.
Be aware that the bolts holes are done only for Lolin NodeMCU v3, any other board will not fit into the holes.
Step 2: Mount the Parts
Everything must fit easily.
For the matrix cover find some kind of plastic sheet or just paper.
Step 3: Do the Wiring
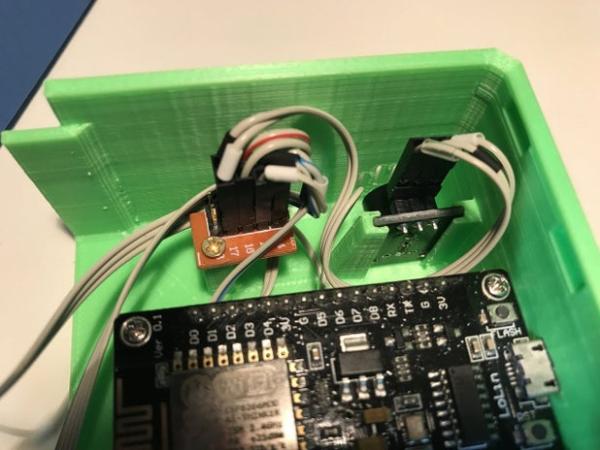
Follow the schematics in the image, is quite easy.
There’s a hole to install a little piece put together all the main power supply, I used a cutted prototyping PCB but you can use whatever you want.
Step 4: Programming the NodeMCU and Colorduino
Both are coded on Arduino IDE
For NodeMCU v3 Lolin
You’ll need following Libraries
- EEPROM.h
- Wire
- Timelib.h
- ESP8266Wifi.h
- ESP8266WebServer.h
- TimeLib.h
- Blynk libraries
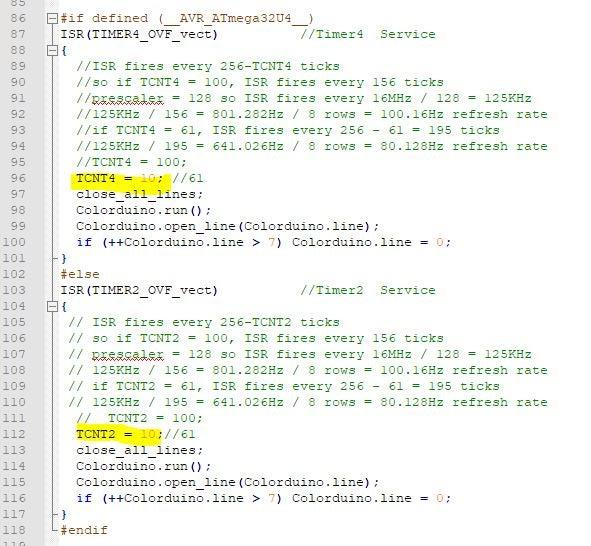
For Colorduino (or icDuino)
You’ll need following Libraries
Use Colorduino.cpp library to have better performance (don’t needed, just change the highlighted lines shown at the picture with code)
Colorduino boards and derivatives like icDuino (is what I used) is a Duemilanove or Decimilia MCU, so configure arduino IDE to load the code.
Step 5: Blynk App Setup
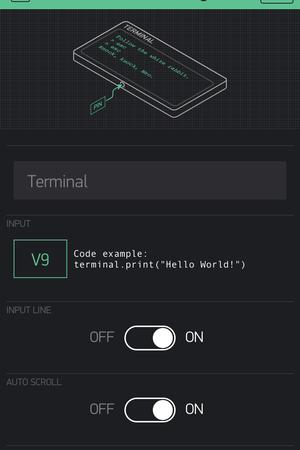
Download Blynk App on your phone or tablet
Clone the project with the QR code on the first image.
Step 6: And Play With It
Source: RGB Box Clock