Automatic Rain Sensing Wiper Using Arduino
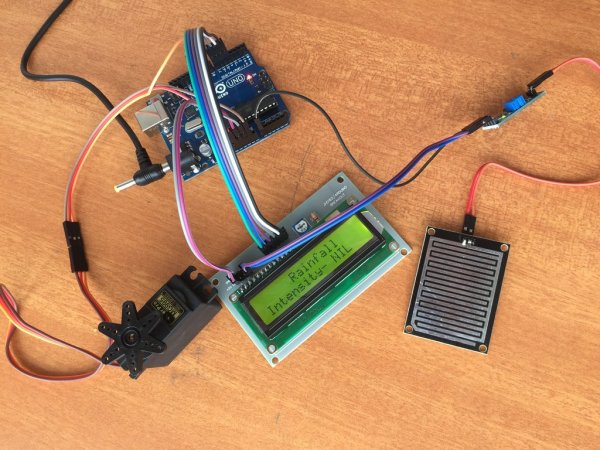
This project is designed to build a car wiper that automatically detects the rainfall intensity and regulates the frequency of wiper operation. It is built, using Arduino UNO board. A rain sensing module is used for measuring the intensity of rainfall. And a servo motor is used for controlling the wiper movements. An LCD module is also attached to the controller for displaying the rainfall intensity. By measuring the amount of rainfall , controller will adjust the speed of servo motor . Servo is controlled by generating PWM signal at its signal line.
Objectives of the Project
- Measuring the amount of rainfall.
- Displaying the intensity of rainfall in an LCD module.
- Controlling the servo motor speed according to the output from the sensor module.
Lets begin to build our project – Rain Sensing Car Wiper
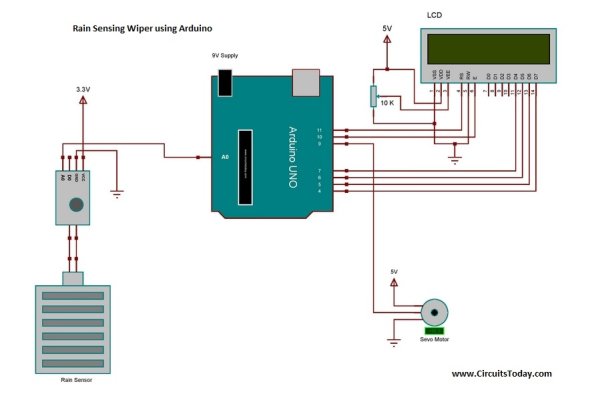
Assemble the circuit as shown in diagram! Important connections are explained below.
MH-RD rain detector is the sensor module that we are using here. The module have 4 pins: Vcc, A0, D0 and Gnd. Vcc and Gnd are connected to the supply pins of the Arduino. A0 and D0 are the analog and digital output pins of the module respectively. Since we need continuous change in rainfall, we will make use of the A0 pin instead of D0. The analog out from senor is then connected to one analog input pin of Arduino.
As mentioned earlier a servo motor is used here for wiper movements. Servo motor is a special kind of high torque dc motor whose shaft can be adjusted to desirable position by generating an appropriate PWM signal at its signal line. Here we connect the signal line of servo to one of the PWM pin of Arduino(i.e. digital pin 9). Next comes is the LCD module, which is for displaying the rainfall intensity. Interfacing of Arduino to 16×2 LCD is quite simple. JHD162A is the LCD module used here. JHD162A is a 16×2 LCD module based on the HD44780 driver from Hitachi. The JHD162A has 16 pins and can be operated in 4-bit mode (using only 4 data lines) or 8-bit mode (using all 8 data lines). Here we are using the LCD module in 4-bit mode. To facilitate communication between Arduino and LCD module, we make use of a built in library in Arduino <LiquidCrystal.h> – which is written for LCD modules making use of the Hitachi HD44780 chipset (or a compatible chipset). Control pin RS, RW and En are directly connected to arduino pin 13, GND and 10. And data pin D4-D7 is connected to 7,6,5 and 4 of Arduino.

When the device is switched ON, the servo motor will turn the wiper to zero degree position. After that the controller will continuously checks the signal from rain sensing module. If the signal from the module goes beyond a minimum value, the servo motor begins to operate . The speed of operation of servo will be varied according to the strength of the signal. And the intensity of rainfall will be displayed on the LCD according to the signal strength .
Read more: Rain Sensing Wiper using Arduino and Servo Motor