Either for benchmarking purposes or as external telemetry to help you stay within the acceptable range for your computer power, super users usually have the desire to have a way of knowing what the performance numbers of your PC are. For today’s tutorial, we will build a PC Hardware monitor which is capable of obtaining several performance-related parameters from your computer and displaying them on a Nokia 5110 LCD display.
Our PC Hardware monitor tutorial is based on the Arduino Nano microcontroller and a Nokia 5110 LCD Display. We have extensively used both of the components in past tutorials, especially the Nokia 5110 LCD Display for which we have done tutorials on displaying custom graphics, and several more tutorials on creating a custom menu on the display etc.
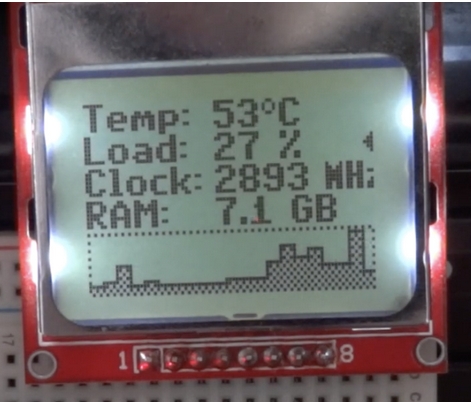
The principle of operation of today’s project is based on the “Grant Snatts” Hardware Serial Monitor project, which in turn, is based on the SerialSender utility which uses the open-source OpenHardwareMonitorLib.dll to sniff the sensors of the dedicated GPUs, graphic Cards, CPU and motherboards of most modern personal computers whilst, also pooling windows hardware stats. This stats and data are then obtained by the Arduino over the serial port and displayed on the Nokia 5110 LCD display. To do a better than other versions of the project out there, rather than just displaying the data, we will plot performance graphs to show information the CPU Load and the CPU Clock.
At the end of today’s tutorial, you would know things like graph plotting etc on the Nokia 5110 as well as interacting with the PC directly using the Arduino.
REQUIRED COMPONENTS
The following components are required to build this project.
- Arduino Nano or Arduino Pro Mini with USB to serial adapter
- Nokia 5110 LCD
- Jumper Wires
- Breadboard
These components can be bought from any electronic components store online.
SCHEMATICS
The schematics for this project is simple and should be familiar if you have been following several of our tutorials. Since the project is made up of just two main components, all we need to do is connect the Nokia 5110 LCD Display to the Arduino as shown in the schematics below;
To further make the connection easy to follow, a pin to pin connection between the Arduino and Nokia 5110 LCD display is described below.
Read more: PC HARDWARE MONITOR WITH NOKIA 5110 DISPLAY AND ARDUINO