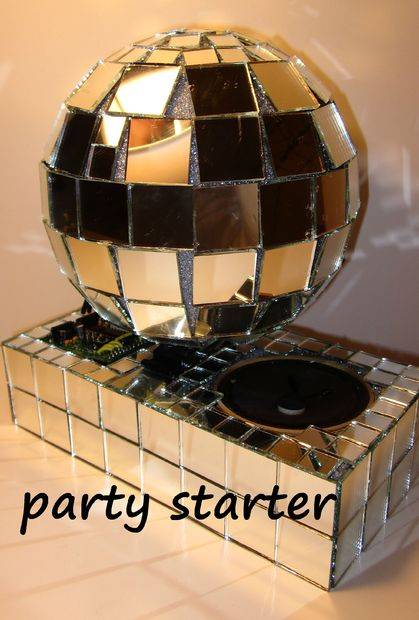
A desktop motorized musical disco ball. Great for holiday parties, impromptu dance-offs, and Tuesday afternoons. Bling, Music, Arduino, and glitter covered styrofoam; this Instructable has got what you need to get your boogie on. Fires need help go get going, so do parties. I recently moved from Hartford where my boys @HPSU(http://hartfordpartystarters.org/) would get it started every week. Now I live in boring Indiana, where there are no parties(Save church socials). With that in mind and the Party Season upon us, Lets make.
I have a glitch in the code, so it stutters every once in a while. No biggy for me, I’ll fix it later. I also would have showed myself dancing and partying in the video, but my clothes are matte and boring.
Step 1: Parts & Tools
Craft Parts
Velco Pads
Electronic Parts
Arduino IDE (I’m still rocking 21)
Solder Iron
Dremel
Glue Gun
Gloves/Face Mask/Eye Protection
Step 2: Underpainting The Ball
I wanted a base coat of reflective, shiny material so that anyplace where mirrors aren’t has some reflective quality. This ball used almost this entire mini can of spray paint. The holder for the ball was quickly made by twisting some coat hanger wire into a shape that’d hold the ball off the ground.
Step 3: Add the mirrors
Start with the center line and work your way out. Dab a bit of glue and place the tiles. Don’t worry too much about gaps, we are attaching square tiles to a circle after all. That’s why we painted it with sparkle paint.
I had to take a break for the night after the top section was completed. The glue I was using took FOREVER to dry. The next day I switch to the ol’ hot glue gun.
Step 4: Finish the Ball
Now that the mirrors are all set, We’ve got to use a clever way to attach it to the servo. Velcro will be our mating material. I don’t want to ruin a servo and it’ll be handy for transportation to be able to remove the ball.
Step 5: Make the Base
Start by marking off where you want the components to go on the foam block
Like all cutting, measure twice and cut once.
I used a Dremel to remove unwanted foam. There are foamcutters, you could use a lighter, smash and tear at it. Whatever your method, know that the servo must be tight so that all the torque and power is transferred to the party ball. Also dremeling this foam turned it into a fake snow like substance, Lots of Fun, bad for the lungs-WEAR PROTECTION.
Go around, add a ton mirrors. Try not to burn yourself on the glue or cut yourself on the glass.
Fore more detail: The party starter


