Ever tried to get out of bed quietly at night only to trip over something and wake up the whole house?
Motion sensing night lights installed discreetly under your bed provide low-level light bright enough to guide you around those stray LEGO bricks but dim enough so you’re not woken up fully. As well as sensing motion, it’s also possible to programme the lights to a colour of your choice for a fixed (or indefinite) length of time. They add a cool glow and ambiance to any bedroom.
With some basic kit, a couple of extra bits and our T3ch Flicks tutorial and video, you can install these lights with relative ease in a couple of hours.
Materials:
- Power supply (5V 6A) Amazon
- Addressable LED strip Amazon
- Arduino Nano Amazon
- Wire clips Amazon
- Motion Sensors Amazon
- Rocker switch Amazon
- AC Plug
- Wire
Step 1: Watch This!
Step 2: Measure the Bed
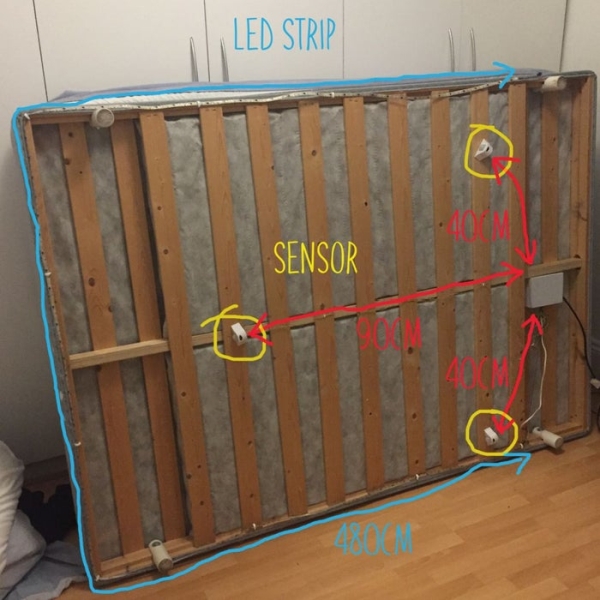
Turn the bed onto its side so the base is readily accessible. Find an appropriate location for the control box, we chose the slightly higher area near the head of the bed (see diagram). Measure the perimeter of your bed and its length and width (see diagram). Note down your measurements.
Determine a location for the three sensors. You want one facing each of the three sides of the bed which are not against the wall. We chose locations which were close to the edge of the bed, but not visible. Measure the distance from the sensor location to the control box.
Step 3: Cut the Wires and LED Strip
Cut the LED stip to the length of the bed perimeter.
Next, cut the wires: you will need three for each sensor and three for the LED strip, each leading back to the control box – 12 in total. Taking three lengths of differently coloured wire, cut to size. We used yellow, green and orange – the accepted convention is red for power, black for ground and another (bold) colour for signal. It doesn’t really matter which colours you use as long as you know which is which.
Step 4: Solder Cables to Motion Sensor
We housed our motion sensors in 3D-printed cases (you can find the file link below). It’s not completely necessary to have these, but they make the sensors tidier and easier to put on the bottom of your bed.
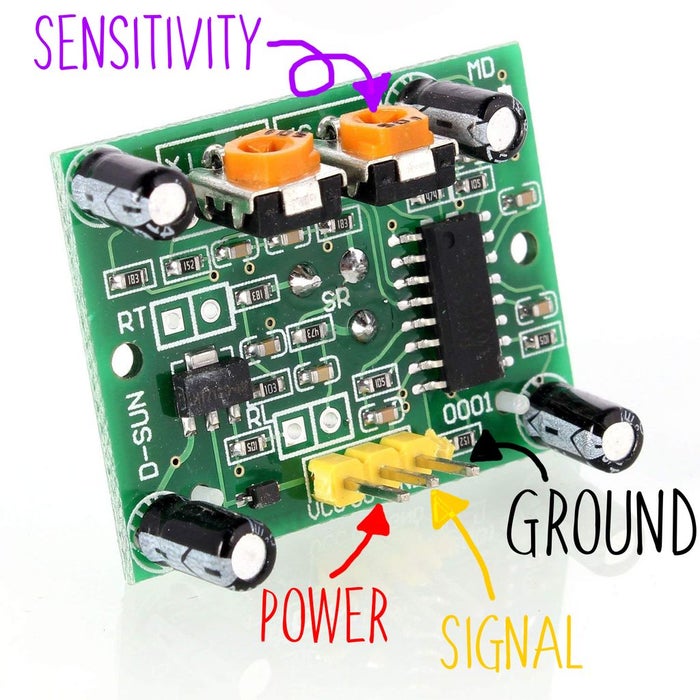
If you are using the 3D-printed case, start by threading the three differently coloured wires through the lid. The motion sensors have three different pins: ground (GND), power (VCC), and signal (S) (shown above). When holding the sensor as shown in the diagram above (i.e. with the pins on the bottom edge of the module), attach the three different coloured wires their respective pins and solder them into place. Then, cover the wires using heat shrink. Repeat this for the wires cut for each of the three sensors.
Push the dome of the motion sensor through the hole in the main case. It should click into place. Close the case, leaving the three coloured wires trailing through the rear hole.
Step 5: Wire the LED Strip
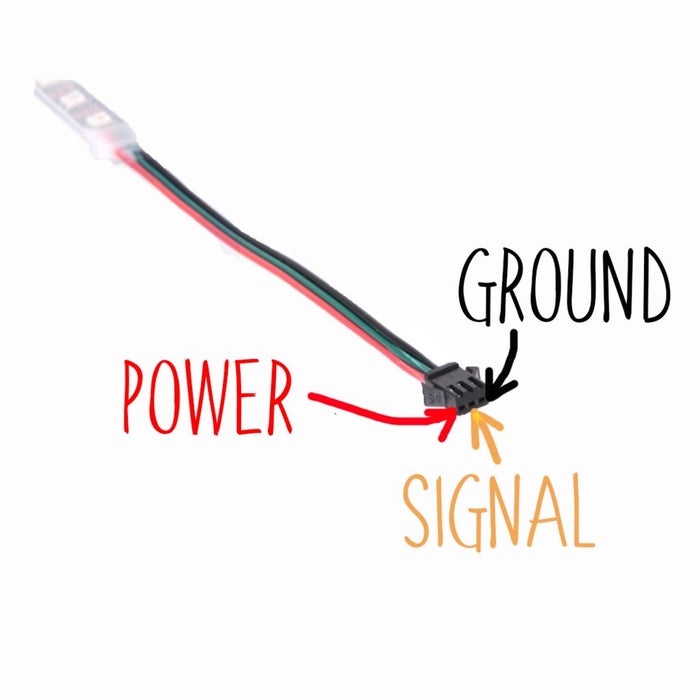
The LED strip has the three same connections: power, signal and ground – except the signal pin is an input.
These LEDs take instructions from the Arduino, each one of them addressable. We can change colour (RGB) and brightness. Solder three coloured wires to the LED strip, these will be used to connect to the Arduino later.
Source: Motion Sensing Under Bed Lighting