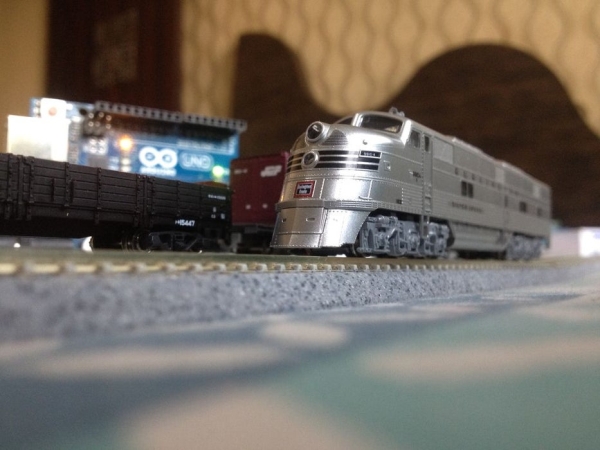
Summary of Model Railway Layout With Automated Passing Siding (V2.0)
This article details an upgraded model railway automation project featuring automatic locomotive coupling and decoupling. The system uses an Arduino to control a motor driver, sensors, and turnouts, enabling the train to shuttle between a mainline and a siding, complete with magnetic uncoupling at the exit.
Parts used in the Model Railway Layout With Automated Passing Siding (V2.0):
- Arduino microcontroller
- L298N motor driver module
- 5 male to female jumper wires
- Set of 3 male to female jumper wires (total of 6)
- 6 breadboard jumper wires
- Two 'sensored' tracks
- 12-volt power supply (at least 1A capacity)
- Appropriate USB cable
- Computer
- Tracks to make the layout
This project is an update of one of the previous model railroad automation projects, The Model Railway Layout with Automated Siding. This version adds the feature of coupling and decoupling of the locomotive with the rolling stock. The operation of the railway layout is as follows:
- The locomotive will start from the mainline and proceed into the siding to couple with the rolling stock.
- The locomotive will couple and take the train out of the siding on to the mainline.
- The train will start to move, speed up, take a couple of loops around the layout and slow down.
- The locomotive will take the train back to the siding in the final loop where it will decouple from the rolling stock and proceed further.
- The locomotive will make one loop around the track, slow down and stop where it started from in the beginning.
- The locomotive will wait for a set amount of time and the whole operation will be repeated again.
So without further ado, let’s get started!
Step 1: Watch the Video
Watch the video to get a complete idea of how the entire railroad operation explained in the previous step takes place.
Step 2: Get All the Parts and Components
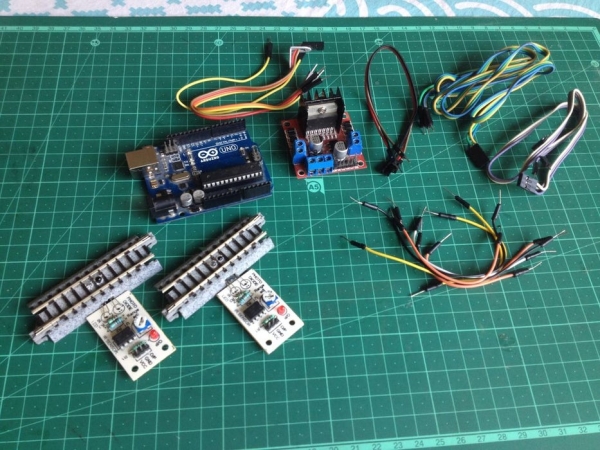
So now you know how stuff is going to go, so get all of the parts and components listed below to get started!
- An Arduino microcontroller(Any Arduino board can be used but take care of pin connections.)
- An L298N motor driver module(This type of motor driver is recommended, regarding its capacity and price.)
- 5 male to female jumper wires(To connect the motor driver’s input pins to the digital output pins of the Arduino board.)
- Set of 3 male to female jumper wires, a total of 6(To connect the sensors to the Arduino board.)
- 6 breadboard jumper wires(Two to connect track power to one output of the motor driver and four to connect two turnouts of the siding to the other output of the motor driver.)
- Two ‘sensored’ tracks.
- A 12-volt power supply(Current capacity of at least 1A.)
- An appropriate USB cable to connect the Arduino board to a computer(For programming).
- A computer(Obviously : )
- Tracks to make the layout.
Step 3: Upload the Arduino Program to the Arduino Microcontroller
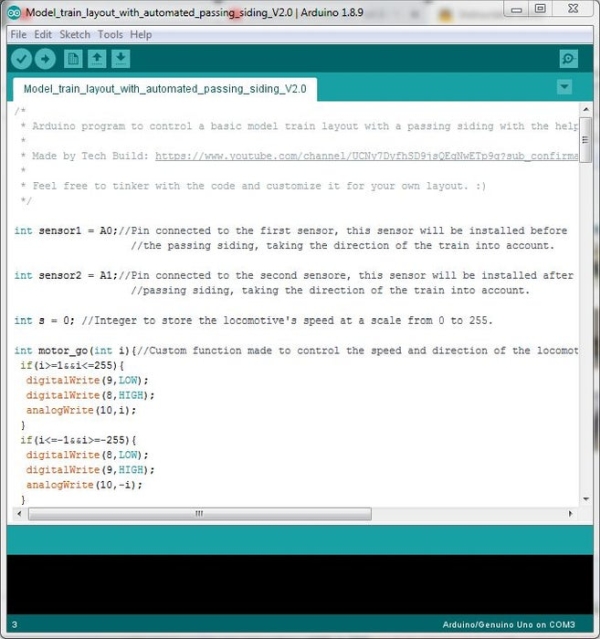
Get the Arduino IDE from here. Go through the code to understand how the operation will work.
Step 4: Make the Layout
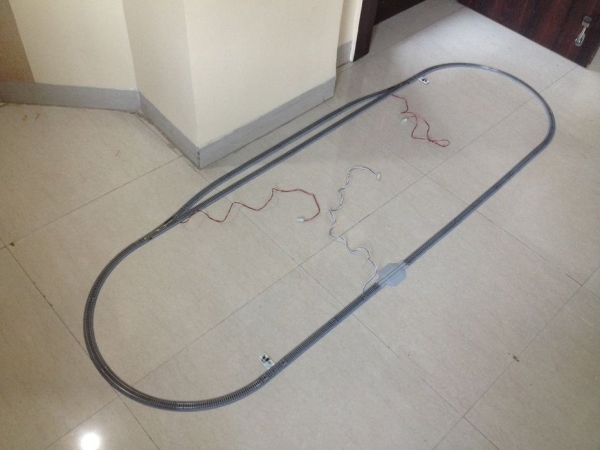
The layout will contain a passing siding with a magnetic uncoupler track at the exit of the siding to let the locomotive uncouple from the rolling stock before leaving the siding. A ‘sensored’ track will be installed just after the siding to let the microcontroller know when the locomotive leaves the siding or crosses that particular section of the track.
Another ‘sensored’ track will be installed before the siding such that the length of track between this ‘sensored’ track and the siding with respect to the train’s direction of movement is greater than the length of the train.
After setting up the layout, make sure the track rails are clean to ensure the smooth running of the train.
Step 5: Connect the Turnouts to the Motor Driver

Connect both the turnouts in parallel(+ve and -ve of one to the +ve and -ve of the other respectively). Connect the parallel wired turnouts to the output pins of the motor driver module marked ‘OUT1’ and ‘OUT2’. You might need to reverse the turnout connection to the motor driver’s output if they switch to the wrong direction after powering up the setup.
Step 6: Connect the Motor Driver to the Track Power Feeder

Connect the track power feeder’s wires to the output pins of the motor driver marked ‘OUT3’ and ‘OUT4’. You might need to reverse the polarity of the wiring connection if the locomotive starts to move in the wrong direction after powering up the setup.
Source: Model Railway Layout With Automated Passing Siding (V2.0)
- What is the primary new feature of this project version?
This version adds the feature of coupling and decoupling of the locomotive with the rolling stock. - How does the locomotive operate during the cycle?
The locomotive starts on the mainline, couples with stock in the siding, loops around the layout, returns to the siding to decouple, makes one loop, stops, waits, and repeats. - Which motor driver module is recommended for this project?
An L298N motor driver module is recommended regarding its capacity and price. - Where should the magnetic uncoupler track be installed?
A magnetic uncoupler track is placed at the exit of the siding to let the locomotive uncouple from the rolling stock before leaving. - How many 'sensored' tracks are required for the layout?
Two 'sensored' tracks are required: one just after the siding and another before the siding. - Can any Arduino board be used for this project?
Yes, any Arduino board can be used provided you take care of pin connections. - What is the minimum current capacity required for the power supply?
The 12-volt power supply must have a current capacity of at least 1A. - How should the turnouts be connected to the motor driver?
Both turnouts must be connected in parallel to the output pins marked OUT1 and OUT2.