Summary of Micro LASER Show with a CD Lens Mechanism using Arduino
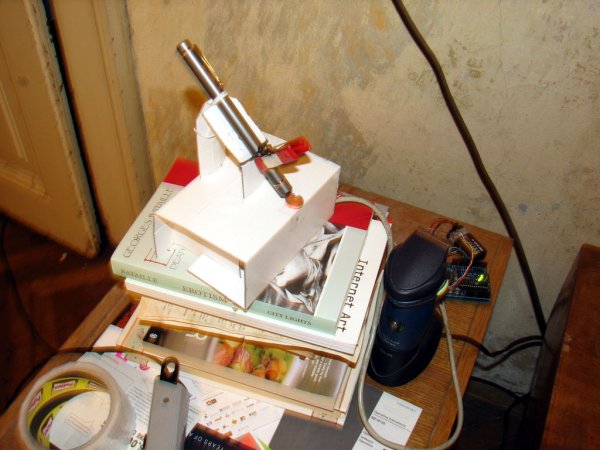
This article details a low-cost, DIY two-dimensional laser show projector using a pivoting mirror driven by a CD/DVD optical drive's lens focusing mechanism. The project is beginner-friendly and can be controlled via an Arduino or other signal sources like sound cards.
Parts used in the Micro LASER Show with a CD Lens Mechanism:
- Broken CD-ROM, DVD or other optical drive
- LASER pointer
- Small round mirrors (or mylar)
- Short piece of stiff wire
- Soft wire for signals
- Stable housing (plastic box)
- Arduino (signal source)
- Cross head screwdrivers
- Soldering iron
- Wire cutters
- Glue gun
- Sharp pin
- Pliers
Hello!
This is the cheapest and easiest way to make a two-dimensional laser show projector.
It uses just one pivoting mirror, powered by the focusing mechanism from a CD or other optical drive.
They said it couldn’t be done, but Ljudmila‘s skunkworks GRL research facility delivers anyway! 😉 This design was first discovered in 2006 and sucessfuly made by several beginners at the Laser Tags workshop in 2007.
I hope this Instructable, my first, will help to spread it around and let all of you make, test and improve it!
Here shown using an Arduino for control, but you could hook some other signal into it easily, from a music player, a soundcard or some other electronic circuit.
Step 1: Gather materials and tools
You will need:
Materials:
- a broken CD-ROM, DVD or other optical drive (you only need the lens focusing mechanism, so you get lots of other cool parts left over)
- a LASER pointer of your choice (those small chinese ones will do fine too)
- the smallest and thinnest mirror you can find. we used small round mirrors meant for making mosaics. (bill buxton recommended trying mylar.) you can also use the very small mirror found inside the optical assembly of a CD drive (under the lens, sitting on an angle)
- a short piece of stiff wire (cut off leg of LEDs work for this)
- some soft wire for signals
- a stable housing – some kind of plastic box. bonus if it’s transparent
- signal source – I recommend an Arduino as it’s easy to use and program
Tools:
- cross head screwdrivers, small and very small
- soldering iron for electronics
- wire cutters
- glue gun (or other glue)
- sharp pin for making a hole
- pliers can come in handy
Step 2: Extract lens actuator from the drive
You’ll have to unscrew a looot of screws to disassemble the CD drive. If you have no better idea, just remove all screws you can find and try separating the components. In the later stages it might sometimes be necessary to apply brute force, but usually it’s possible to separate all of the surprisingly many parts of a drive without damaging them.
The picture shows what you’re hunting for. It’s the moving lens part of the optical head assembly.
It can look a bit different, depending on your drive. it has a static back and moving top part. Inside the moving part are two coils, one moves the lens up and down, the other one left and right. Permament magnets are fixed to the static back.
If you’re lucky, you will just be able to unscrew it. But sometimes you won’t be able to separate it from the bigger optical head with the lasers and pickups inside. That’s OK too.
See the wires in the last picture? That’s what you’ll add next!
For more detail: Micro LASER Show with a CD Lens Mechanism using Arduino
- What is the cheapest way to make a two-dimensional laser show projector?
It uses one pivoting mirror powered by the focusing mechanism from a CD or other optical drive. - Can I use components other than an Arduino for control?
Yes, you can hook up a music player, a soundcard, or some other electronic circuit. - Which part of the optical drive is needed for this project?
You only need the lens focusing mechanism from the broken drive. - What type of mirror should be used for the projector?
Use the smallest and thinnest mirror you can find, such as small round mosaic mirrors or mylar. - How do you separate the moving lens part from the optical head assembly?
Unscrew all screws you can find and try separating the components, sometimes applying brute force if necessary. - What tools are required to disassemble the CD drive?
You will need cross head screwdrivers, a soldering iron, wire cutters, a glue gun, a sharp pin, and pliers. - Where are the coils located inside the moving part of the actuator?
Inside the moving part are two coils; one moves the lens up and down, and the other moves it left and right. - Is this project suitable for beginners?
Yes, several beginners successfully made this design at a Laser Tags workshop in 2007.