Summary of MFRC522 RFID Reader Interfaced With NodeMCU
This article guides users in building a simple NodeMCU RFID access control system using the MFRC522 module. It explains RFID technology, details hardware and software requirements, provides pin wiring instructions emphasizing 3.3V power, and outlines steps to install libraries and upload code for reading card UIDs. The project demonstrates granting or denying access based on detected tag serial numbers via the serial monitor.
Parts used in the NodeMCU RFID Reader:
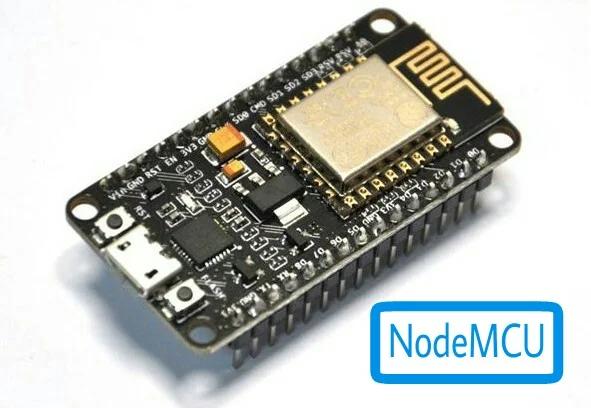
- NodeMCU
- MFRC522 RFID Reader
- RFID Tags (13.56 MHz)
- Bread Board
- Jumper Wires
- Micro USB Cable
If you have noticed in an office before, you would be probably aware of those RFID cards or Tags that would unlock specific doors depending on your access.
Well let’s make a simple NodeMCU RFID reader using the MFRC522 module, and program the NodeMCU to provide access when the right card is detected. This simple example will read the serial number on the Card or Tag, display it in the serial monitor.
Step 1: Materials Required
Here is the list of components required to get started with the Instructable,
Hardware Components
- NodeMCU
- MFRC522 RFID Reader
- RFID Tags ( 13.56 MHz )
- Bread Board
- Jumper Wires
- Micro USB Cable
Software Components
- Arduino IDE
Step 2: Description
What’s RFID?
Radio-Frequency Identification (RFID) is the use of radio waves to read and capture information stored on a tag attached to an object. A tag can be read from up to several feet away and does not need to be within direct line-of-sight of the reader to be tracked. This is the advantage over Bar-code.
> A RFID reader is a device used to gather information from an RFID tag, which is used to track individual objects. Radio waves are used to transfer data from the tag to a reader.
> A passive tag is an RFID tag that does not contain a battery, the power is supplied by the reader. When radio waves from the reader are encountered by a passive rfid tag, the coiled antenna within the tag forms a magnetic field. The tag draws power from it, energizing the circuits in the tag.
Specifications
- Input voltage: 3.3v
- Frequency: 13.56MHz
That’s all guys lets get into Connections & Coding part.
Step 3: Pin Wiring
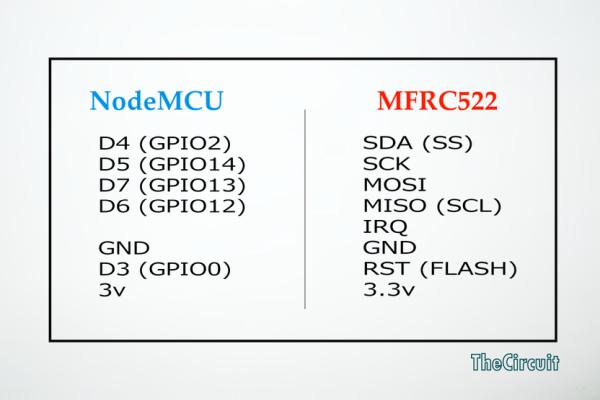
Check the schematic and pin configuration to make connections.
Caution: You must power this device to 3.3V!
Step 4: Library Download
Before you download library you need Arduino IDE to get started.
To download Arduino IDE and for NodeMCU setup, you can check my previous instructacle.
Interface Servo Motor with NodeMCU
Here’s the library you need for this project:
- Download the RFID library here created by miguelbalboa.
- Unzip the RFID library.
- Install the RFID library in your Arduino IDE.
- Restart your Arduino IDE
Step 5: Reading Data From a RFID Tag
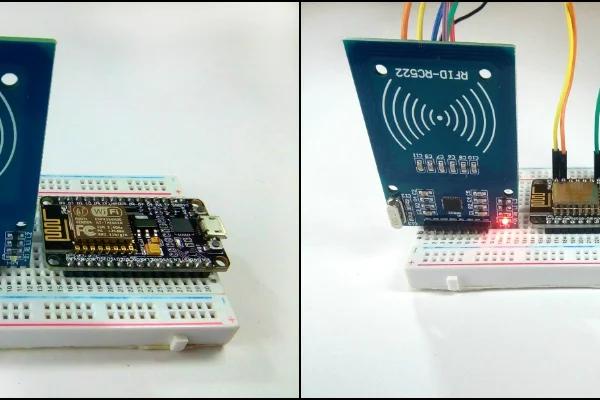
After having the circuit ready
Go to File > Examples > MFRC522 > DumpInfo > Upload the code.
This code will be available in your Arduino IDE (after installing the RFID library).
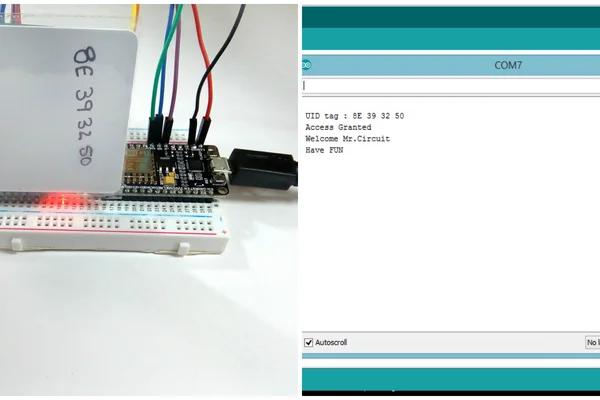
Then, open the serial monitor. You should see something like the image above.
Write down your UID card ( ” Card UID : xx xx xx xx ” ) because you’ll need it later.
The next step is to write some code to play with RFID cards.
Download the “RFID_Access.ino” file and open it up in the Arduino IDE.
Then Create a new sketch and paste the code below in the arduino IDE and hit Upload.
You can tinker with it if you like based on the application, or just use it as it is.
Step 6: Demonstration

Swipe the card you’ve chosen to give access and you’ll see an access message popup on serial monitor.
If you swipe another tag with another UID, the denial message will pop up.
That’s all makers!
I hope you found this instructable most useful.
You can contact me by leaving a comment. If you like this instructable probably you might like my next ones.
Source: MFRC522 RFID Reader Interfaced With NodeMCU
- What is RFID?
Radio-Frequency Identification uses radio waves to read information stored on a tag attached to an object without needing direct line-of-sight. - How does a passive tag work?
A passive tag has no battery; it draws power from the magnetic field formed by radio waves from the reader when encountered. - At what voltage must the device be powered?
You must power this device to 3.3V. - Which library is required for this project?
The project requires the RFID library created by miguelbalboa. - What code example should be uploaded first to find the UID?
Upload the DumpInfo code found under File > Examples > MFRC522 after installing the library. - How do you grant access with the final code?
Access is granted when the serial monitor displays a message upon swiping the chosen card with the correct UID. - What happens if an unauthorized tag is swiped?
If you swipe another tag with another UID, a denial message will pop up on the serial monitor.