
Summary of Low cost digital microscope with automated slide movement using arduino
This article describes a low-cost, automated digital microscope modification designed for clinicians and researchers to capture whole slide images. By using 3D-printed components and salvaged parts like stepper motors from CD-ROM drives, the device automates slide movement in a grid pattern. Images captured by a webcam are later stitched together using Fiji software on a computer, enabling high-magnification virtual slides for accurate analysis at a cost under $100.
Parts used in the Low Cost Digital Microscope:
- slide holder.STL
- periscope.STL
- periscope top.STL
- neck.STL
- base.STL
- Lens assembly (15X eyepiece and 45X objective lens)
- 3.5 cm x 3.5 cm one way mirror
- Miniature stepper motors (2 nos.)
- Microscope body or stand
- Webcam
- 0.5W LED
The device allows one to take multiple images of the slide under high magnification, which can later be stitched together on a local or remote computer, paving the road for more accurate image analysis.
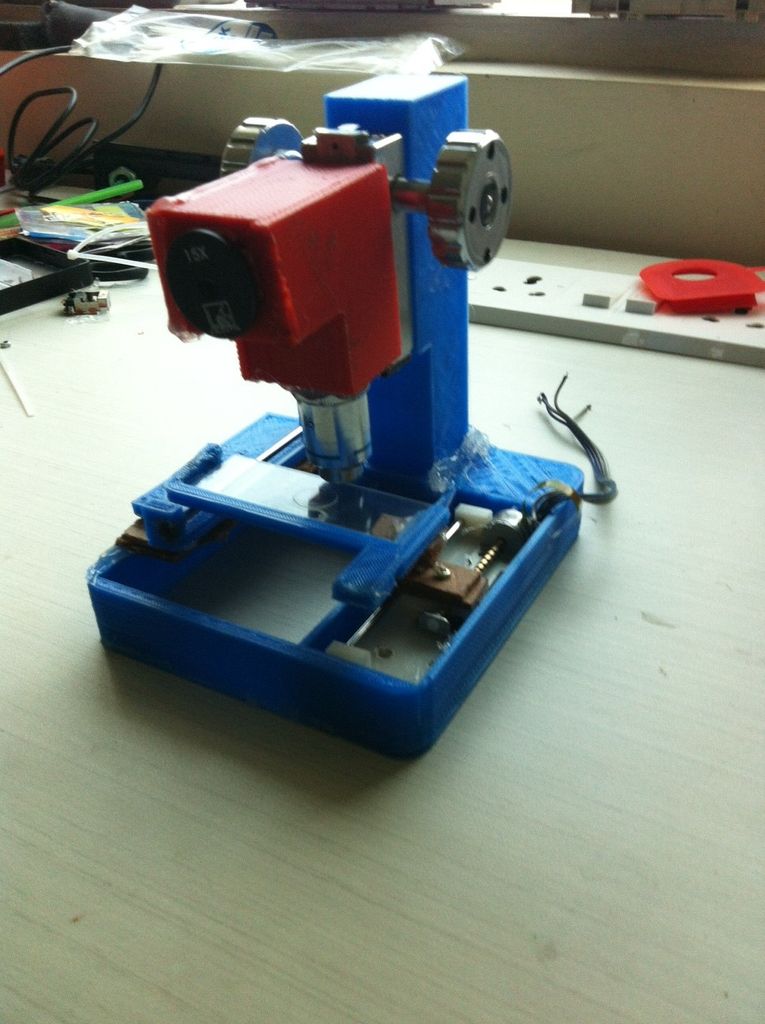
Step 1: What you will need
The digital microscope uses readily available parts and can be put together in less than $100.
• Lens assembly for the microscope – This can be newly purchased or can be salvaged from an old student microscope. We decided to buy a low cost student microscope ($50) and use the lens assembly for our project.
A 15X eyepiece and 45X objective lens were used for our project.
You will also need a 3.5 cm x 3.5 cm one way mirror to feed inside the periscope (as per 3D printed periscope design).
• Miniature stepper motors (2 nos.) from old CD-ROM drives – These can be easily sourced from second hand stores for less than $10.
One could also buy these along with a stage and movable carriage – http://www.aliexpress.com/item/New4-5V-2-phase-4-wire-stepper-motor-with-screw-drive-slider-slider-for-DIY-miniature/1139615226.html
The stepper motors are used to move the slide in a grid-wise manner.
• Microscope body – There are multiple options available for this
o Retain the microscope stand from the student microscope and use it to house the slide movement mechanism
o A good 3D model can also be found at http://www.thingiverse.com/thing:92355
o We created our own design to best suit our needs. The modified design eliminates the additional space under the slide base, making the design more compact and ergonomic. The design also incorporates a mounting arrangement for the motor assembly and allows for unobstructed movement of the slide holder.
• Webcam to capture individual slide images.
• Stitching of the captured images is carried out using Fiji, an open-source image stitching tool – http://fiji.sc/Image_Stitching
• 0.5W LED – This is placed under the slide and is used for illuminating the image under the microscope
For more detail: Low cost digital microscope with automated slide movement using arduino
-
What is the primary purpose of this project?
The device allows users to take multiple images of a slide under high magnification which can be stitched together to create virtual slides. -
How much does it cost to build this microscope?
The entire setup can be put together for less than $100 using readily available parts. -
Can I source the lens assembly from an old device?
Yes, the lens assembly can be newly purchased or salvaged from an old student microscope. -
What specific lenses were used in the example project?
A 15X eyepiece and a 45X objective lens were used for the project. -
Where can I find the miniature stepper motors?
They can be sourced from old CD-ROM drives or bought online along with a stage and movable carriage. -
How is the image stitching performed?
Stitching is carried out using Fiji, an open-source image stitching tool. -
What component is used to illuminate the image?
A 0.5W LED placed under the slide is used for illuminating the image. -
Does the design eliminate space under the slide base?
Yes, the modified design eliminates additional space under the slide base to make it more compact and ergonomic.
