Open source is love, and so are hugs!
Things used in this project
Story
We all know that being without that special person in your life can be difficult, but what if you could send love and affection remotely over the Internet by just hugging a pillow?
Now, we can’t really send hugs… but what we can send is a sweet emoji through a messaging app, triggered by you giving a pillow a hug.
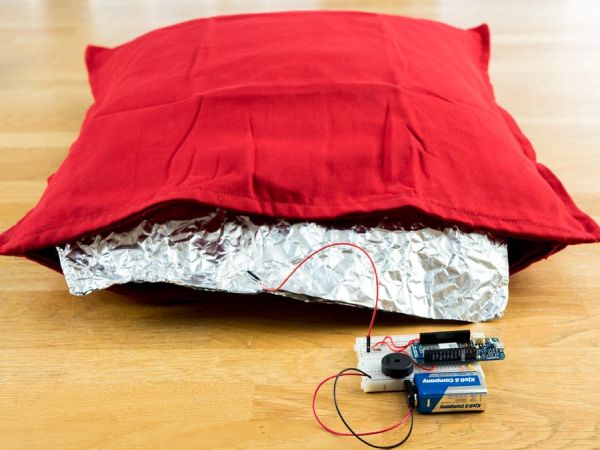
When you hug the I Love You Pillow you will hear the sound of a heartbeat coming from the buzzer inside. Depending on the length of your hug, a different emoji will be sent from a Telegram Bot to whatever chat you choose.
Stay in touch with your loved one with this huggable device!
In a Nutshell
In this experiment, we will use aluminium foil to create a DIY capacitive sensor that will be used to detect hugs.
In order to create our hug-sending-device we will need the following components:
- Buzzer
- Aluminium foil
- 1 resistor 5M ohm
- Breadboard
- Wires


Learning Goals
- Introducing Telegram Bots
- Managing capacitive sensors
- Telegram Bots and group chats #ProTips
- WiFi best practices #ProTips
Pro Tips are useful but not strictly necessary steps that add a layer of complexity to the project.
Want to Know More?
This tutorial is part of a series of experiments that familiarise you with the MKR1000 and IoT. All experiments can be built using the components contained in the MKR IoT Bundle.
- I Love You Pillow
Introducing Telegram Bots
Telegram is a popular messaging app for both mobile and desktop. Besides letting us chat with our friends it also allows us to create handy and powerful chat-bots!
A chat-bot is nothing but a contact you can chat with, but instead a person behind it, there is a machine that replies accordingly to the code you wrote.
The TelegramBot library for Arduino gives us an easy way to implement the logic behind the chat-bot.
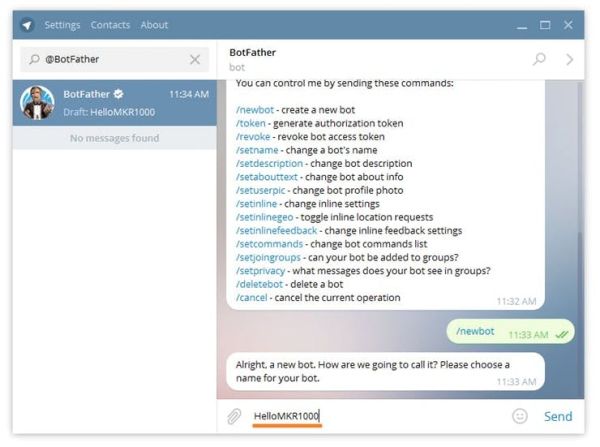
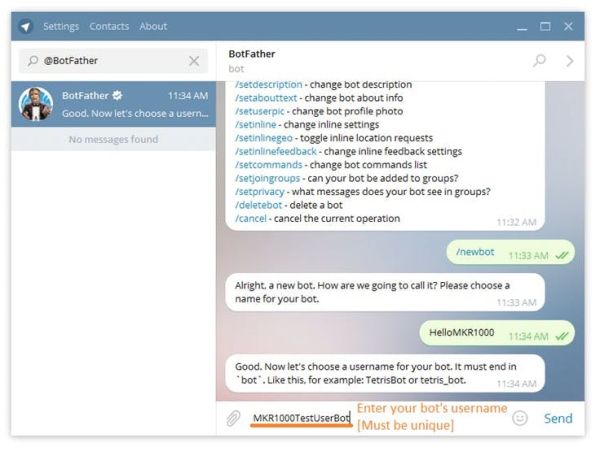
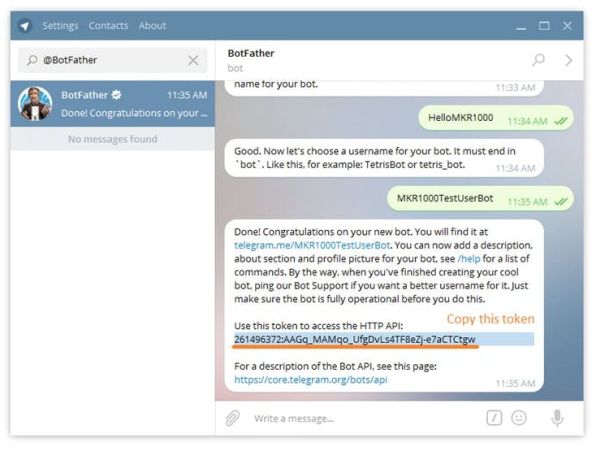
Create Your Bot
Creating a bot is so easy!
Just follow these few simple steps or take a look at the documentation here.
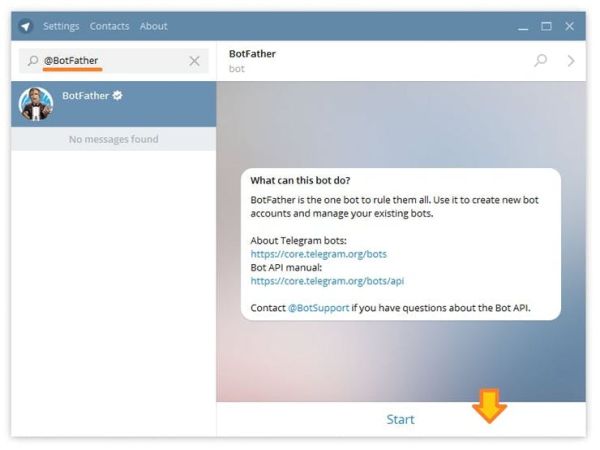 Look for @BotFather
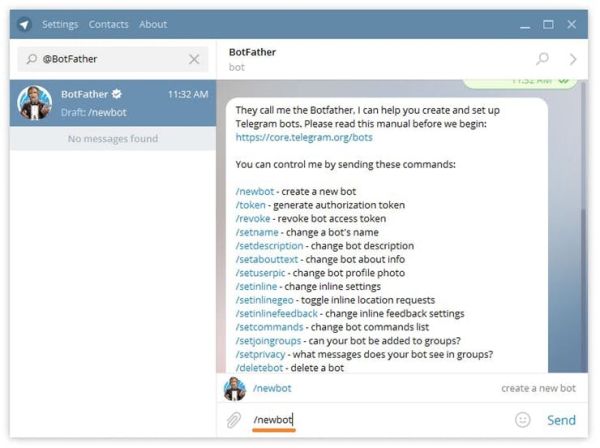
Set Up the Board
First off make sure we have all the needed libraries.
Here’s the list of all the libraries we will need:
- WiFi101
- TelegramBot
- ArduinoJson
- CapacitiveSensor
You can easily install them following this simple guide.
In order to use Telegram’s API we first need to upload the certificates on the MKR1000. This applies to most of online services and APIs!
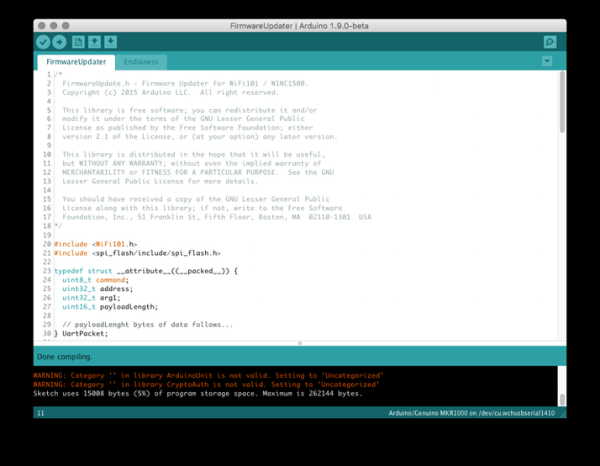
Upload the Firmware Updater example from the WiFi101 library and add api.telegram.org to the domains.
> examples > WiFi101 > FirmwareUpdater
If you are using the Arduino Web Editor this feature is not yet implemented and you need to do this through the Arduino Desktop Application.
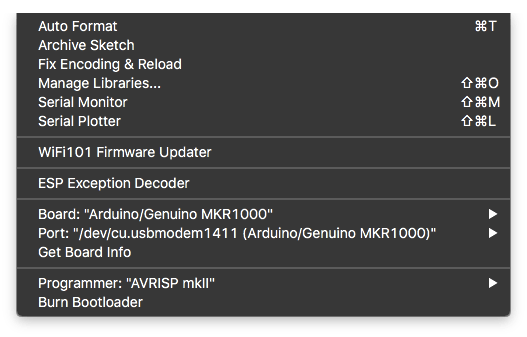

Let the magic happen!
Open the EchoBot example from the TelegramBot library, fill in your WiFi credentials and the API token you received from the BotFather and upload!
> example > TelegramBot > EchoBot
You just created a bot that echoes all your messages.
EchoBot and Emoji
Emojis are everywhere! We will use them to send our love and hugs. Using the EchoBot example is an easy way to see how the bots read your emoji.
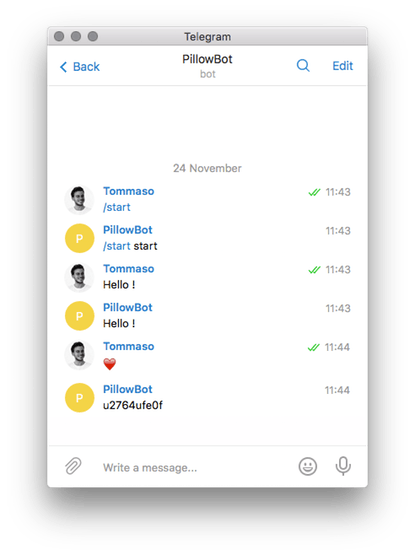
Unfortunately the way the bot receives the emoji is not the same used to send them. In order to send an emoji we will need to use UNICODEcharacters.
For instance to send an heart emoji we will use: \U00002764
You can see the full list of unicode emoji codes here. In order to create a bot that replies to an heart emoji with another heart emoji we will use a code like this:
void loop() {
   message m = bot.getUpdates(); // Read new messages
   if ( m.chat_id != 0 ){ // Check if there are some updates
     Serial.println(m.text); // print the message received
     if(m.text == "u2764ufe0f"){ //check if it received an heart emoji
     bot.sendMessage(m.chat_id, "\U00002764");
    // Reply to the same chat with the heart emoji
     }
   }
}
The result will be:
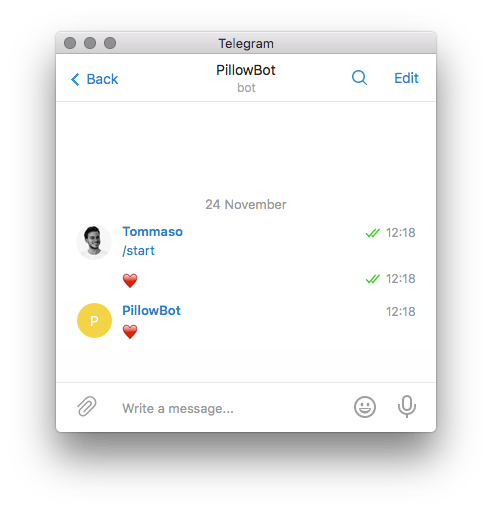 Reply to heart emoji with another heart emoji
Capacitive Sensor
Enough with Telegram, let’s start building our DIY capacitive sensor!
The CapacitiveSensor library turns two or more Arduino pins into a capacitive sensor, which can sense the electrical capacitance of the human body. All the sensor setup requires is a medium to high value resistor and a piece of aluminum foil.
At its most sensitive, the sensor will start to sense a hand or body inches away from the sensor and through different kind of materials. We will hide our sensor inside the pillow!
Upload the example sketch, connect the wires and see the result on the console:
#include <CapacitiveSensor.h>
CapacitiveSensor   foil = CapacitiveSensor(5,4);
// 10M resistor between pins 5 & 4, pin 4 is sensor pin, add a wire and or foil
void setup()
{
  foil.set_CS_AutocaL_Millis(0xFFFFFFFF);     // turn off autocalibrate
  Serial.begin(9600);
}
void loop()
{
   long start = millis();
   long sensor_value =  foil.capacitiveSensor(30);
   Serial.print(millis() - start);        // check on performance in milliseconds
   Serial.print("\t");                    // tab character for debug windown spacing
   Serial.print(sensor_value);            // print sensor output
   Serial.println("\t");                    // print sensor output 3
   delay(500);                             // arbitrary delay to limit data to serial port
}
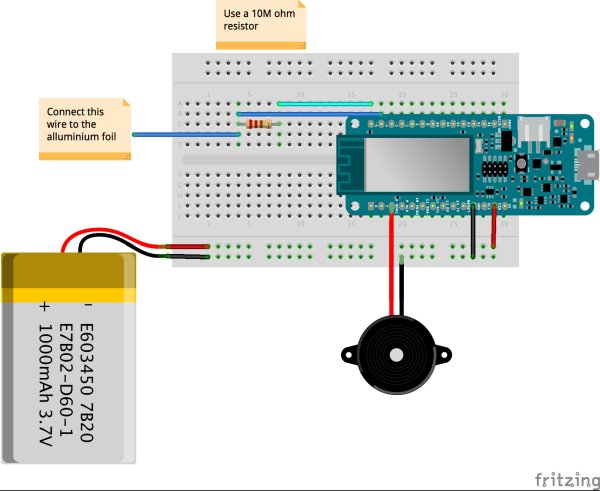
Wiring and Results
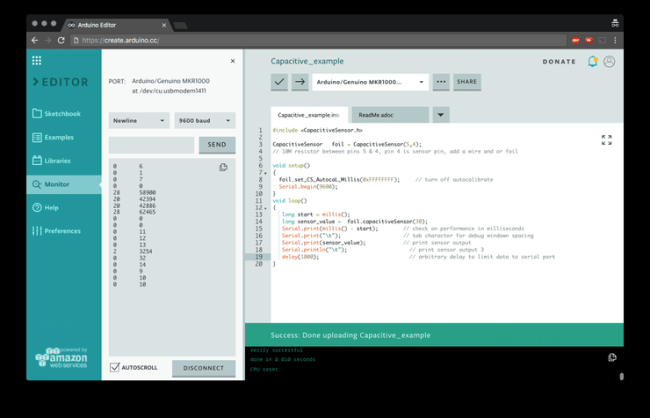
We will use sensor_value as a threshold to detect hugs!
The Heartbeat
The longer you hug, the more heartbeats you hear. The more the heart beats the more love you send (and different emoji, as well).
We will emulate the sound of a heartbeat using a buzzer and a few simple lines of code.
int Buzzer = 8; // Pin attached to the buzzer
void setup(){}
void loop(){
 HeartBeat();
 delay(1000);
}
void HeartBeat(){
   tone(Buzzer, 31, 200); // tone(Pin, Note, Duration);
   delay(200);
   tone(Buzzer, 31, 400);
   delay(200);
   noTone(Buzzer);
   delay(1000);
}
For a more complex use of the buzzer and the Tone function take a look at the dropdown menu examples and look for Digital > ToneMelody
#ProTip: Chat-id and Group-chat
In order to send messages, a bot needs a chat-id.
The chat id is the unique identifier of a chat between someone and a bot. In order to get the bot to send messages to a specific person you first need that person to text the bot and save the chat-id of that specific chat.
In this project, the bot will reply only to the very last person who text it no matter who that was.
The bots are public, everyone can text a Bot!
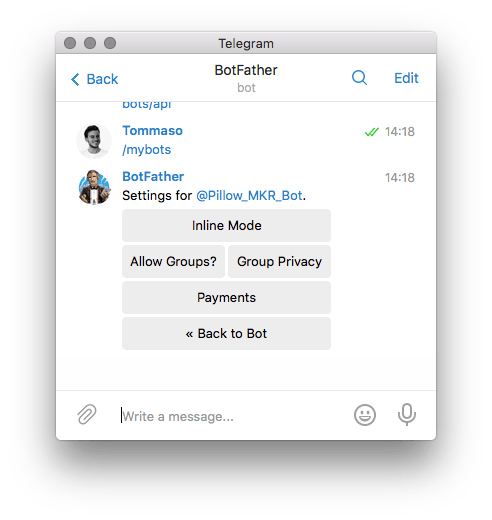
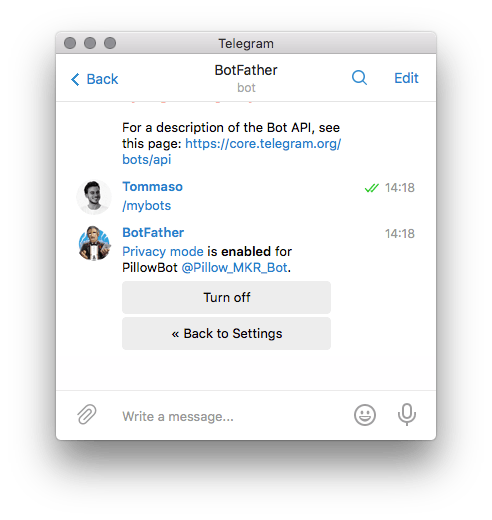
If you want to include the bot in a group chat you need to disable the privacy mode allowing the bot to read all the messages, otherwise it would only be able to detect commands that start with /:

#ProTip: WiFi Best Practices
WiFi can be tricky. Sometimes it just turns off for few seconds with apparently no reason at all. This could be a problem for your Arduino since most of the time we run the WiFi connection function only at the beginning of the sketch.
Online services can be tricky as well, When the Arduino sends a request to a server (Telegram in this case) it waits for a reply. For hundreds of reasons a reply can fail to arrive, keeping the Arduino in an infinite loop.
To make your project more stable, you can add a watchdog.
A watchdog is a timer that has to be periodically updated, otherwise it will reboot the board.
You can use these two libraries to add a watchdog to your project:
- Adafruit ASF Core // has to be downloaded and installed manually from Github
The EchoBot example will then look like this:
#include <WiFi101.h>
#include <SPI.h>
#include <TelegramBot.h>
#include <Adafruit_SleepyDog.h>
// Initialize Wifi connection to the router
char ssid[] = "xxxx";             // your network SSID (name)
char pass[] = "yyyy";           // your network key
// Initialize Telegram BOT
const char BotToken[] = "xxxx";
WiFiSSLClient client;
TelegramBot bot (BotToken, client);
void setup() {
 Serial.begin(115200);
 while (!Serial) {}
 delay(3000);
 // attempt to connect to Wifi network:
 Serial.print("Connecting Wifi: ");
 Serial.println(ssid);
 while (WiFi.begin(ssid, pass) != WL_CONNECTED) {
   Serial.print(".");
   delay(500);
 }
 Serial.println("");
 Serial.println("WiFi connected");
 bot.begin();
 Watchdog.enable(10000); // set the timer to 10 sec
}
void loop() {
   Watchdog.reset(); // if this function is not called within 10 seconds the board will reset itself
   message m = bot.getUpdates(); // Read new messages
   if ( m.chat_id != 0 ){ // Checks if there are some updates
     Serial.println(m.text);
     bot.sendMessage(m.chat_id, m.text);  // Reply to the same chat with the same text
   } else {
     Serial.println("no new message");
   }
}
Schematics
Code
Source : Love You Pillow


