This is a project that I created for my Children and Technology class that I am taking in my Masters of Library Science Program. This was one of my first experiences with coding so this was a trial and error process but this instructable should outline my success throughout the process.

My initial inspiration came from pinterest where I saw this canvas painting of song lyrics with lights. I decided to recreate this painting and then add some flair with my LilyPad by making it play the song “From the Inside Out” by Hillsong (the song the lyrics come from) with lights that blink along with the song. The following steps will dictate how I went about creating this and how you can do the same. Below you can download the video of the finished product (it is a little dark so that you can see the LED’s lighting up through the canvas).
Step 1: Materials
Electronics Materials:
LilyPad Arduino Simple board – https://www.sparkfun.com/products/10274
6 white LilyPad LEDs – http://www.sparkfun.com/products/10081
Li-Po battery – https://www.sparkfun.com/products/731
Conductive thread – https://www.sparkfun.com/products/10867
LilyPad FTDI basic – http://www.sparkfun.com/products/10275
Mini-USB cable
FTDI driver (http://arduino.cc/en/main/software) and Arduino IDE (http://arduino.cc/en/main/software) should be installed on your computer
Crafting Materials
Canvas (I used 14×18, but any size you are comfortable working with is good) – make sure to get the stretched canvas that has the wooden frame so there is room for the LilyPad on the back
Acrylic paint – I got a 2oz bottle of each color and it was plenty
Paintbrushes – preferably a sponge once for painting the whole canvas and then a very thin one for tracing letters
Tape (or some way to attach the thread, LilyPad, etc.)
Needles (this should come in the kit) – you will need them for connecting the thread and also for poking holes in the canvas
Song inspiration (you are going to need the sheet music of whatever lyrics you are using)
Step 2: Coding the LilyPad
The first thing I did was to work on the programming side of the project since I figured that would be the most challenging. I tackled the LED lights first. My original thought was to have them blink in a loop. Since there are 5 on the LilyPad board I decided to put one on each letter of the word “shine” and have them blink down the line and back again. Mimicking code from Geek Gurl Diaries, who made her lights blink in a circle, I made a code that successfully went down the line and back again for the amount of time I wanted it to.
Then came the tricky part: creating the song. (You could use the following process to code any song but you will need a little musical knowledge.) I found the sheet music for the song and wrote out the lyrics of the chorus with the accompanying notes, taking note of the longer notes so I would know where to make the note last a longer number of milliseconds. Once I had the notes corresponding with the words, I converted every note into a frequencies based off this chart so the LilyPad buzzer would buzz the notes of the song.
Once I had these frequencies I borrowed code from my instructor’s code that activated the buzzer and showed me how to play particular notes. I adjusted each note’s length according to how many beats in the song it was. I also added short pauses between each line of the song to help the listener differentiate and be able to hear the tune.
I then had to mesh the two codes so they would loop together. This just meant interlacing the light blinking in between the lines of the song. I also added a 5 second pause at the end of the code so that there would be a moment before the chorus and lights began to repeat themselves.
Attached below is the code for the project.
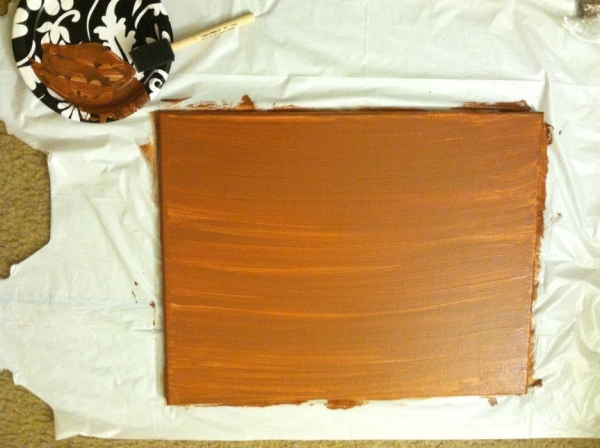
Step 3: Painting
Now that the coding is out of the way, the next step is to craft the canvas!
I did three coats of brown (or whatever your base coat color is) to ensure that there were no streaks and it was a solid background color. I let it dry for several hours before painting the words to make sure I wouldn’t smear anything.
I sketched the words out on paper so I could practice the spacing before painting. I also measured and made note of the middle of the canvas so I could center my words. I then wrote the lyrics in pencil so I could change them if I made a mistake. Once I was satisfied with how it looked I used a thin paintbrush to trace the letters.
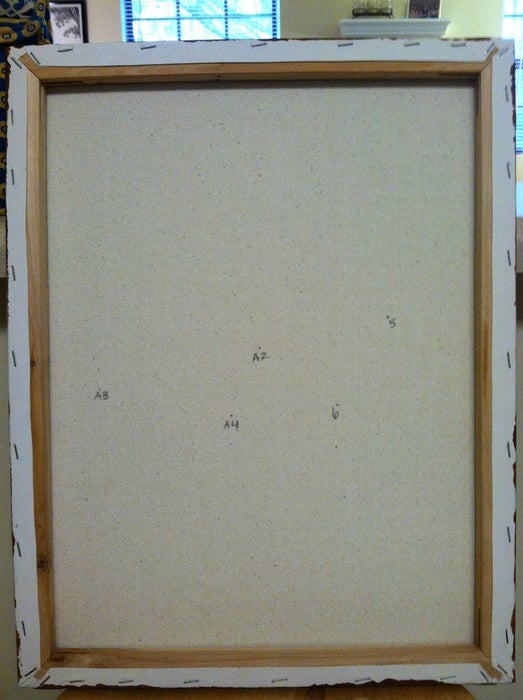
Step 4: Plan the Outline
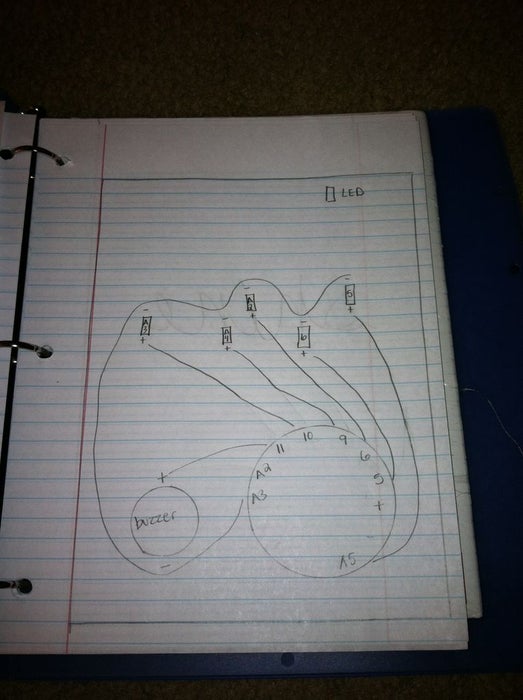
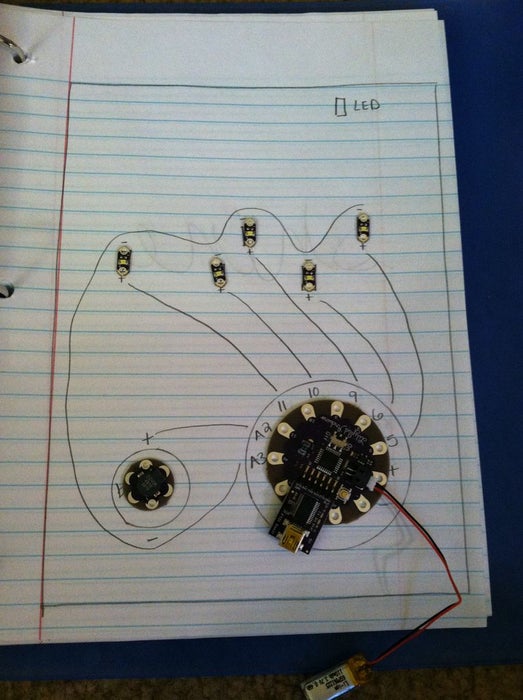
Before you disconnect your beautifully working LilyPad board, you are going to want to make sure you have a plan that can make it work. So I sketched out the lyrics on the back of a sheet of paper (particularly SHINE) so I could see it on the other side. I then sketched where I wanted the LED’s to shine and connected them to the Lilypad pins. Be sure not to let any of your negative or positive wires cross or it won’t work. The negative thread can connect to all of the negative pins but the positive pins will each need their own thread line because we want them to blink separately. Attached is a picture of my outline.
Step 5: “Sew” Conductive Lines
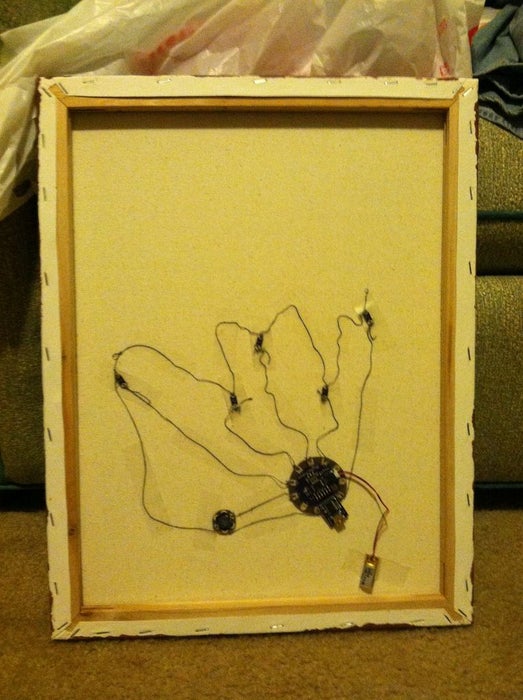
I poked holes through at the five points I wanted the LED’s to light up and then laid out my pieces accordingly on the back of the canvas. Try not to move anything once you have it in place until it is all securely attached.
Since I have no idea how to sew, I simply laid out all of my thread and then once I had everything in place, taped it to the back of the canvas. It isn’t the prettiest on the back, but it works and no one will see it once it is hanging on the wall! I made sure to thread each line through the holes multiple times to make sure there is a connection and taped them down to keep them from crossing.
Step 6: Test It Out!

By this point everything should be working properly! Turn that switch and make sure it is singing and blinking in the right order. If there are any problems be sure to check the ports to make sure they are named correctly in your program.
Then hang on the wall and enjoy!
Source: LilyPad Arduino Painted Canvas With Music and Lights