Summary of Laser Shooting Game
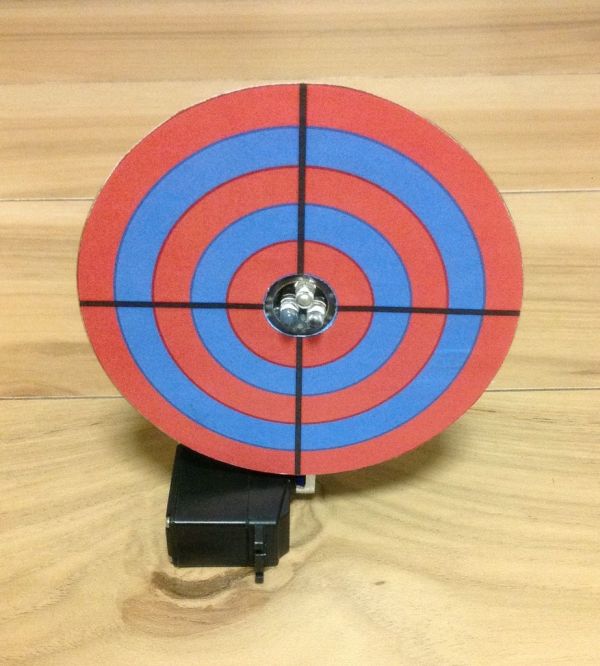
This article outlines a DIY laser shooting game built with an Arduino Mini. The system uses target boards equipped with sensors and servos; when a toy laser hits the center, a photo diode triggers a servo to make the board fall flat. The project involves soldering components onto a custom PCB, mounting it on a servo arm, and attaching a printed graphic to a CD as the target surface.
Parts used in the Laser Shooting Game:
- Shooting Target board PCB
- Servo
- Photo diode x 3
- IR transmitter x 1
- IR receiver x 1
- 9014 NPN transistors x 3
- Pins and socket
- Arduino Mini x 2
- SMD components (Caps, resistors)
- CD
- Target board graphic (CD size)
- Toy laser gun
This laser game is a simple project that utilizes an Arduino mini. All target boards have an Arduino, sensors, and servo control ports. Shooting the target center triggers the servo and the board falls flat.
Step 1:What you need
Bill of material:
1. Shooting Target board PCB (attached gerber file)
2. Servo
3. Photo diode x 3
4. IR transmitter x 1
5. IR receiver x 1
6. 9014 NPN transistors x 3\
7. Pins and socket
8. Arduino Mini x 2
9. SMD components (Caps, resistors)
10. CD
11. Target board graphic (CD size)
12. Toy laser gun
Step 2: Soldering
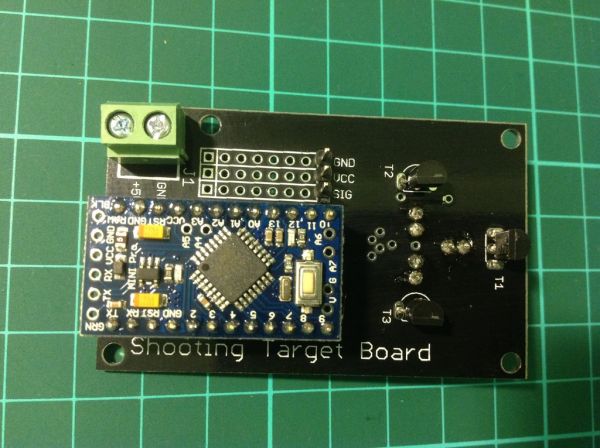
Assembly all components on the PCB.
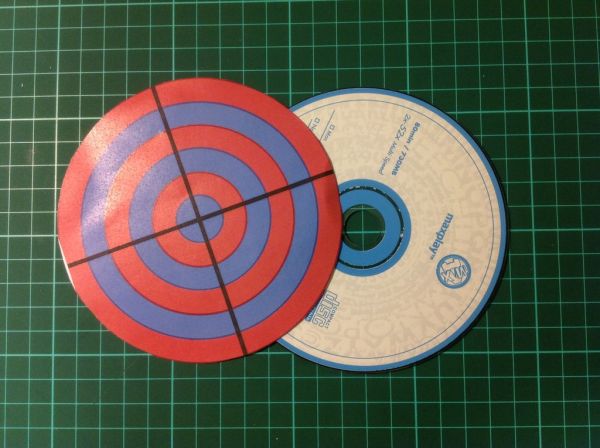
Step 3: Prepare the target board
Cut out the and stick it on the CD by glue
The diameter of the CD is 120 mm and the inner diameter is 15 mm.
Step 4: Glue the PCB on servo arm
Use the hot glue gun to glue the assembled PCB on the servo arm.
Please reserved some space between the servo and the PCB. As the servo chassis may collide with the PCB during servo arm moment.
Step 5: Stick the target board on the PCB
Use hot glue gun to glue the CD (target board) on PCB
For more detail: Laser Shooting Game
- What components are required for the target boards?
All target boards have an Arduino, sensors, and servo control ports. - How does the target board react when shot?
Shooting the target center triggers the servo and the board falls flat. - How many Arduino Minis are needed for this project?
The bill of material lists two Arduino Mini units. - What is the diameter of the CD used for the target?
The diameter of the CD is 120 mm and the inner diameter is 15 mm. - Which tool is recommended for gluing the PCB to the servo arm?
A hot glue gun is used to glue the assembled PCB on the servo arm. - Why should space be reserved between the servo and the PCB?
Space must be reserved because the servo chassis may collide with the PCB during servo arm movement. - How is the target board graphic attached to the assembly?
The graphic is cut out and stuck on the CD by glue before being glued to the PCB. - What type of sensors are used in the target board?
The project utilizes three photo diodes along with IR transmitter and receiver components.