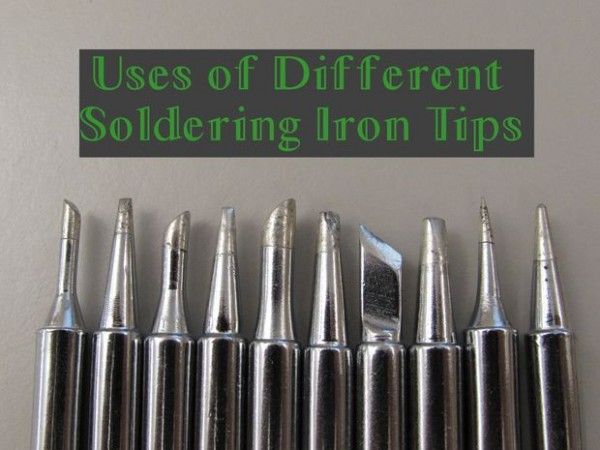
I recently got a collection of soldering iron tips and realized that many people (including myself) might not know what the different tips are used for. After all, for a long time I was under the impression that there was only about three different types of soldering tips and only one useful type of tip.
While I still only use two different types of tips (an improvement), I am much more familiar and confident in using whatever soldering iron tip I may happen to find on the iron. Please know that is far from a comprehensive list of all the different types of soldering tips available, but rather a small handful that I am personally prone to use.
If you are not familiar with soldering, I recommend checking out noahw’s instructable on How to Solder.
Step 1: Tips that I am using
For those of you that want to know, I am using a 10 piece set from The DIY Outlet. This particular set features 5 different categories of 900M soldering iron tips. It has:
- three 900M-T-C series tips
- four 900M-T-D series tips
- one 900M-T-B series tip
- one 900M-T-I series tip
- one 900M-T-K series tip
Don’t worry if none of this means anything to you; we’ll go over each of them individually.
Step 2: B series tips
This is the tip that many people new to soldering would likely imagine to be the only kind of soldering iron tip, because, well, it looks like a soldering iron tip as opposed to being ground down on one side.
Due to its round shape so that soldering can be done from any angle, you can use this particular tip in a large amount of soldering applications from point soldering to drag soldering. Because of this, B series tips are widely used for general purpose soldering, but tend to be put aside when a specific soldering job needs to be done.
Step 3: D series tips
These tips, which have a kind of chisel look to them and are my personal favorite, are also widely used in general purpose soldering much like the round B series tips. The difference is that these tips offer a much larger surface area on the face and tip of the chisel than the B series tips.
The reason you would want a larger surface area is so that more heat is able to be transferred from the soldering iron to the electrical component and/or solder. With more heat transfer, solder will flow more readily, arguably making the D series tips easier than B series for quick solder applications.
The four tips shown in the picture are different sizes (just in case you weren’t sure). This is so you can pick the appropriate sized tip since larger is not always better, even though you would have more heat transfer with larger tips. The reason for this is because if your tip is too big, you may end up having solder flow from the one point you were trying to work on to it’s friend next to it creating a solder bridge, which can be a real bummer.
Step 4: C series tips
Despite looking like they were accidentally ground down on one side, these C series tips are rather useful, especially in drag soldering. The slightly curved face is ideal for spreading out solder over the tip and then evenly applying small amounts of the solder over multiple components in close proximity (such as the pins on a surface mount component).
These C series tips are different than the “hoof tips” (CM series), which have a concave impression in their surface to either distribute or collect excess solder.
If you want to learn how to drag solder the small surface mount components, check out my upcoming Instructable on drag soldering.
For more detail: Uses of Different Soldering Iron Tips

