How to develop a simple but powerful IoT thermometer using a Zerynth-powered single-board MCU and the Zerynth App.
Story
The Zerynth App
Zerynth App is a mobile application for Android and iOS that allows fast prototyping of graphical interfaces for your IoT projects.
With Zerynth App you can turn any mobile into the controller and display for smart objects and IoT systems! In particular, you can manage and control the connected devices programmed with Zerynth, enabling a bidirectional communication channel between them and your mobile.
In this tutorial, we’re going to see how to develop a simple but powerful IoT thermometer, using a Zerynth-powered single-board microcontroller and Zerynth App as the remote display.
Required materials
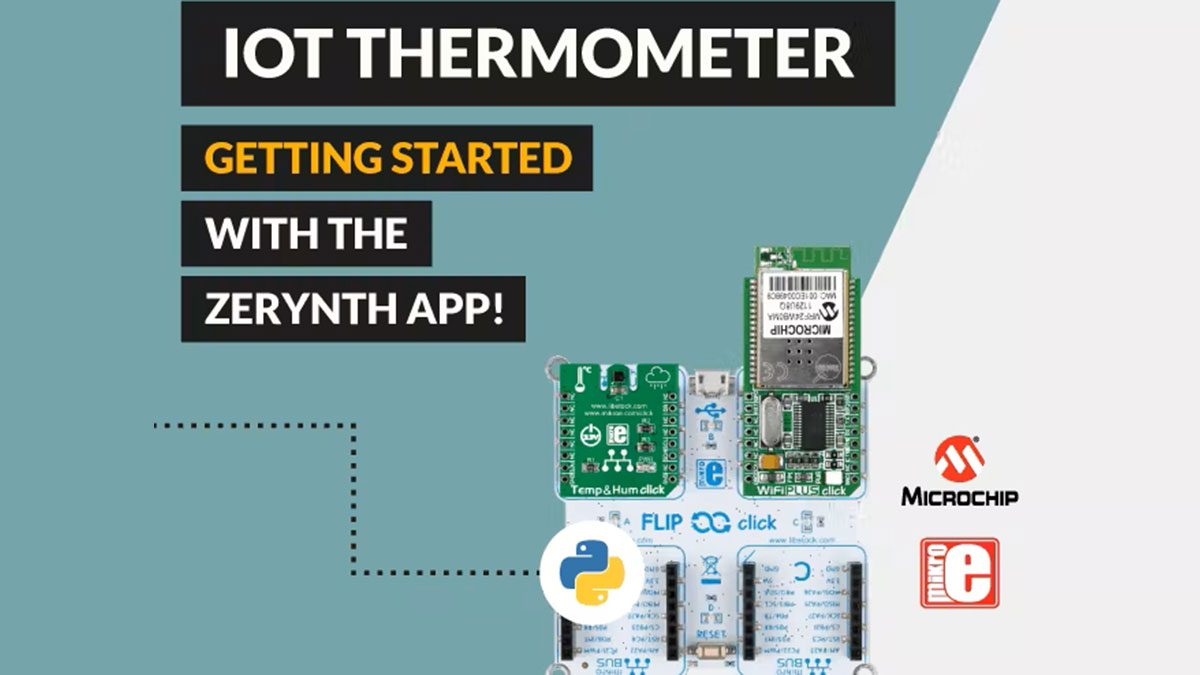
First of all, you need a board. You can select one of the 32-bit microcontroller devices supported by Zerynth. We’ve chosen the Flip&Click by Mikroelektronika, that shares many of the same attributes as the popular Arduino platforms, including the 32-bit AT91SAM3X8E by Microchip, the core of Arduino Due.
To measure the temperature we’ve picked the Temp&Hum Click, that carries an HTS221 temperature and relative humidity sensor.
To connect the board to internet we’ve chosen the WiFi PLUS Click, that features MRF24WB0MA – 2.4GHz, IEEE std. 802.11 – compliant module from Microchip, as well as MCW1001 companion controller with on-board TCP/IP stack and 802.11 connection manager.
Last but not least, you need:
- Zerynth Studio, our powerful IDE for embedded programming in Python that enables the IoT. You can download it here.
- Zerynth App. You can download it here.
Assembling your IoT Thermometer
Flip&Click is Arduino’s two-sided cousin. On one side it’s an Arduino. But on the other side, you’ll find four open mikroBUS sockets for what the company calls “click boards.” Essentially, these are add-on modules that resemble Arduino shields, but shrunken down so that you can fit a few at the same time on the Flip & click without any trouble. Just add the Temp&Hum and the Wifi Plus clicks to the board, respectively at the slot A and B.
How to program the IoT Thermometer using Python
Clone the example
Once you have installed Zerynth Studio and created a Zerynth user, you can clone the example “Zerynth App Oscilloscope“. Take a look here to learn how to clone an example.
Let’s take a look at the original code in the “main.py” file: here is where you develop the logic of your Python script. We’ll start from the original code and then we’ll edit the script to develop our specific project.
In this simple example, a graphical oscilloscope is visualized by the Zerynth App with data coming from the connected board. Data are acquired from an analog sensor by the “analog” pin A4.
Import the right wifi driver and sensor libraries
As you can see in the comments, this example is based on the Particle Photon board and its wifi driver. Since we want to use the WiFi Plus Click, we have to change the following lines:
Then, we want to use the temperature sensor of the Temp&Hum Click. So, we have to add the following lines to import the library and set up the sensor, as you can read in the documentation:
Read more: IoT Thermometer Using Python