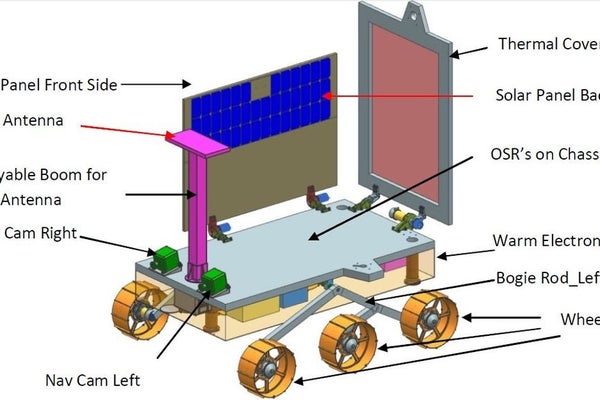
This project is inspired by the Indian moon mission Chandryaan-2 Which will take place in September 2019.This is a special mission because they are going to land on the spot where no one has every landed before.So to show my support i decided to build the actual rover based on the images of the rover online. I was restricted by my 3d printers size so i had to do some slight modifications.
Step 1: Componentes Needed
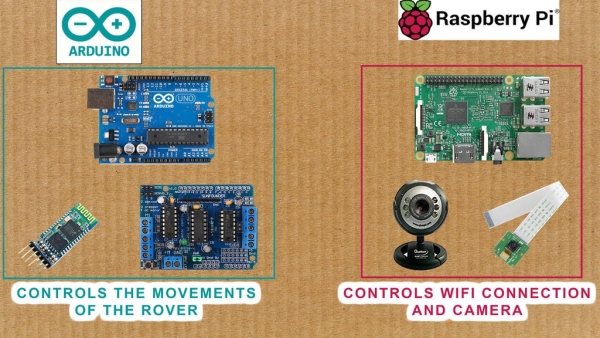
This is a modular design it has two control boards an arduino and a raspberry pi. Both work independent of each other. If you dont have enough budget you can leave the raspberry pi and camera out the rover will still work by Bluetooth. Raspberry pi is used only for camera and controlling the rover over WiFi and internet. The movement of the rover is controlled by arduino. Both devices have different power supply.
Control system components
- Arduino uno
- L293D Motor driver shiled
- 6 dc motors
- 6 tyres (3d printed)
- Mainbody+links (3 printed)
- 2 servo motors
- Various attachments (3d printed)
- 5mm,4mm,3mm and 2mm screws
- Self locking nuts 4mm and 5mm
- 7v power supply
Network control compnents
- Rapberry pi
- USB webcam(for video streaming and recording)
- Pi camera (for still images)
- 5v power supply
Step 2: Main Body and Attchments
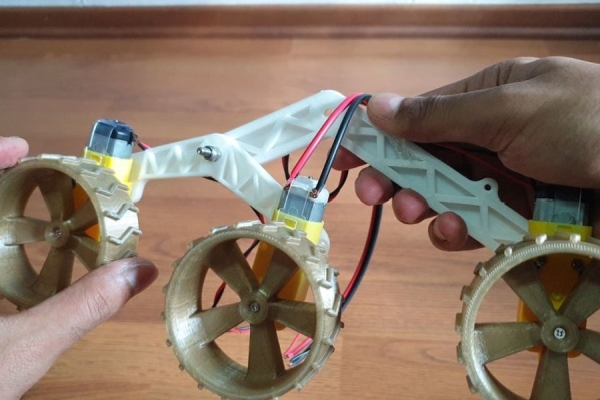
If you have a 3d printer you can directly print all the stuff but if you do not have you can use a lunch box for the main body and for making the links for rocker bogie mechanism you can use pvc pipes i will leave the link for your references.
If you don’t want you can leave the attachment the rover will still work. The antenna and solar panel i have just added because i had lots of time and spare parts.
The cad modelling is done in solidworks 2017. I have included both stl files and solidworks file so you can make changes according to you or directly print the parts. I used ender 3 pro for printing the parts.
Watch the video for better understanding how to assembly the rover.
Download Code and CAD Files Here
Step 3: Wiring and Circuit
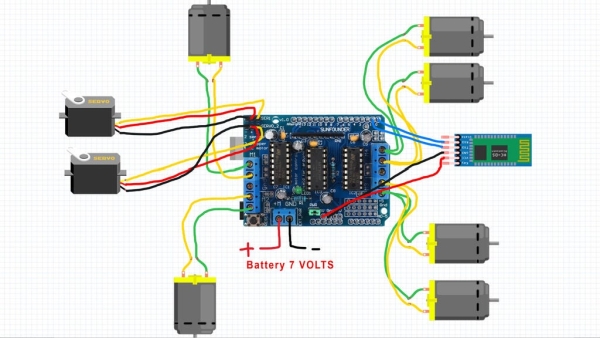
Use the above image for reverence of connecting all the motors to the arduino board.
We will connect two motors on each side to single slot. And if motors are running in wrong direction just swap the wires that should fix it.
For Raspberry pi connect the USB webcam to the usb port any camra should work there is no installation needed
Connect the Raspicamera module th the connector pin on borad.
IMPORTANT
Supply only 5v to raspberry pi. DO NOT USE SAME POWER SUPPLY FOR RASPI AND ARDUINO
You will fry your board.
I know its silly using two supply but i made it like this so that people not having raspi and camera can also build it.
Step 4: Controling the Rover
There are two modes of control one by Bluetooth using an android device another over WiFi and internet
Local Bluetooth connection
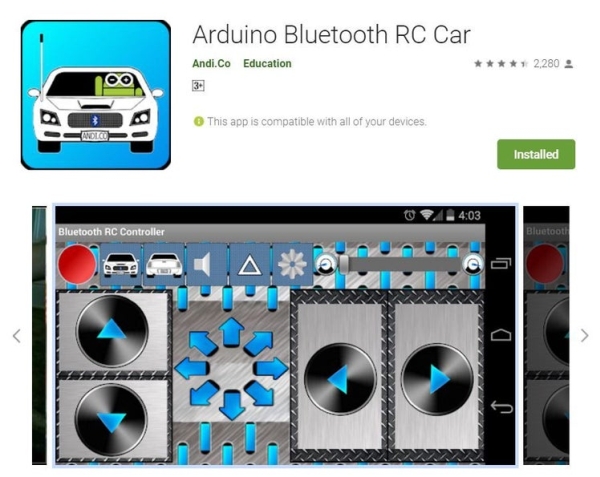
For this you will have to download the Bluetooth app from the play store and connect to the rover.
For WiFi and internet control
This is little tricky because we will use raspberry pi for this. First you need to connect to the raspberry pi via SSH through remote desktop connection. Then run the Rovercontol script it will ask you to connect to the ardruino board via Bluetooth once done it will open up a window and now use w,a,s,d keys to drive the rover and press j to stop it.
To control the camera run webcam script it will start the live video to take a still picture use this command in the terminal window
raspistill -v -o test.jpg
Both camera work independent of each other and can be use at the same time.
To setup RaspiCam Click here
Webcam script uses Opencv 3 running on Python 3 to setup that click here
Read more: IOT Lunar Rover Raspberrypi+Arduino