Summary of IoT Cloud – Getting Started
This tutorial walks through connecting an Arduino MKR board (MKR1000 or MKR WiFi 1010) to Arduino IoT Cloud, creating a Thing, adding Properties, and controlling hardware (LED, potentiometer, pushbutton) from the Cloud. It explains wiring, generated sketch files (thingProperties.h and .ino), configuring WiFi secrets, uploading code, and using callbacks to sync property changes. It also covers mapping analog readings, debouncing a button with FTDebouncer, and viewing/debugging via the Cloud Dashboard and Serial Monitor.
Parts used in the Arduino IoT Cloud Tutorial:
- Arduino MKR1000 (or MKR WiFi 1010)
- Arduino MKR IoT Bundle (optional)
- Breadboard (generic)
- LED (generic, 20mA)
- Resistor 221 ohm (example used 150Ω)
- Rotary potentiometer (generic)
- SparkFun Pushbutton switch 12mm
- Resistor 10k ohm (pull-down)
- Arduino Web Editor (software)
- Arduino IoT Cloud (online service)
Get familiar with the Arduino IoT Cloud and take your first steps into the world of connected objects.
Things used in this project
Hardware components |
||||||
 |
|
× | 1 | |||
 |
|
× | 1 | |||
 |
|
× | 1 | |||
 |
|
× | 1 | |||
 |
|
× | 1 | |||
 |
|
× | 1 | |||
 |
|
× | 1 | |||
 |
|
× | 1 | |||
Software apps and online services |
||||||
 |
|
|||||
|
||||||
Story
In this tutorial we’ll build a quick project to connect a MKR1000 (or MKR WiFi 1010) board to the Arduino IoT Cloud. By the end we’ll be able to control and monitor the board over the Internet using the Arduino IoT Cloud website.
To do this, we’ll add our board to Arduino IoT Cloud as a Thing – a representation of our board in the cloud. We’ll then give our Thing a set of Properties which represent sensors, LEDs, motors and many other components in the project that we want to access from the cloud.
1. Create a Thing and Control an LED via Cloud
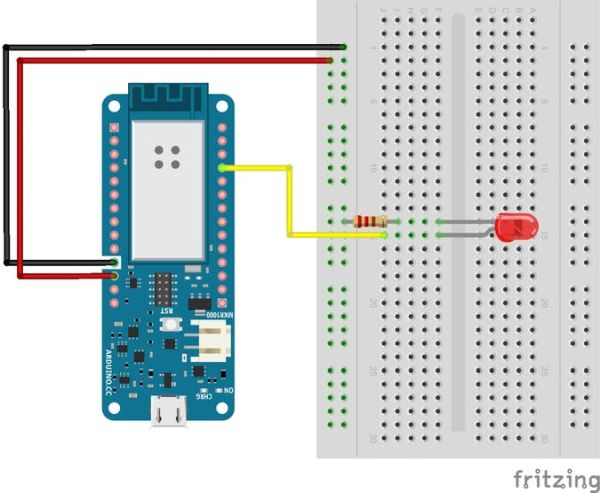
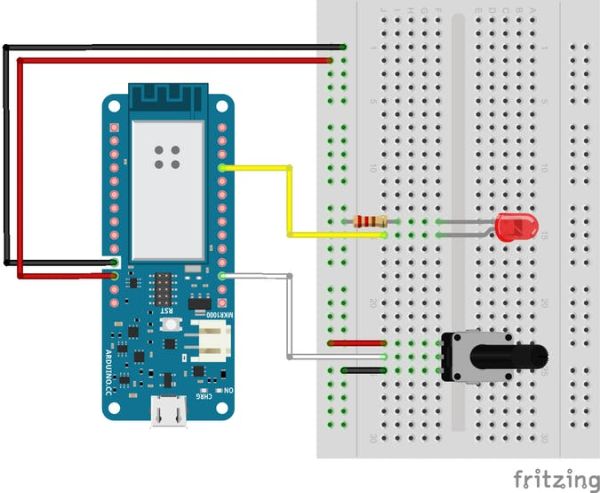
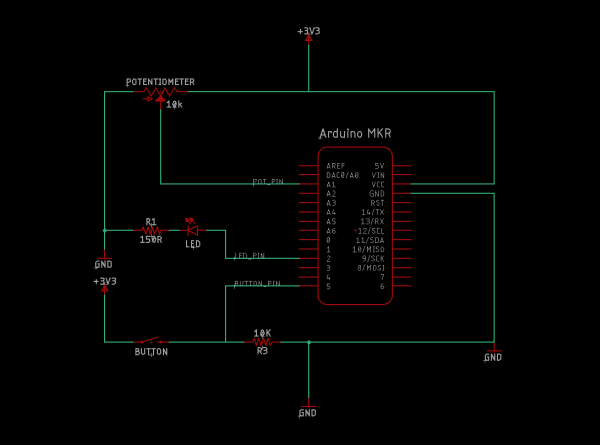
To get started we’ll create a simple circuit consisting of an LED wired to the Arduino MKR1000 (or MKR WiFi 1010) board. As shown in the schematics, connect the positive leg of the LED to Digital Pin 2 of the board and the negative leg to ground through a 150 Ohm resistor. Notice that power to the breadboard comes from the Vcc, not the 5V pin of the MKR1000 board. If we connect it to the 5V pin, we might damage the board during the following steps of this tutorial, when we add a push button.
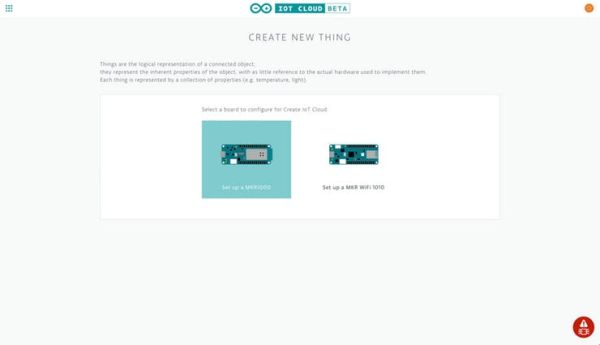
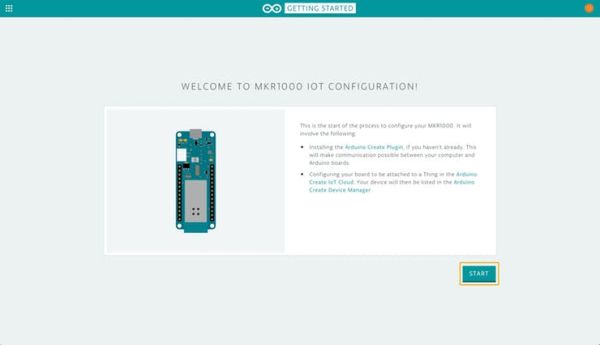
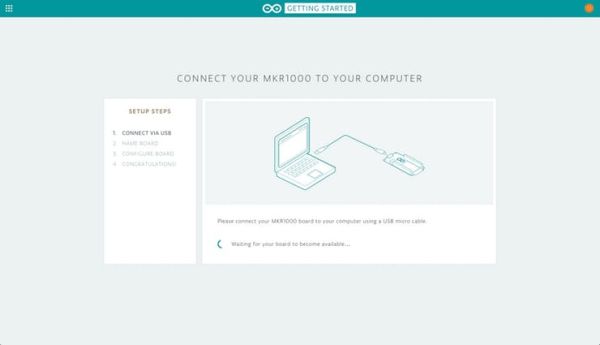
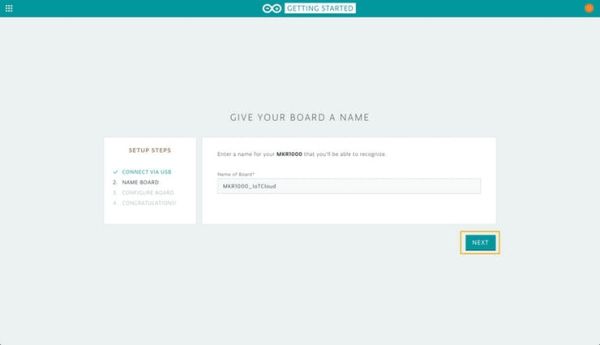
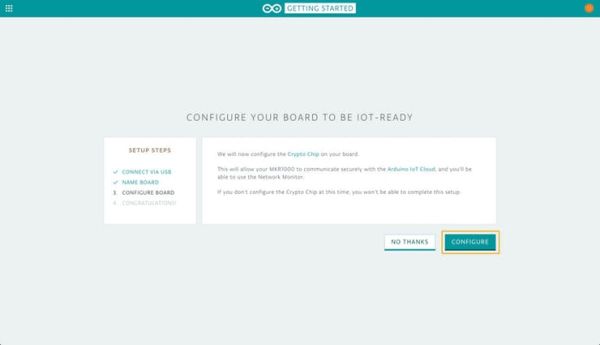
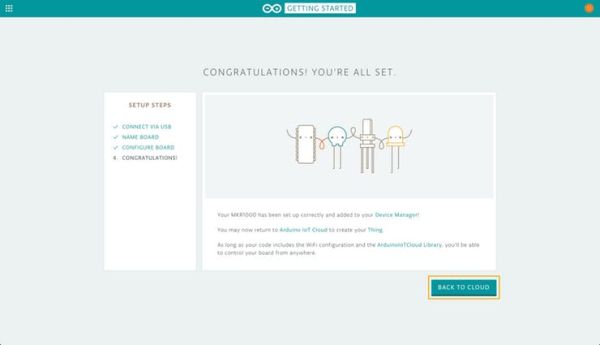
Now that we’ve wired our LED, we have to make it IoT-enabled. Prior to that, we will have to configure an Arduino board to enable it to communicate with the cloud. For this project, we can either choose a MKR1000 or a MKR WiFi 1010. Now that our board is configured, let’s go to Arduino IoT Cloud and the Getting Started guided process will help us configure our board, give it a name and install the keys which will allow it to securely connect to our Cloud using an encrypted channel.
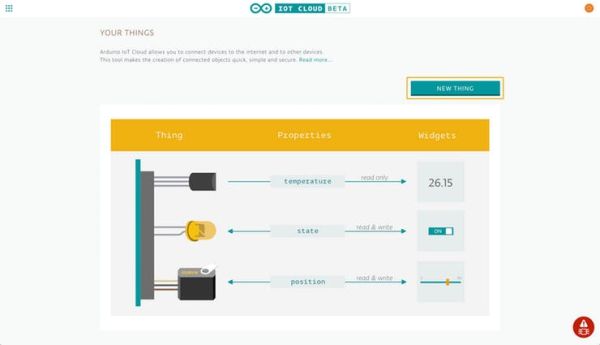
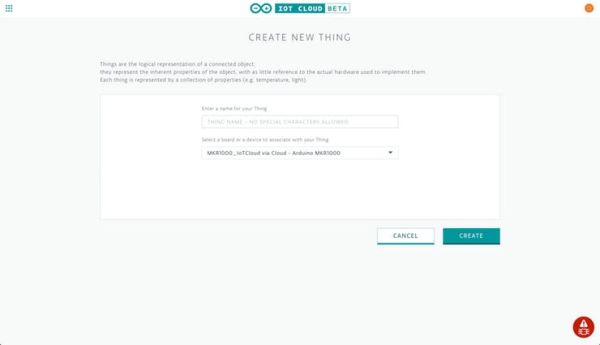
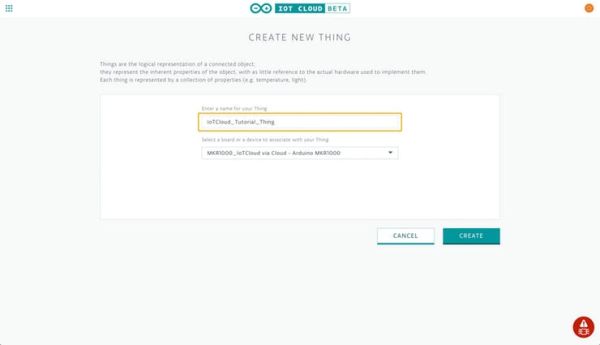
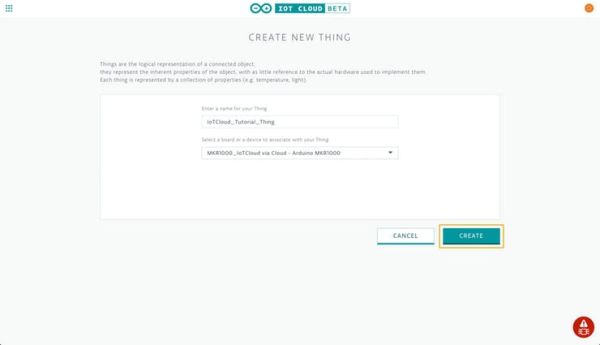
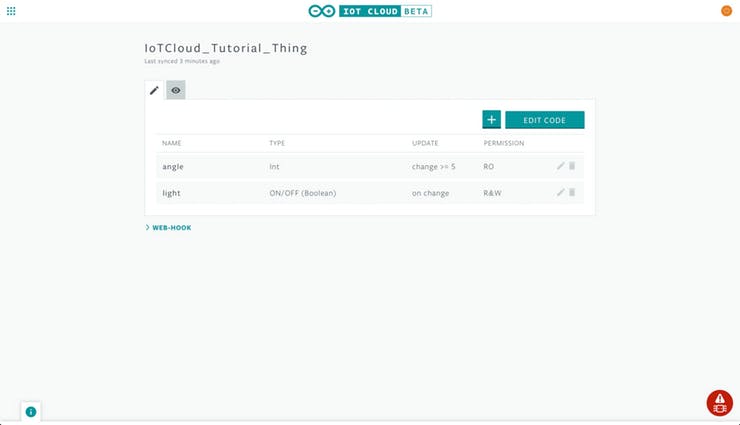
Upon clicking the “BACK TO CLOUD” button we’ll be able to create our first Thing. Our just configured MKR board will be automatically selected to be associated with our Thing, so all that remains is giving it a name. We chose to call it IoTCloud_Tutorial_Thing but you may name it to your heart’s content.
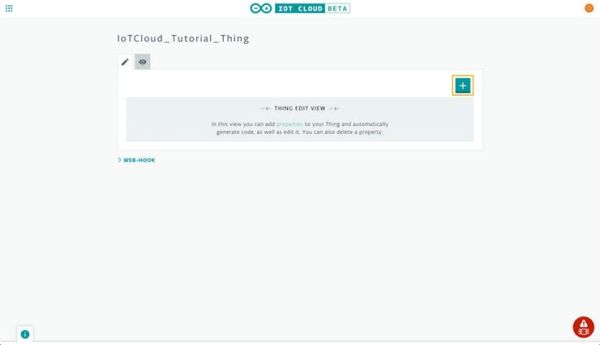
We will now be redirected to our Thing‘s edit view, where we can create and modify its Properties – the representation of sensors and actuators we want to access via the cloud.
Our goal is to turn the LED ON and OFF via Cloud when we toggle a graphical switch in our browser. In order to do so, we have to create a Property, so click the + button as shown in the image below.
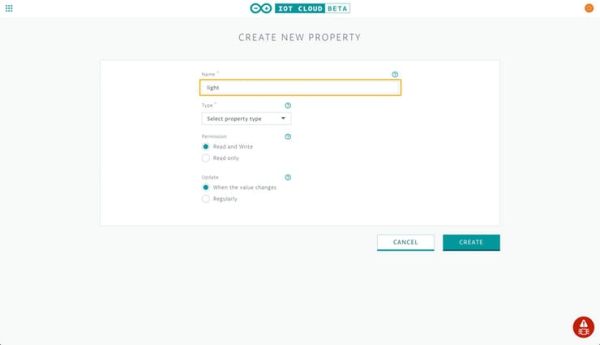
We’ll use light as meaningful Name (this name will be reflected in the variable name we’ll use in the sketch).
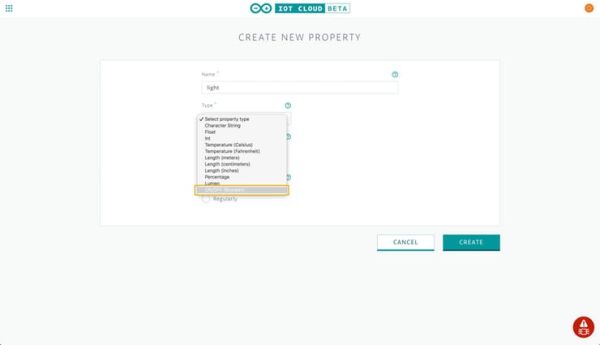
The Type of this property should be “ON/OFF (Boolean)”.
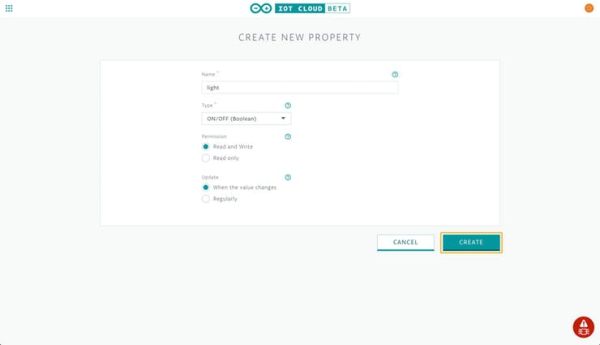
We can leave Permission set to “Read and Write” – so that we can turn ONand OFF the LED from the browser. Also leave Update to “When the value changes”, this will make sure that whenever the value of the property/variable changes inside the board’s sketch, such value will be immediately sent to the Cloud. Finally click on CREATE.
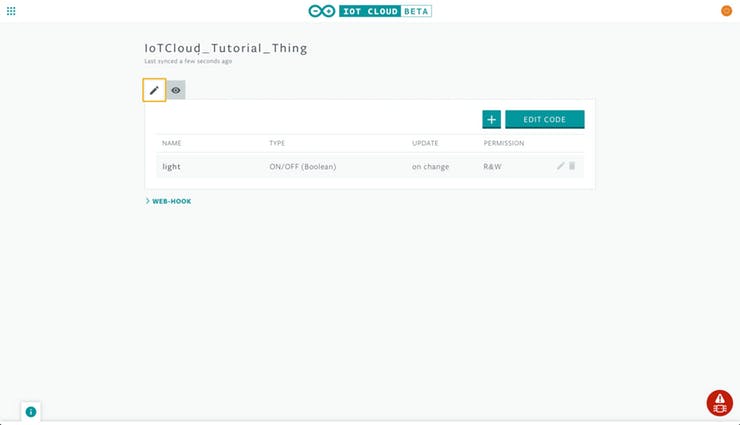

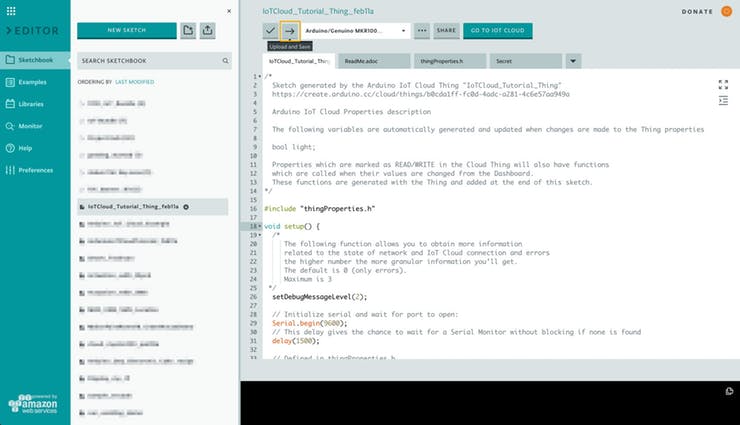
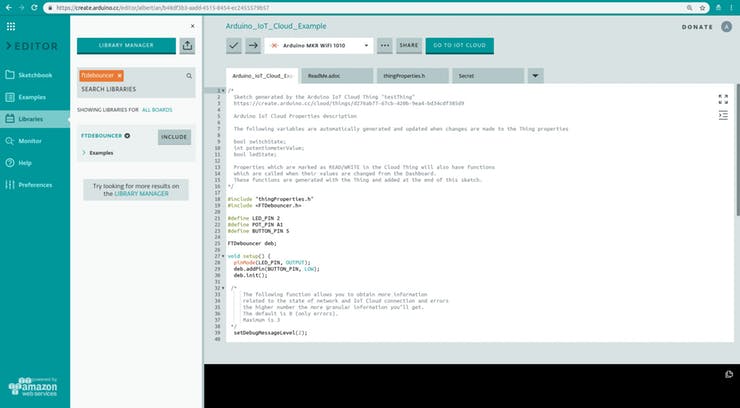
From the Edit view we can click on “EDIT CODE”. This will redirect us to the Editor showing a ready-made sketch that has been generated for our Thing.
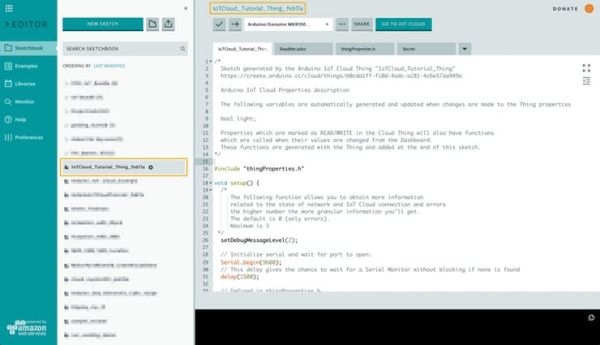
The sketch will be named exactly like our Thing, plus the date of creation and eventually a number if a smilarly named sketch already exists. Other than the main .ino file shown in the picture above, you’ll see three more files:
- ReadMe.adoc: this is a plain text file containing information about the sketch, the author and the project itself.
- thingProperties.h: this is code generated by Arduino IoT Cloud when we added our
lightproperty. We don’t need to edit this code, but it’s useful to look at it as it shows which variables in our main sketch file (.ino) will be synchronized with the cloud.
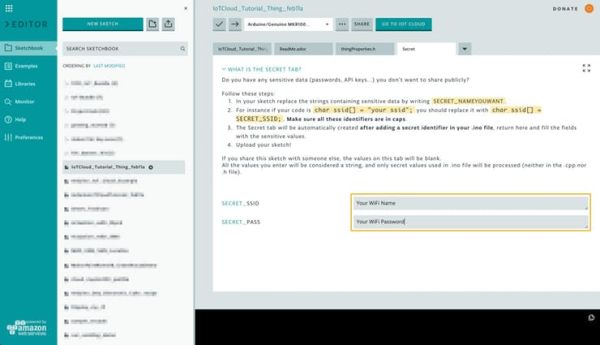
- Secret: this tab allows us to fill in the values for
SECRET_SSIDandSECRET_PASS, which are the name and password for the WiFi network our board will connect to.
Let’s dive into every line of this sketch to understand what it does:
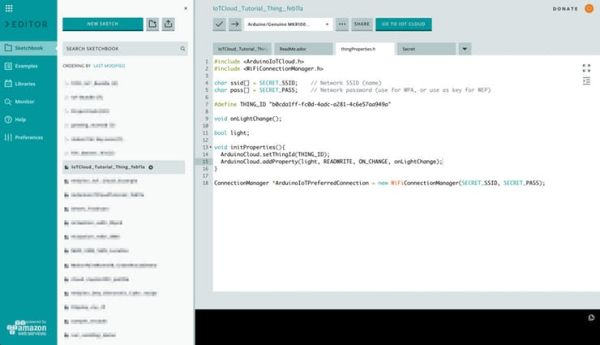
thingProperties.h
#include <ArduinoIoTCloud.h>Imports the ArduinoIoTCloud library, which is needed to synchronize our local sketch variables with their IoT Cloud properties.
#include <WiFiConnectionManager.h>The WiFiConnectionManager is used to manage the WiFi connection and reconnection seamlessly.
char ssid[] = SECRET_SSID;
char pass[] = SECRET_PASS;
These values are extracted from the Secret tab.
#define THING_ID "d276ab77-67cb-420b-9ea4-bd34cdf385d9"The Thing’s unique ID code.
void onLightChange();
This line declares a function to be called every time the value of our lightproperty is changed in the Dashboard. This type of function is known as callback.
bool light;Declaration of the light variable.
void initProperties()
This function will be called inside the setup() block of our *.ino file.
ArduinoCloud.setThingId(THING_ID);Tells our sketch which Thing to connect to.
ArduinoCloud.addProperty(light, READWRITE, ON_CHANGE, onLightChange);Tells the sketch to treat the light variable as a Property of our Thing, and to execute the callback function onLightChange every time the property value is changed from Arduino IoT Cloud. Permissions are set to READWRITE for this property because this is what we selected while creating this Property.
ConnectionManager *ArduinoIoTPreferredConnection = new WiFiConnectionManager(SECRET_SSID, SECRET_PASS);
Initializes the Connection Manager using the WiFi Access Point name (SECRET_SSID) and password (SECRET_PASS) we set in the Secret tab
*.ino
Just like in any Arduino Sketch, there are two main functions, void setup(){...} and void loop() {...}. The setup() is called only once; when the sketch starts or is reset. The loop() is executed continuously as long as the board is being powered.
#include "thingProperties.h"Imports variables and functions declared in thingProperties.h as well as other imported libraries.
setDebugMessageLevel(2);Sets the desired level of log messages that will be printed into the Serial Monitor. Right now the level is set to 2, but we can change it from0 (which logs only errors) up to 3 (which logs EVERYTHING!). If something isn’t working with the connection to either WiFi or Cloud, it will be easier to find the issue if this is set to a higher level. For now, we can leave it as it is.
Serial.begin(9600);
Initializes the Serial Monitor, to print and read from it.
delay(1500);Waits 1.5 seconds to give the Serial Monitor the time needed to initialize.
initProperties();Initializes the properties as defined in thingProperties.h.
ArduinoCloud.begin(ArduinoIoTPreferredConnection);InitializestheArduinoCloudusingthe afore-mentioned ConnectionManager.
Inside the loop() we find
ArduinoCloud.update();It handles a lot of things behind the scenes, including synchronizing properties’ values between the cloud and the board,checkingtheconnectiontonetworkandCloudand other logic. If the value of a property changes in the sketch, the library will automatically detect it and notify the Cloud, so that such value will be reflected in our Arduino IoT Cloud Dashboard. Likewise, when the value of a property is changed in the Dashboard, the library will update the corresponding value on the device.
void onLightChange() {...}The implementation of our callback which will be called any time the value of the light property changes. Here we’ll add any code we want to be executed when the property in our Dashboard changes.
And now, in order to actually turn ON and OFF the LED from the Arduino IoT Cloud Dashboard, we need to write a few lines of code. First we define the pin our LED is connected to. Add this code right above the setup() function
#define LED_PIN 2In the setup() function, we need to initialize this pin to be an OUTPUT:
pinMode(LED_PIN, OUTPUT);
Finally, in the onLightChange() function, we add some logic to trace the light state in the serial monitor and to turn ON and OFF the LED. Notice that this callback function is automatically generated whenever a new property with Read and Write permissions is added.
void onLightChange() {
    digitalWrite(LED_PIN, light);
    Serial.print("The light is ");
    if (light) {
        Serial.println("ON");
    } else {
        Serial.println("OFF");
    }
}
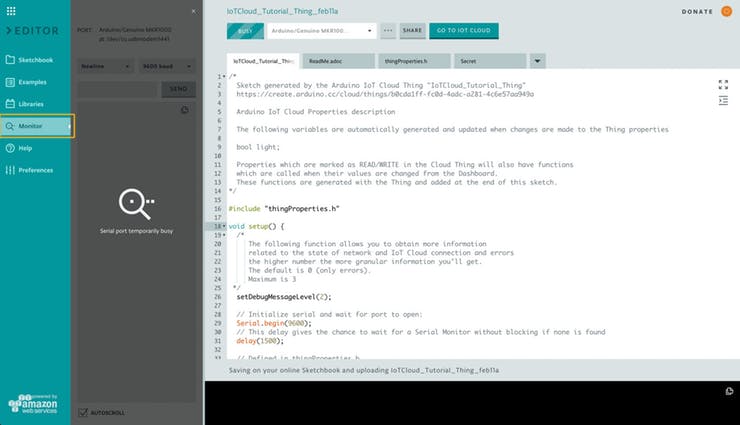
And that’s it. We can now upload the sketch clicking the Upload button.
And then open the Serial Monitor on the left to see if everything works.
 Arduino Create Editor – Serial Monitor
Because we have set the logging level at 2, the Serial Monitor will show us information about the progress of our board connecting to IoT Cloud.
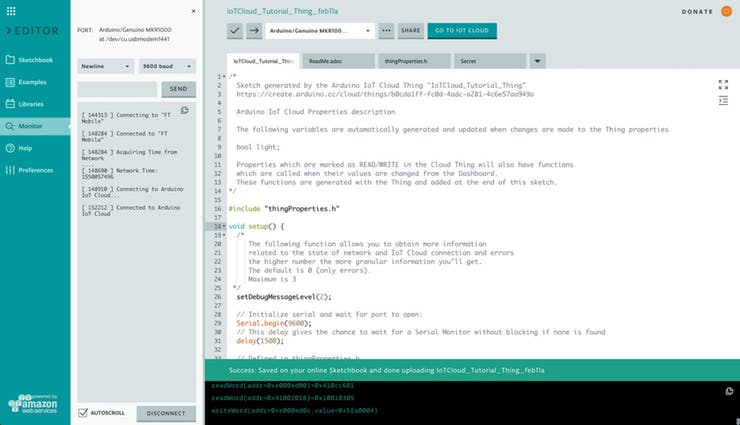
Once successfully connected to our WiFi, managed to obtain an address and initiated a secure link, the board will connect to IoT Cloud and begin exchanging data with it.
[ 144313 ] Connecting to "FT Mobile"
[ 148284 ] Connected to "FT Mobile"
[ 148284 ] Acquiring Time from Network
....
[ 148690 ] Network Time: 1550057496
[ 148910 ] Connecting to Arduino IoT Cloud...
[ 152212 ] Connected to Arduino IoT Cloud
Should any of the above steps fails we’ll receive an error. If that happens we can reset the board and try again. If the above steps have been carefully followed it is an unlikely case 🙂
Clicking the GO TO IOT CLOUD button we will be redirected to our Thing’s page on Arduino IoT Cloud. From here we’ll click on the dashboard button.
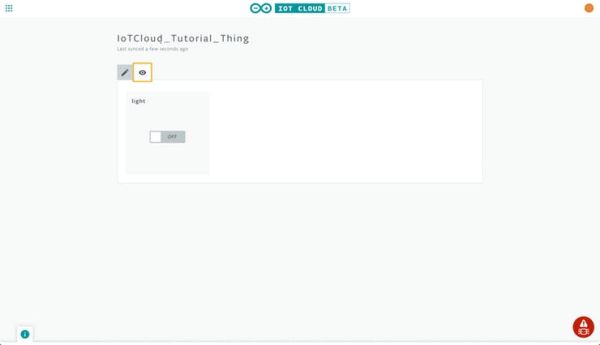
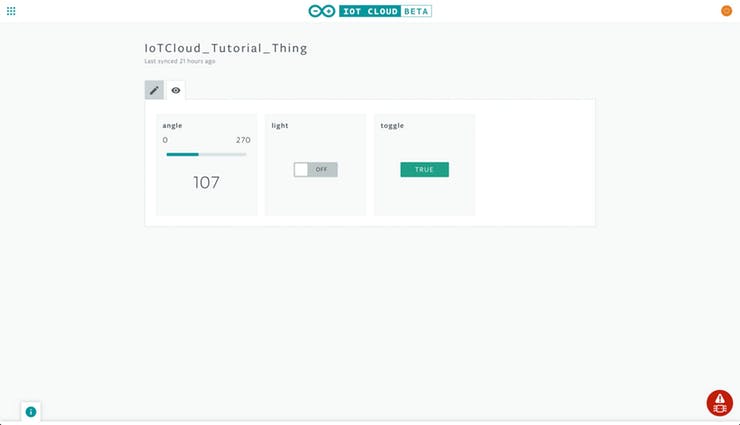
We should see a widget showing the state of the light property we created, and it should be set to OFF.
Let’s click it a few times and we will see the LED turn ON and OFF… and ON… and OFF again…
Mission accomplished!
2. Add a Potentiometer and Map It to a Int Property
Now that we have confirmation of everything working, we can add new properties to our Thing. We will link the new property to a potentiometerwhich needs to be added to the circuit. The potentiometer is connected to power and ground through its respective pins and the signal pin is connected to the Analog Pin A1 of the Arduino board.
To add a new property let’s proceed as we did earlier: while in our Thing’s properties view, let’s click on the + button and create a property named angle. Set the type to Int with Min Value and Max Value set to 0 and 270respectively. The permission should be set to Read only and the property should be updated when the value changes; we can set a Delta value greater than zero if we want to introduce some tolerance for the update (e.g.: if we set the Delta to 5, the property value will be updated via cloud only when the difference between the new value and the old value is greater than 5, otherwise the change will be ignored).

Clicking on CREATE will add the new Property to our Thing and bring us back to the Property edit view.
Although we don’t see it, our sketch has been updated to reflect the changes, so let’s click on EDIT CODE to go back to the editor. Looking at thingProperties.h, we’ll notice that two new lines have been added:
int angle;
Declares the variable representing the property we just created
ArduinoCloud.addProperty(angle, READ, ON_CHANGE, NULL, 5.000000);
Connects the angle variable to its corresponding property, with READpermissions (i.e.: we’re not going to be able to set it from the dashboard). Because of the Read Only permission, no callback function will be generated and the second to last argument of the addProperty method is set to NULL. The last argument represents the Delta value discussed above.
To make the potentiometer interact with the cloud we need to define the pin to which it is connected:
#define POTENTIOMETER_PIN A1Then, in the loop() function, we read the analog input from the potentiometer and map it to the angle variable. In this way, turning the potentiometer reflect changes the corresponding Property value in the cloud dashboard.
int angleSensor = analogRead(POTENTIOMETER_PIN);
angle = map(angleSensor, 0, 1023, 0, 270);
Let’s Upload our sketch again and see what happens in our thing’s dashboard when we turn the potentiometer’s knob. We should see the value going up and down from 0 to 270 (this may vary with the potentiometer’s build quality).
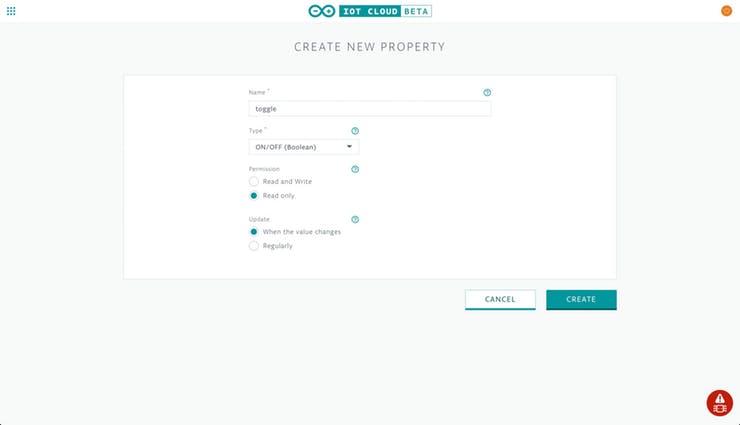
3. Add a Push Button and Link It to a Boolean Property
Finally, let’s add one last property! This new property will be associated to a push button added to the previous circuit as shown in the schematics below: one pin of the button is connected to the positive power rail (Vcc), the other pin is connected to Digital Pin 5 (via the white wire) and to ground through a 10k pull-down resistor. This configuration forces a LOW logic level into our pin when the button is at rest, while routing Vcc through when pressed (logic level HIGH).
From the editor, GO TO IOT CLOUD and create a new property named toggle, with Type ON/OFF (Boolean), Permission Read only and Update When the value changes.
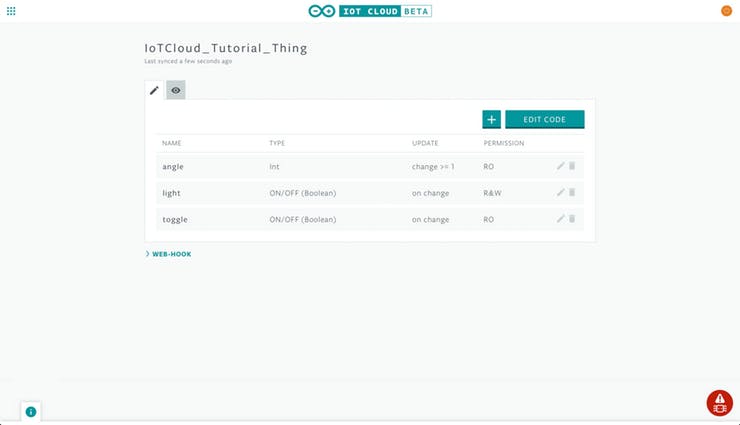
Once again EDIT CODE and we’ll be back to the editor. A quick glance at thingProperties.h will show that a new variable Toggle has been defined and associated to its property via ArduinoCloud.addProperty(...).
In our .ino file we’ll define the new pin and two variables related to the button state (more on this later)
#define BUTTON_PIN 5
int btnState;
int btnPrevState = 0;
btnPrevState is needed because we want the property to be updated only once when the button is pressed and not when it is released.
Then, in the setup() we set the pinMode for this pin to INPUT
pinMode(BUTTON_PIN, INPUT);
And finally we add these lines towards the end of the loop()
btnState = digitalRead(BUTTON_PIN);
if (btnPrevState == 0 && btnState == 1) {
 toggle = !toggle;
}
btnPrevState = btnState;
In this way the button acts as a toggle and when pressing it we should see the switch on the cloud changing accordingly and flipping between ON and OFF.
Amazing, right? How about uploading the new code and testing out how our circuit interacts with the Dashboard? Let’s do that.
Schematics
Schematic
Code
Source : IoT Cloud – Getting Started
- What board can I use for this Arduino IoT Cloud tutorial?
You can use an Arduino MKR1000 or a MKR WiFi 1010; an MKR IoT Bundle is also an option. - How is the LED wired to the MKR board?
The positive leg of the LED connects to Digital Pin 2 and the negative leg to ground through a 150 Ohm resistor; power the breadboard from Vcc. - How do I make the board connect securely to Arduino IoT Cloud?
Use the Getting Started wizard to configure the board, install keys, and provide WiFi credentials in the Secret tab (SECRET_SSID and SECRET_PASS). - How do I create a cloud-controllable LED property?
Create a Property named light of type ON/OFF (Boolean) with Read and Write permission and Update When the value changes. - How is the potentiometer value mapped to a cloud property?
Connect the potentiometer signal to Analog Pin A1, read with analogRead, and map the 0-1023 value to 0-270 and assign it to the int angle property. - How is the push button implemented to toggle a cloud property?
Wire the button between Vcc and Digital Pin 5 with a 10k pull-down to ground, read the pin, detect rising edge, and flip the toggle boolean property. - What files does Arduino IoT Cloud generate for the Thing?
It generates ReadMe.adoc, thingProperties.h, the main .ino sketch, and a Secret tab for WiFi credentials. - How do callbacks work when a property changes from the Dashboard?
A callback function like onLightChange is declared and called whenever the corresponding property value changes from Arduino IoT Cloud. - How can I avoid button bounce issues?
Use the FTDebouncer library to manage debounced press and release actions and register the button pin with the debouncer. - How can I view connection and debug information?
Enable Serial output and set setDebugMessageLevel to a higher level (e.g., 2 or 3) to see WiFi and Cloud connection logs in the Serial Monitor.