Summary of Interface I2C LCD Using NodeMCU
This article guides users on interfacing a 16x2 I2C LCD with a NodeMCU board using the Arduino IDE. It details necessary hardware and software, provides specific wiring instructions for power and data lines (SDA/SCL), and includes C++ code to initialize and display text on the screen. The project is designed for displaying sensor data in electronics applications.
Parts used in the Interface I2C LCD Using NodeMCU:
- NodeMCU
- 16x2 LCD with I2C Board
- Breadboard
- Jumper Wires
- Micro USB Cable
- Arduino IDE
- LiquidCrystal_I2C Library
Wassup Makers!!
In this Instructables we will learn how to interface an LCD (Liquid Crystal Display) to the NodeMCU board.
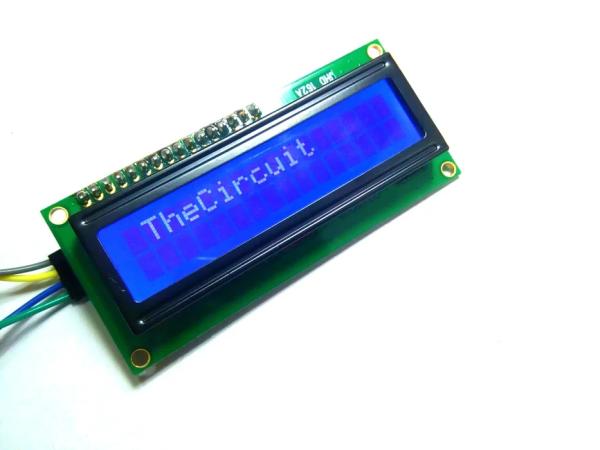
These 16×2 LCDs are very popular and broadly used in electronics projects as they are good for displaying information like sensor data from your project, and also they are very cheap.
Step 1: Things Needed
We need few components to get started with the Instructable,
Hardware Components
- NodeMCU
- 16×2 LCD
- I2C Board
- Breadboard
- Jumper Wires
- Micro USB Cable
Software Components
- Arduino IDE
Step 2: Circuit Connection
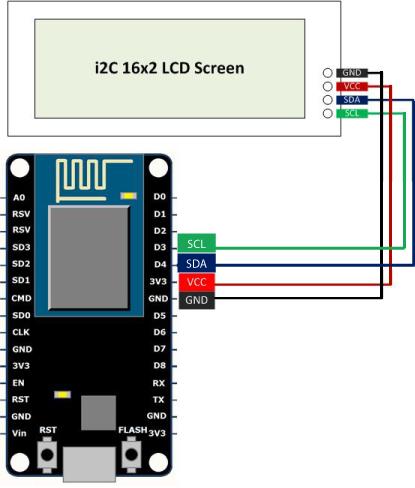
Connecting LCD to I2C and then interfacing it to NodeMCU is very simple.
The LCD’s registers from D0 to D7 and Vcc, GND, RS, R/W pins will be connected to I2C.
GND pin of I2C is connected Ground pin (GND) of the NodeMCU.
VCC pin of I2C is connected Vin pin of the NodeMCU. (Because we need to supply 5v to LCD)
SDA pin of I2C is connected D4 of the NodeMCU.
SCL pin of I2C is connected D3 pin of the NodeMCU.
Before you get started with coding you need Arduino IDE.To download Arduino IDE and for NodeMCU setup, you can check my previous instructacle.
“Interfacing Servo Motor With NodeMCU“
Step 3: Coding Time Begins
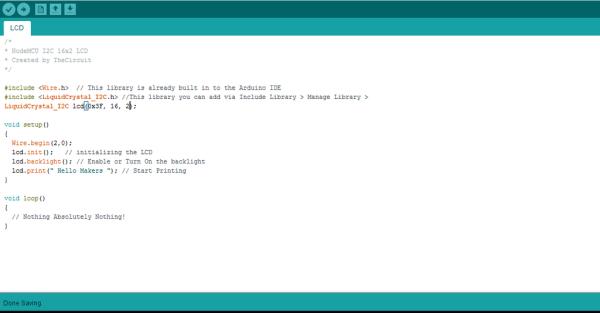
#include <Wire.h>

#include <LiquidCrystal_I2C.h>

LiquidCrystal_I2C lcd(0x3F, 16, 2);
void setup(){
  Wire.begin(2,0);
  lcd.init();   // initializing the LCD
  lcd.backlight(); // Enable or Turn On the backlight
  lcd.print(" Hello Makers "); // Start Printing
}
void loop(){
  // Nothing Absolutely Nothing!
}
First thing we need to do is to insert the Liquid Crystal Library. We can do that like this:
Sketch > Include Library > Manage Libraries > LiquidCrystal_I2C LCD
Download the “LCD.ino” file and open it up in the Arduino IDE.
Then Create a new sketch and paste the code below in the Arduino IDE and hit Upload You can tinker with the code to make it more useful or just use it as it is.
Step 4: Output
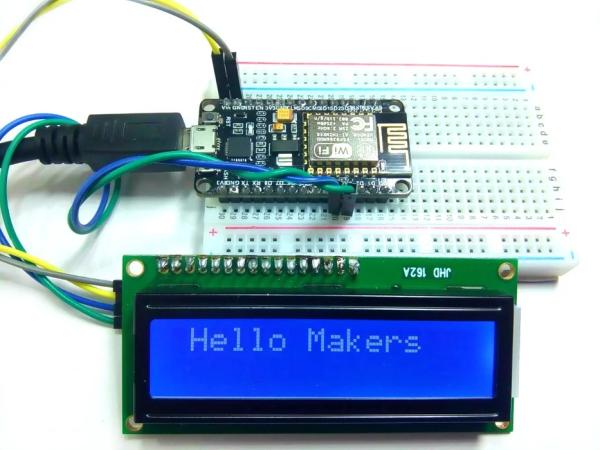
Now, you can develop this instructable to all your sensor based projects and implement in many other applications.
That’s all makers!
I hope you found this instructable most useful. You can contact me by leaving a comment. If you like this instructable probably you might like my next ones.
Source: Interface I2C LCD Using NodeMCU
- How do you connect the VCC pin of the I2C board?
The VCC pin of the I2C is connected to the Vin pin of the NodeMCU to supply 5v. - Which pins on the NodeMCU are used for SDA and SCL?
The SDA pin connects to D4 and the SCL pin connects to D3 on the NodeMCU. - What software is required to start this project?
You need the Arduino IDE installed on your computer before starting. - How do you install the Liquid Crystal Library?
Go to Sketch, select Include Library, choose Manage Libraries, and find LiquidCrystal_I2C LCD. - What function initializes the LCD in the code?
The lcd.init() function is used to initialize the LCD. - How do you turn on the backlight in the provided code?
Use the lcd.backlight() command to enable or turn on the backlight. - Does the loop function perform any actions in this example?
No, the loop function contains no code as indicated by the comment Nothing Absolutely Nothing! - Can this project be adapted for sensor data?
Yes, you can develop this instructable for all your sensor-based projects.