Summary of Intelligent-Vision Eye-glasses For Blind
This article details the development of AI-powered glasses designed to assist the legally blind and those with low vision, glaucoma, or cataracts. The prototype integrates an ESP32-CAM for object and face detection, an HC-SR04 ultrasonic sensor for obstacle avoidance, and a 2W speaker for audio feedback. The system connects these components to an Arduino Uno via serial communication, powered by dual 3.7V batteries regulated to 5V. It utilizes WiFi SoftAP for connectivity and includes SD card logging capabilities to enhance navigation safety for visually impaired users.
Parts used in the AI Automation Glasses:
- Arduino Uno Board
- ESP32-CAM module
- 2W Speaker
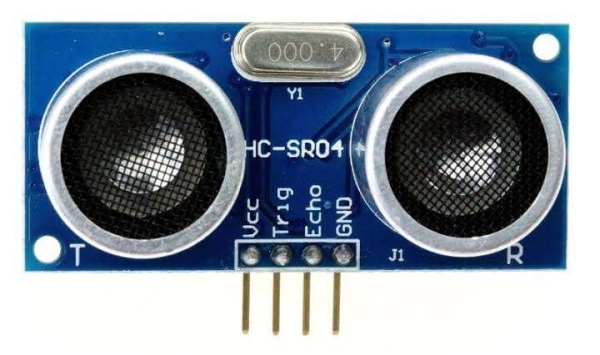
- HC-SR04 Ultrasonic Sensor
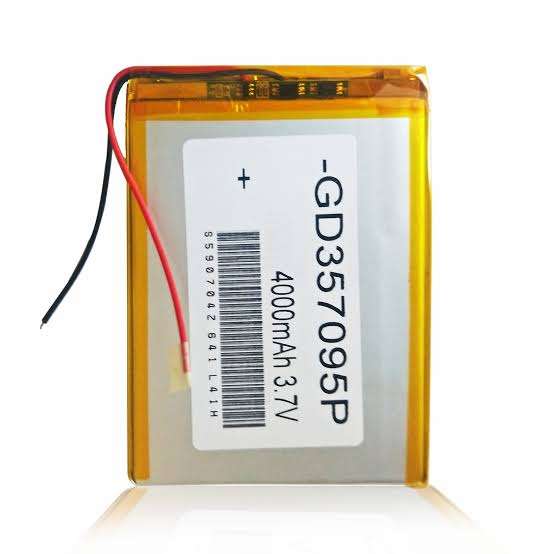
- Two 3.7V batteries
- 7805 Voltage Regulator
- SD Card
- PCB (Printed Circuit Board)
- Lenses for Carnot Efficiency
An AI Automation glasses to solving problems for the legally blind, low vision, glaucoma and Cataract.
Abstract
After the successful prototype for the Blind Glass @Blind-targeted AI Glasses
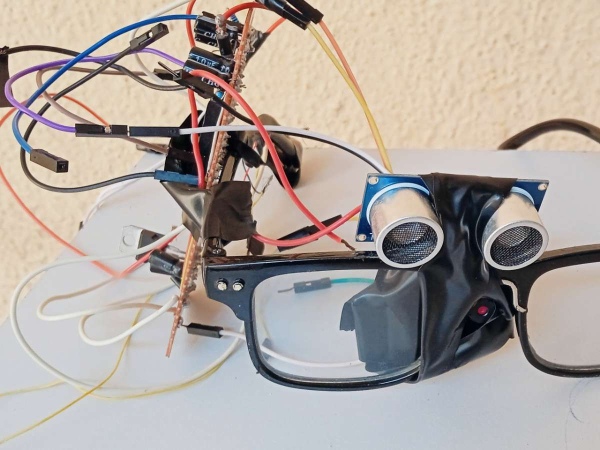
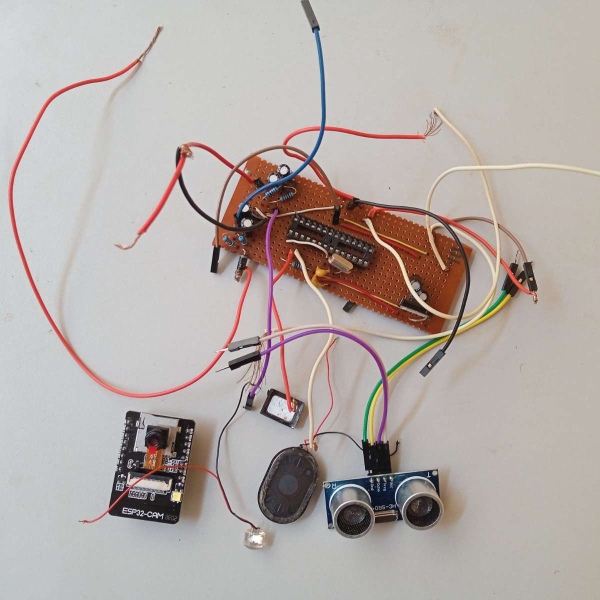
Friends and colleagues reached out to me to further develop the project. I was highly motivated and took the path in developing the project although PCB design is what I craved for. I added a Camera (esp32-cam), 2W Speaker, Two 3.7V batteries, and Ultrasonic Sensor. Camera for vision, face detection, and differentiating objects from animate (object identification), Speaker speaks out what it sees and obstacle to avoid, HC-Sr04 Sensor for distance measurement and detect (avoid) obstacles.
It took a very long time (days and nights) in writing the code but at a later time, everything works out. I’m using this to solve the problems for people suffering from low vision, legally blindness, and glaucoma by adding the necessary lenses for Carnot Efficiency.
Review and Methodology
The project made use of the Arduino Uno Board, Esp32-cam module, 2W Speaker, HC-Sr04 module. All of these except the Arduino Board are embedded on eyeglasses.
I made use of the Arduino IDE with the Atmega328 microcontroller for encoding and uploading.
Installed the Esp_32 espressif system library to Arduino library, and after installation, I changed the Board type to ESP32 Wrover Module, Upload Speed (115200), Flash Frequency (40MHZ), Flash mode (“Q/O”), and Programmer (AVR ISP).
The Esp32-cam module consists of 10 Inputs/Output pins which can be used to communicate with (any board) the Arduino Uno board and other components or modules.
GPIO1 and GPO3 are the transmitter and receiver of the camera module respectively and are connected to the TX and RX of the Arduino Board.
Connect the 5V and GND of the camera module to the 5V and GND of the Arduino socket.
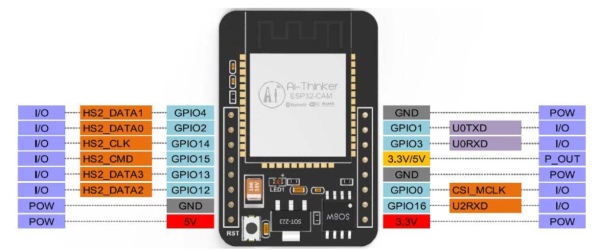
Pins GPIO12 and GPIO15 were used as the outputs for HC-Sr04 and pin GPIO13 is used for 2W Speaker.
WiFi.SoftAP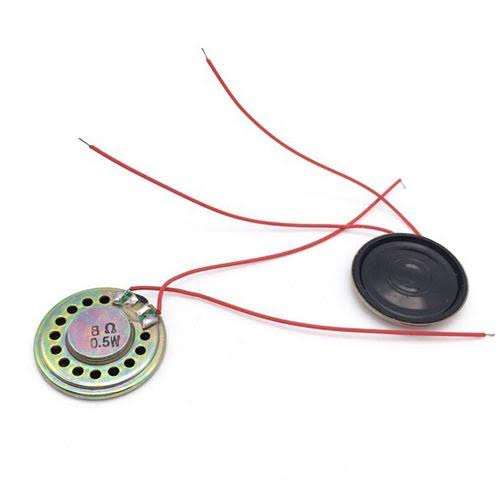
During the course of coding, the line_notify(library) was used to send SD card messages for a successful operation.
Before uploading the code, I connected the GPIO0 pin to the GND.
Declared Mobile Access Point (WiFi.SoftAP) to get the AP declared as HYDROSTECH AP in the code.
After successful coding, the code is then uploaded on the Esp32-cam module, thereby the GPIO0 was also disconnected from GND on the Esp32-cam module before checking the Serial Monitor. To get the AP, I press the reset button on the Esp32-cam and it displayed the IP address on the screen. I copied it, then disconnected the camera module from the Arduino Board.
I inserted the SD card to the designed slot, connected the HC-sr04 module to the appropriate pins on the camera module, and also the panel of the speaker was connected to the camera module. Therefore, the two 3.7V batteries were connected in series and are regulated to 5v using 7805 regulators. Hence, the battery polarities were connected to the 5v and GND respectively of the camera module.
Operation
The system operates on the principle that the camera serves as the eye to see and capture the image of the object to detect whether it’s animate or object through face detection, then at a particular distance in, it alerts the ultrasonic sensor to calculate the distance of the obstacle from the user. When the distance is <=200, the speaker will be triggered to alert the person about the obstacle at the front.
Source: Intelligent-Vision Eye-glasses For Blind
-
What is the primary purpose of this project?
The project aims to solve problems for people suffering from low vision, legal blindness, glaucoma, and cataracts. -
How does the system detect obstacles?
The HC-SR04 ultrasonic sensor calculates the distance of an obstacle, triggering the speaker if the distance is less than or equal to 200. -
Which microcontroller is used for encoding and uploading code?
The Atmega328 microcontroller on the Arduino Uno board is used for encoding and uploading. -
How are the camera inputs connected to the Arduino?
GPIO1 and GPIO3 on the camera module act as the transmitter and receiver, connecting to the TX and RX pins of the Arduino Board. -
What power source is used for the device?
The system uses two 3.7V batteries connected in series and regulated to 5V using 7805 regulators. -
Can the device send messages during operation?
Yes, the line_notify library was used to send SD card messages for successful operations. -
What specific board type is selected in the Arduino IDE settings?
The board type is changed to ESP32 Wrover Module with an upload speed of 115200. -
How does the user access the Access Point?
The user presses the reset button on the ESP32-cam after connecting it to display the IP address on the screen.