Summary of Illuminate Your Space: Crafting an Arduino Sunflower
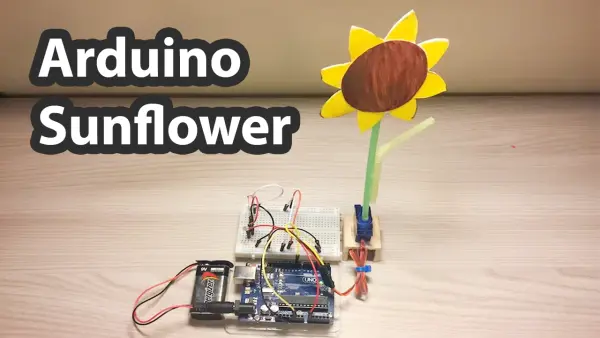
This article introduces a DIY Arduino Sunflower project that mimics real sunflowers by tracking light sources. Using an Arduino Uno, SG90 servo motor, and two photoresistors, the system rotates the flower model toward illumination. The tutorial covers hardware assembly, wiring connections, code installation in the Arduino IDE, and explains how the logic drives the motor based on sensor input to foster beginner electronics skills.
Parts used in the Arduino Sunflower:
- Arduino UNO
- Photoresistor LDR (2 units)
- Servo Motor SG90
- Breadboard
- Jumper Wires
Introduction
Arduino isn’t solely for complex projects; it can also serve as a platform for simpler ones, imparting valuable skills to beginners. Our aim is to demonstrate the fun side of electronic components, educating others about circuits and components. In this tutorial, let’s embark on creating an Arduino Sunflower DIY project. This type of project not only sparks inspiration but also fosters a deeper understanding of electronics, which is essential for learning.
The inclusion of a servo motor is pivotal in our choice of this do-it-yourself (DIY) endeavor. Our objective is to simplify the learning process around the servo motor for you. When approaching Arduino with enthusiasm and purpose, the process of connecting any component becomes much more manageable. Therefore, let’s first grasp the concept of an Arduino sunflower before delving into constructing the circuit.
What is Arduino Sunflower?
The Arduino sunflower essentially mimics the behavior of a sunflower by tracking and following light sources. It involves the utilization of a servo motor, two photoresistors, and a sunflower model to enable movement based on light cues. Notably, this project creates a do-it-yourself (DIY) flower using cardboard sheets, not an actual flower.
Hardware Components
You will require the following hardware to make Arduino sunflower.
| S.no | Component | Value | Qty |
|---|---|---|---|
| 1. | Arduino | UNO | 1 |
| 2. | Photoresistor | LDR | 2 |
| 3. | Servo Motor | SG90 | 1 |
| 4. | Breadboard | – | 1 |
| 5. | Jumper Wires | – | 1 |
Steps for Making Arduino Sunflower
To craft the Arduino Sunflower, you’ll require easily accessible basic electronic components: an Arduino, servo motor, and photoresistor. Follow a series of steps to construct the circuit for this project.
Schematic
Make connections according to the circuit diagram given below.
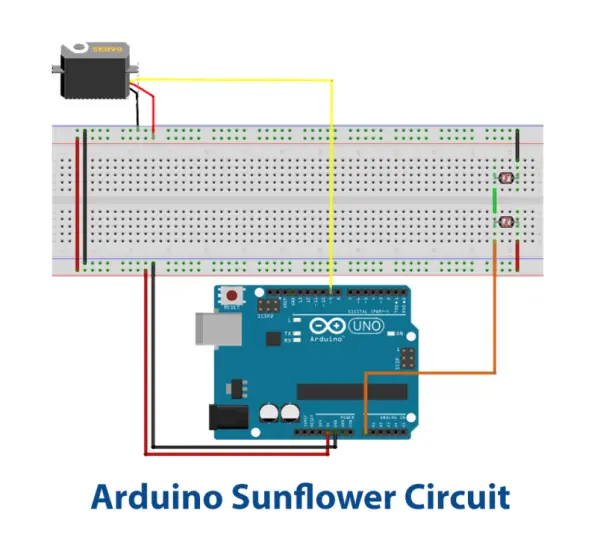
Wiring / Connections
| Arduino | Servo Motor | Photoresistor Sensor 1 | Photoresistor Sensor 2 |
|---|---|---|---|
| 5V | VCC | One End | |
| GND | GND | One End | |
| D9 | Signal | ||
| A0 | Other End | Other pin |
Installing Arduino IDE
Initially, you’ll need to download the Arduino IDE Software from the official Arduino website. Here’s a straightforward, step-by-step guide on installing the Arduino IDE.
Code
Now copy the following code and upload it to Arduino IDE Software.
#include <Servo.h>

int sensorPin = A0;
int servoPin  = 9;

int sensorValue = 0;
int servoGrad = 90;
int tolerance = 40;

Servo myservo;

void setup() {
  pinMode( sensorPin, INPUT);
  myservo.attach( servoPin );
  myservo.write( servoGrad );
}

void loop() {
  sensorValue = analogRead(sensorPin);
  if ( sensorValue < (512-tolerance) )
  {
    if (servoGrad < 180) servoGrad++;
  }

  if ( sensorValue > (512+tolerance) )
  {
    if (servoGrad > 0) servoGrad--;
  }

  myservo.write( servoGrad );

  delay(100);
}
Let’s Test It
Now, it’s the moment to test the device post the code upload. Let’s power on the Arduino and put the Arduino sunflower to the test. You’ll notice its enthusiasm in seeking out the light. The motor initiates rotation toward the light source. For a closer inspection, move it to a darkened space and then activate your phone’s flashlight to observe the outcomes.
Working Explanation
The entire functionality of the circuit hinges on the code. Let’s delve into understanding the code:
Initially, we define the Arduino pins essential for the circuit’s construction.
Within the void setup, the sensor pin (a photoresistor) is primarily set as an input. By calling the Servo.attach() function, the default position of the servomotor is set at 90 degrees. Subsequently, the Servo.write() function follows this call to initialize the servomotors at a specific position.
In the void loop, the analogRead function is utilized to capture values from the photoresistor sensor. A conditional statement is introduced: if the sensor value falls below a defined threshold and the motor angle is less than 180 degrees, the motor will rotate. Conversely, if the sensor value surpasses a predefined threshold, the servo motor is evaluated; if the motor angle is less than 180 degrees, the motor will remain stationary. The code includes delays to accommodate the reading of subsequent values.
- What is an Arduino Sunflower?
An Arduino sunflower mimics sunflower behavior by tracking and following light sources using a servo motor and photoresistors. - How many photoresistors are required for this project?
The project requires two photoresistors (LDR) to enable movement based on light cues. - Can I use actual flowers for the Arduino Sunflower project?
No, the project creates a do-it-yourself flower using cardboard sheets rather than an actual flower. - Which servo motor is specified for this build?
The specified component for rotation is the SG90 Servo Motor. - What is the function of the tolerance variable in the code?
The tolerance variable defines thresholds to determine if the sensor value indicates a need for the motor to rotate left or right. - Does the motor rotate continuously or only when light changes?
The motor initiates rotation toward the light source and remains stationary if conditions do not meet the threshold criteria. - How do you test the device after uploading the code?
You power on the Arduino, move it to a darkened space, and activate a phone flashlight to observe the motor seeking the light. - What is the default position of the servomotor in the setup function?
The default position is set at 90 degrees using the Servo.write function within the void setup.