Welcome to the SM-1 project from ArduinoArts.com!
(A.K.A as the Annoying IKEA Lamp)
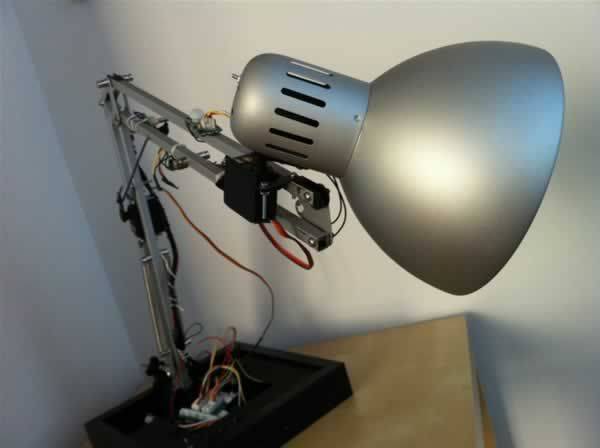
We are proud to introduce you to the SM-1 project (aka the Annoying IKEA lamp), as part of the Toy hacking contest from the SeeedStudio.com friends.
The project consists in modifying an IKEA 5€ lamp and adding it some sensors, lights, sound and movement to make it more fun. (even that we have made a few other hacks to this same lamp as the Iphone photostudio).
Here is a sample diagram of what we have in mind (and hope to be able to make it real!).
Part 1
So, the first thing that we need is the lamp:
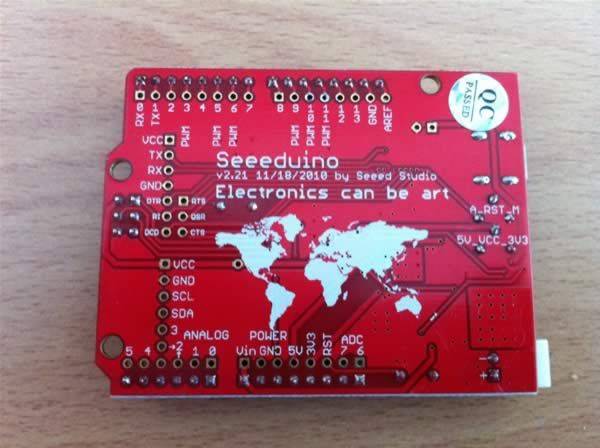
and the Grove Toy Kit from our friends of SeeedStudio.com

The basic idea is to detect if there is movement or not (with the motion detector); if there is movement we start the servo no.2 and play a pre-recorded message. Otherwise, there is working the servo no.1 and a different pre recorded message.
Reading the state of the motion sensor is very simple: we assign and digital input and read the state. The result is a binary data 0 or 1 (quiet or movement). Doing a simple loop and based on this result we start one or another gadgets.
The sound recorder on it´s own, can only play 4 pre-recorded sounds via external signal. To record them there has to change a switch from play to record position and press the desired button (it has 4 buttons, one for each sound) and record it (should be less than 15sec each). Once recorded we change the switch to play position, and access them by the play() function declared on the code.
The servos work in a very simple logic, they have 3 cables: positive, negative and digital data. The first two give the servo the power to move (max 7v) and the third one goes to an digital output where it receives the information on which degree should it be, and the change begins. We are using the sweep tutorial code in this example.
Part 2
We continue the developing of our SM-1 Lamp Robot, this time we are doing hacks on the lamp to install one servo, the one that will move the lamp head to the sides (as if the lamp looks to each side).
Here is the detail of the lamp head:
Let´s dissarm all of it. Also we should remove all the electrical parts of the original lamp.
We are not going to use a 220v lamp, but instead we are going to need all this space to install some sensors.
This is how it shoul look without the lamp head. See in the background the lamp head allready without the electrical parts:
Now, we are using some spare parts (also from IKEA), from the EXPEDIT furniture. They come with some metal supports in case you are attaching the furniture to the wall (which i never do), and these parts fit perfectly in the lamp and hold perfectly also the servo.
Now, lets drill the lamp head to attach it to the servo arm.
And this is how it looks!!! Looks almost as terminator isn´t it? 😉
We also added a second servo (later) and improved the installation on the lamp servo as seen on this pictures:
Step 1: Adding light and base
So, we now have a first prototype working, it talks, it moves, it knows when you move, but what is a lamp without a light? and also a lamp has to look nice in your house, so we are making a neat base to show the guts of the lamp, but with style.
For the lamp, we are using the IKEA OLEBY sun powered lamp, (this time we are only using the led lamp, the solar charger we will keep it for another project). This is the lamp (allready without the solar charger base):
we had to modify it a little bit; add a screw for fixing it to the lamp base and extracting the switch system.
The installed switch was digital, and only worked when there was current. If we are controlling this led lamp with our Seeeduino board trough a digital output, when we set the D/O as LOW, there will be no current, and when set back to HIGH, we would have to manually start the lamp with the switch. I guess this system was installed to prevent accidental discharge of the solar powered batteries.
This is the inside of the lamp:
now, we add a resistor (to protect the led, because the original was on the PCB of the switch) and some cable to close up the lamp.
now it´s time to install it on the lamp:
Now, with the lamp light installed, it´s time to make a Base for the lamp, and for this we are using a photo frame… and guess where it´s from? IKEA again!
This is a very simple step, so we are going to show only the results:
Step 2:
So, we finally have a working prototype of the lamp.
We have installed a base, a led lamp, 2 servos, a motion sensor, a noise sensor, and 3 axys accelerometer and an audio accesory capable of recording and playback of 4 different sounds (thanks to seeedstudio.com).
The working logic of the lamp is the following:
If Noise is detected:
Turn on lamp
Play audio#3 (i´m trying to sleep here!)
Make a sweep left – right – left movement witht he lamp servo (as a negative head movement).
Rest servos on 90 degreees
Turn off lamp
If motion is detected:
Turn on lamp
Move to the left side (base servo and lamp servo).
Play audio#2 (are you sarah connor?)
Move to the right side (both servos also)
Play audio#2 (are you sarah connor?)
Return to rest position (90 degrees on servos)
Turn off lamp
If max hight is detected (with the 3 axys readed value):
Play sound#4 (Oh Yeah!)
Now it´s time to clean the code that is a mess!!!
Step 3: Adding a 3axys control remote and aut/manual switch
Here are a few of the improvements i have done on the lamp (check the details on the photo gallery below):
-Improved the fix on the servos
-Servo to rise the lamp (instead of the base rotation).
-Base light fixed
-Manual Mode with 3 axys realtime remote control.
-Better fix on the speaker (sounds louder) and audio jack out.
The Auto and Manual Mode:
I added a switch connected to a digital input on the Seeeduino Board, to control which part of the code i want to be running on the lamp. This was controlled by an IF statement, if switch is on, play the auto code, if off, play the manual mode.
-Auto Mode: this is the standard code of the previous versions; the lamp responds to the state of the sensors. In this case we have only 2 sensors: motion and noise (as you can see on the previous post)
-Manual Mode: since the position change on the second servo (from the base of the lamp to the middle in order to rise the lamp, there was no sense on using the 3 axys accelerometer on the lamp (we can know when the lamp is up with the position of the servo). So i managed to make a really good use of this 3 axys accelerometer: as a control remote. If we have the lamp on manual mode, we can control the servos as a responde on the position of 2 axys (X and Y). It´s really fun. Also added a sound response to the hight position, this time instead of the “Get me down” of the previous version, an “Oh yeah”, as you can see on the video.
There is a lot of improvement to make on the lamp, here are a few things I think should be improved:
-The code: i´m more a creative maker than a coder… it just need to be improved A LOT!!!!

-Independent power for the servos: these are high torque servos, and the consume a lot of power when working (specially when moving at high speed or when they are forced). You can see the problem on the leds when the servos are moving. It also triggers some times undesired audio playback (i guess the shield resets on low power).
-360º movement on the lamp: adding a third servo on the lamp head for real movement, will add weight, but i think is worthy.
-Stronger servo for the rise: or a weight balance to help the servo rise the lamp.
-Improved audio shield: to playback more audio messages. Right now it can only playback 4 pre-recorded messages. We could be doing a more attractive robot with more phrases and ideas triggered by more sensors, more states, etc.
-Ethernet / WiFi connection: to be controlled / control social networks.
-LCD screen: to display messages (alike the audio shield).
-RGB leds on the base: to express different “feelings” trough colors.
-Jump: this is something YouTube viewers have complained a lot on the last video; it doesn´t jump! we should be able to do something to make it jump?
-Base Movement: i was thinking on adding 4 spider kind of legs, but it will be on a not so near future…
For more detail: The IKEA Robot Lamp
