
Summary of How to Use GPS With Arduino
This tutorial explains how to interface a GPS module with an Arduino board to read location data, including latitude, longitude, and UTC time. It details the setup process for testing or interfacing the GPS by removing the Atmega chip to use the board as a serial gateway. The guide covers necessary hardware connections between the GPS receiver and the Arduino, emphasizing power supply requirements and pin configurations for data transmission.
Parts used in the Arduino GPS Interface Project:
- Arduino Board
- GPS Receiver Module SKG13BL
- Computer
- 12v/3.3v Adaptor
- USB to Serial Converter (Optional alternative)
GPS is a very useful device which is used in many electronics projects and applications like vehicle tracking system, GPS Clock, Accident Detection Alert System, traffic navigation and surveillance system etc. But question is how to use the GPS and read the data from GPS? We can easily get the GPS data directly into our computer using Arduino.
GPS stands for Global Positioning System and used to detect the Latitude and Longitude of any location on the Earth, with exact UTC time (Universal Time Coordinated). This device receives the coordinates from the satellite for each and every second, with time and date. GPS offers great accuracy and also provides other data besides position coordinates, we will into look it shortly.
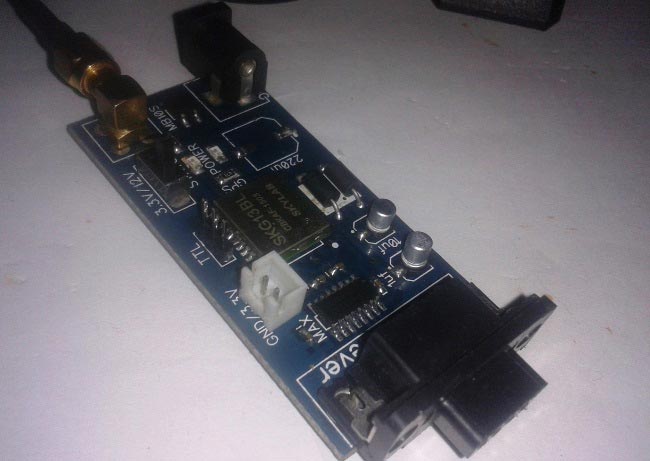
In this Arduino GPS tutorial, we are going to explain that how to Test or Interface GPS module using Computer and Arduino. For interfacing GSM with computer we either need USB to Serial Converter or Arduino Board. Here we are using Arduino board to interface GPS. We only need Arduino Board, GPS module, computer and 12v/3.3v adaptor for power supply. Here we have used GPS receiver Module SKG13BL
Before connecting it to the computer, we first need to remove the Arduino IC (Atmega chip) from the Arduino Board, as we only need the serial circuitry of the Arduino. This is called the Gateway mode.
Now do the connection like given in below picture:
- GPS TX pin to Digital PIN 1 of Arduino (TXD)
- GPS Ground Pin to GND PIN of Arduino
- GPS Power (3.3v) Pin to 3.3v PIN of Arduino
Read More: How to Use GPS with Arduino
- What is the primary function of a GPS device?
A GPS device detects the Latitude and Longitude of any location on Earth along with exact UTC time. - How can I get GPS data directly into my computer?
You can easily get the GPS data directly into your computer using an Arduino board. - What components are needed to interface GPS with a computer?
You need an Arduino Board, a GPS module, a computer, and a 12v/3.3v adaptor for power supply. - Why must the Arduino IC be removed before connecting the GPS?
The Arduino IC must be removed because you only need the serial circuitry of the Arduino, which is called Gateway mode. - Which digital pin should connect to the GPS TX pin?
The GPS TX pin connects to Digital PIN 1 of the Arduino labeled as TXD. - Where does the GPS Ground Pin connect?
The GPS Ground Pin connects to the GND PIN of the Arduino. - What voltage should power the GPS Power pin?
The GPS Power Pin should connect to the 3.3v PIN of the Arduino. - Does GPS provide data besides position coordinates?
Yes, GPS offers great accuracy and provides other data besides position coordinates.
