Introduction:
On one of my weekly pilgrimages to Lowes (as any devout Kansan does), I found a sad little plant in the Gardening Department: a Janet Craig Compacta. The poor little guy looked lonely and dehydrated. We clicked right away and immediately I knew I had to take him under my wing. There was one major problem.
I *suck* at gardening. I am a disgrace to my home state’s agricultural prestige and heritage — I frequently forget to water the plants in my care, countless dying from my neglectful hand. I knew I had to save this little guy, but I could not lead him to the same demise. I was determined to atone for my past sins.
With my engineering skills and technical knowledge, I could create a solution that could keep my plants alive and redeem myself as a Kansan while wholeheartedly indulging my habit of short-term memory loss.
Determined, I brought home that plant. He was overjoyed to be chosen (I could tell). I named him Plonty, short for Plonty Mython, and I quickly got to work on designing his brand new smart home, an IoT Mason Jar Planter.
This is how I made it.
This Instructable was sponsored by the Urban Farming Guys, in association with the Green Thumb Project. Huge thanks to these guys for helping me fund this tutorial, aiding in an effort to encourage and educate about more intelligent gardening.
Step 1: Gathering the Tools and Materials
Step 1a: Preamble
This project has a long list of Tools and Materials. Because of this, I’ve divided the list into sections so you can see what materials are required, depending on the part of the project you are building. I’ve also provided Amazon links to each product, so you can easily find the parts you need.
Let’s get into it!
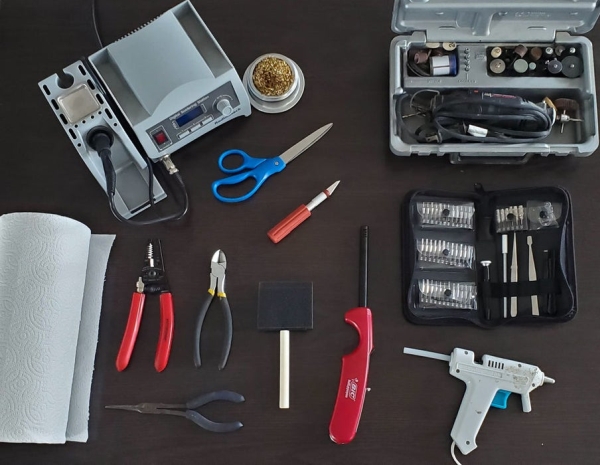
Tools:
The Pointy Bits: (please be careful!)
- Scissors
- Diagonal Cutters
- Exacto Knife
- Hand Drill (w/ bits)
Disassembly:
- Crescent Wrench
- Prying Tool
- Needle Nose Pliers
- Allen Key Set
Hot Stuff: (also be careful!)
- Lighter
- Hot Glue Gun
For the Electronics:
- Soldering Iron
- Wire Stripper
For Staining:
- Foam Brushes
- Paper Towels
Materials:
Jar Planter:
- Mason Jar
- Rocks (optional)
- Wire Mesh
- Yarn/Wick
Electronics:
- ESP32
- Buzzer (Piezo)
- Relay Module
- Breadboard (2x)
- Moisture Level Sensor
- Water Height Sensor
- 5V Micro USB Wall Wart
- 100Ω Resistor
- Wire Jumpers
Wooden Base:
- Wood Square
- Wood Circle Plaque
- Wood Ring
- UV Lamp
Expendables:
- Heat Shrink
- Hot Glue
- Electrical Tape
- Rosin-Core Solder
- Wood Glue
- Wood Stain
(Note: some of these tools can be very dangerous, supervision is recommended for kids completing this project.)
Step 2: Prepping the Base
Step 2a: Drilling the Mounting Hole
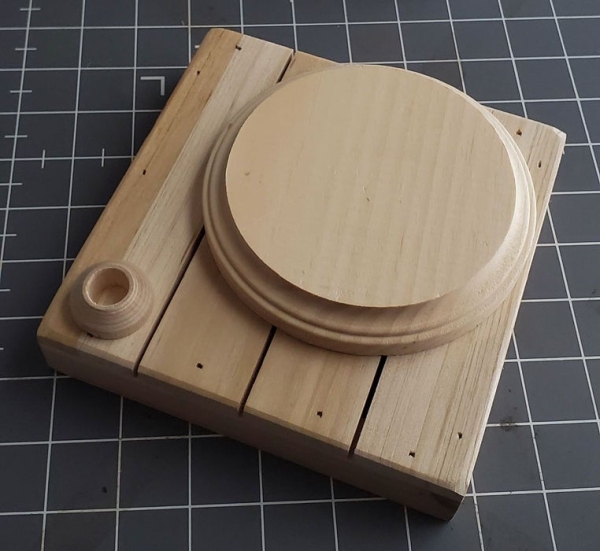
Once we have all of our materials, it’s time to begin! We will start by creating the wooden base for the Mason Jar to sit on.
First, we need to drill a hole for the lamp to mount later on. To do this, we will make a small ink mark using a Sharpie. This marks where to drill the hole. We want it as close to the corner as possible!
Don’t worry about making a few mistakes, the wooden ring will help to hide these.
Now it’s time to drill. Make sure the base is securely mounted/clamped down, and then begin to drill the hole. Don’t go too fast, or you’ll risk splitting the wood.
I also did this in my carpeted apartment living room… maybe try doing it outside instead?
Step 2b: Gluing the Base Together
After the hole has been drilled, glue the pieces together. Apply a moderate amount of glue to the bottoms of the pieces, and place them onto the base. Now we wait for the glue to dry…
*Jeopardy music begins to play*
Step 2c: Staining the Base
Now that the glue has dried, we can stain the wood!
Carefully use a flat head screwdriver or prying tool to open the can of stain. After the can is open, stir the stain slowly to make sure it’s ready for use. Lay down paper towels to protect your work surface. Then we will use a foam brush to apply a coat of stain to the wood. Make sure to get all the faces, as well as the little corners and cracks.
Step 3: Attaching the Lamp
Step 3a: Disassembling the Clamp
Depending on the lamp you purchase and the base you use, this step will most likely change, but I am adding it here to fully explain my process in the event that someone follows exactly the steps I took. For me, my lamp had a clamp on the end, with a hex bolt holding it together. I used my Allen screwdriver to loosen this (while also snapping my finger with the spring in the process. Would not recommend).
During disassembly, always remember to pay attention to where compressed energy might be hiding.
Once I had the clip apart, I had to remove a 14mm nut from the base, which required me bending part of the clip down so I could access the nut.
Step 3b: Removing the Switch
After the nut was gone, it was time to open up and remove the power switch.
We will be using the relay in its place later on.
This will require using the prying tool again, and then a soldering iron to detach the switch. Now that the switch is gone, we can feed the wire through the hole in our base.
Step 3c: (Actually) Attaching the Lamp
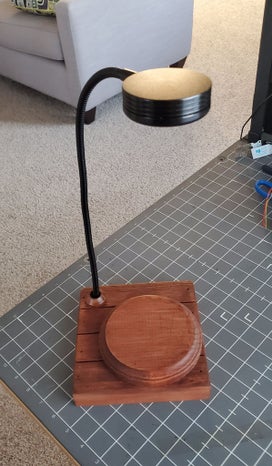
The lamp should be completely stripped away with just a cable running out of the bottom. Slide this through the hole we drilled earlier, and slip the nut onto the wire. Press the lamp neck as far into the wood as possible, and begin to tighten the nut onto the bottom. Do this until it’s nice and firmly mounted.
It should be able to stand up on it’s own. (as shown in the first picture)
Read more: How to Make a Self-Watering IoT Planter With a Mason Jar and an ESP32!