Summary of Halloween Candy Dispenser
This article details the construction of an automatic Halloween candy dispenser that detects hands via an infrared sensor and randomly dispenses "good" or "bad" flavored candies using servomotors. The project features a spooky aesthetic with toxic green lighting, sound effects, and 3D-printed parts designed to look like hazardous material storage tanks. It is programmed in CC+ and can be built using either buzzers or a DFPlayer mini for audio.
Parts used in the Halloween Candy Dispenser:
- Arduino UNO
- Infrared sensor (IR)
- Servomotor (x2)
- LEDs strip (Neopixel compatible)
- Buzzer (x2) or DFPlayer mini with Speakers (x2) and SD card
- 220 ohm resistors
- 1kohm resistor
- Adhesive paper
- Tin wire
- Metallic-effect paint
- Glue/cold or hot silicone
- 3D Printer polymer (PLA)
- Soldering equipment
- 3D printer
Have you ever felt like not wanting to celebrate Halloween? Or too lazy to open the door and hear “trick or treat” a thousand times?
Well, if that’s you, we offer the perfect solution without losing the spirit! This project is an automatic machine that works as a candy dispenser by detecting when a hand is placed under. Thanks to its infrared sensor and servomotors, programmed in CC+, the system recognises whether there’s a hand or not and if there’s one, randomly chooses between two different tanks of candy (good or bad flavour).
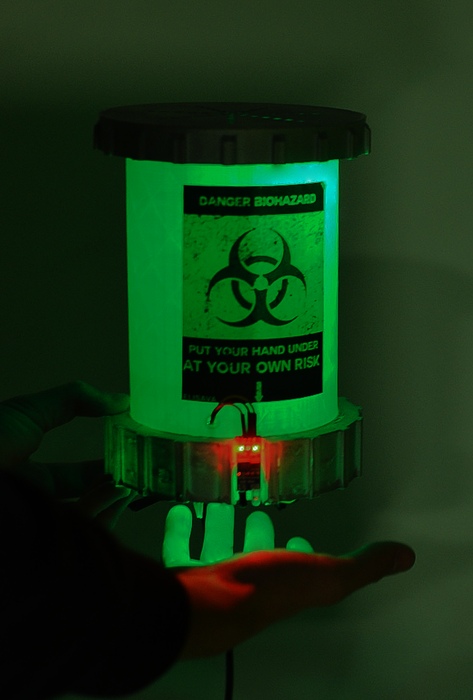
But… hang in there! It’s possible that if you’re lucky enough you could be the chosen one and win a big haul of sugary delights. Plus, its aesthetics match the spooky theme, as it is inspired by experimental storage tanks and hazardous materials with light and sound details, to make it a complete experience.
What are you waiting for? Want to try your luck?
Supplies
Electronic parts:
- Arduino UNO: to make all the required connections with the components.
- Infrared sensor (IR): it detects whether there’s a hand placed below to initiate the code.
- Servomotor (x2): they control the dispensing mechanism, so they are placed below the tube of candies to prevent them from falling. Their angle and delay are programmed to ensure candies fall one at a time.
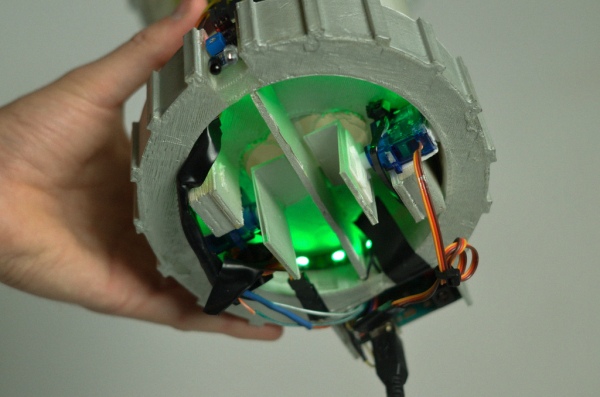
- LEDs strip: we wanted a powerful source of light that mysteriously attracted people to our machine. Under the lower part (halo_abajo.STL), 16 LEDs circle-shaped are placed. Then, 6 other LEDs are placed above the cylindric part divided in two (halo_arriba1.STL): 3 on the left side and 3 on the right side, to create the toxical green effect. They require 220 ohms resistors and the installation of the Neopixel library.
- Buzzer (x2): these buzzers were used to reproduce sounds (they are only able to reproduce musical notes).
- * Optional: if you want to reproduce audio, you could use instead of the buzzer a DFPlayer mini (with Speakers (x2) and an SD card): the SD card is placed inside the DF with the songs (in .MP3 format) that would be played by the speakers. It requires a 1kohm resistor and the installation of the DFPlayer-Mini-mp3 library.
Tools:
- Soldering equipment: necessary to be able to connect the wires and components, ensuring strength and durability.
- Printer: in order to print the design of the sticker.
- 3D printer: it is needed to print the 3D models of the prototype parts. If you can’t 3D print, the parts can be reconstructed by means of other materials such as cardboard or by laser-cutting of wood.
Materials:
- Adhesive paper: is for the sticker used as a warning sign.
- Tin wire: to solder all components and cables in their respective places to avoid bad connections.
- Metallic-effect paint (optional): it gives the prototype a more polished and realistic look.
- Glue/cold or hot silicone: to fix the components in place.
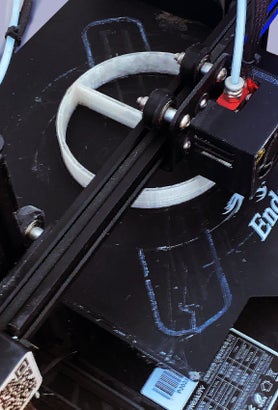
- 3D Printer polymer (PLA): this is a translucent material as we want to let some light pass through.
Step 1: Create the Electrical Connections Schematic
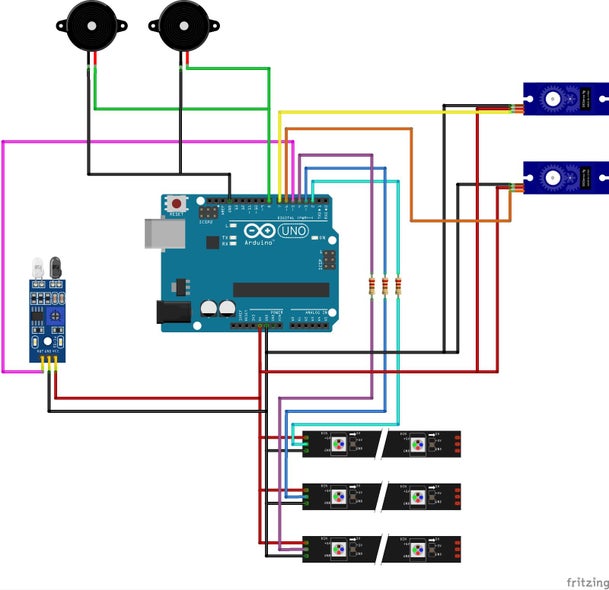
The first step required to create the prototype is to have a schematic of the electrical connections. This is going to make the soldering process of all the connections easily. Moreover, we have added the electrical connections schematic of the optional model, which instead of the buzzer uses the DFPlayer mini mp3.
Step 2: Define the Flow Diagram
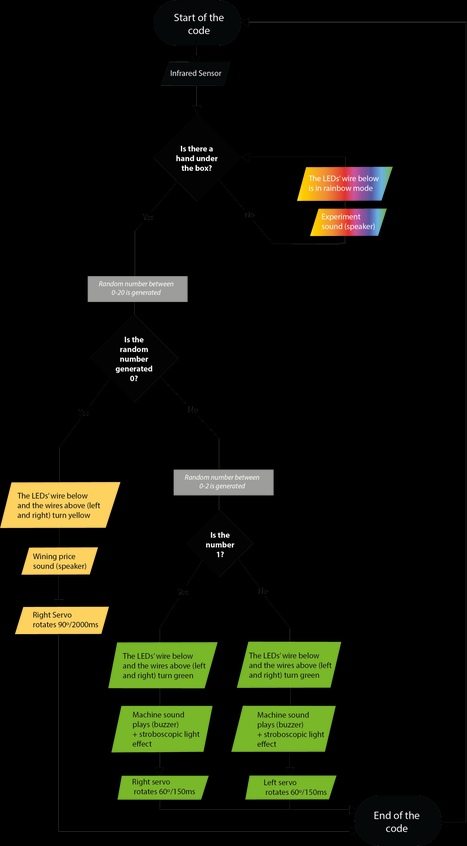
After understanding which components play a role in the protype and how this components are connected to the Arduino UNO, a Flow Diagram is required before starting the code programmation. But don’t panick! The final code is also attached for you to consult.
Step 3: Model the 3D Components
Once we understand how it will work, we need to materialise our idea. We have decided to make a tube structure (halo_medio.STL) with an inner funnel/thinner tube (tubo_caramelo.STL) to avoid the candies getting stuck inside. The lower part (halo_abajo.STL) has two extrudes of material that enables us to glue the servomotors, and the upper part consists of two parts (halo_arriba1.STL and halo_arriba2.STL), which allowed the buzzers to sound better, since they were secured inside and the other part had holes. We used Solidworks for the modelling and KeyShot for the rendering. The files of the parts used by us are also available to you.
Step 4: Print and Make Sure the Pieces Fit Together
If you have a 3D printer within your reach, you can print the parts and in a few hours you will have them at your disposal, to work with them. Nevertheless, you can use other materials for prototyping, such as cardboard or wood. Due to all the burrs and excess material left by 3D printing, it is necessary to polish the surfaces and remove the unnecessary material since before placing the system of electronic elements and parts, it is necessary to make sure that the structure is finished and refined for its correct assembly and disassembly.
Step 5: Check the Dispenser Mechanism
Once the 3D parts are assembled, the candies are placed inside the tube and an inverted “L” shape is joined to the servomotors to regulate the dispenser mechanism. Then, the angle is adjusted (in the code) to make one candy fall each time. Sometimes it is possible that the servomotors do not work correctly and their movements are inaccurate or more abrupt than normal. To check that it is in the correct state, you should use the example provided by Arduino.
Step 6: Test the LED Strip
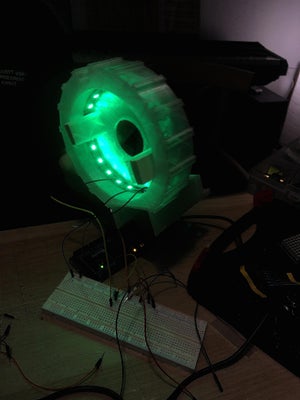
As with the servomotors, it is necessary to check that the LED strip works in its entirety and then cut it according to your preferences. To do this, download the NeoPixel Arduino library and use its examples to check it works properly. Ideally, after cutting the new strips, they should be tested again to avoid possible errors. We have placed 16 LEDs under the lower part, and 3 on each side of the central part (the “good” and the “bad” candy).
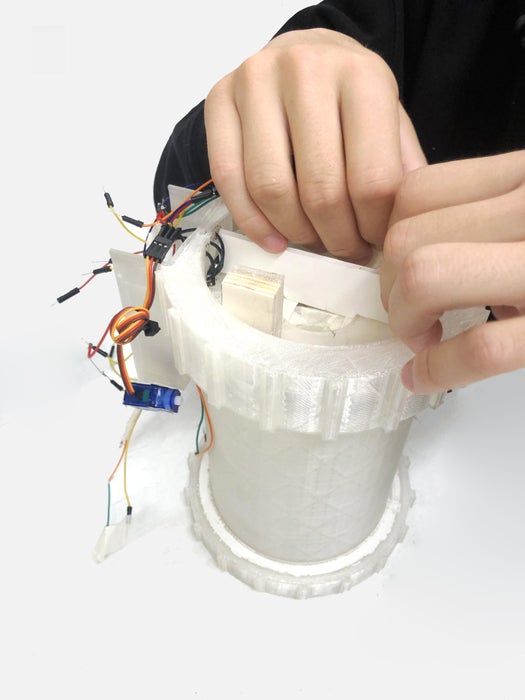
Step 7: Place the Remaining Electrical Components
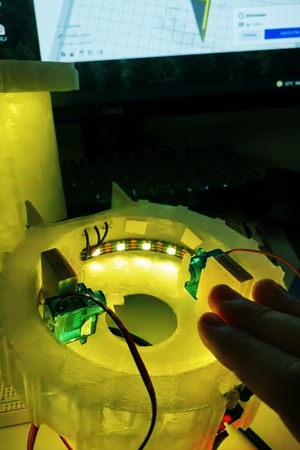
Once the LED’s strips and the servomotors are placed, the candy machine should work properly. Yet, to initiate the movement we need to place the infrared (IR) sensor, which should be located in the lowest part of the prototype (halo_abajo.STL), and the distance should be adjusted to where a hand is usually placed. After that, we have to place the buzzers on the top of the second part (halo_arriba1.STL).
Step 8: Paint the 3D Print Pieces
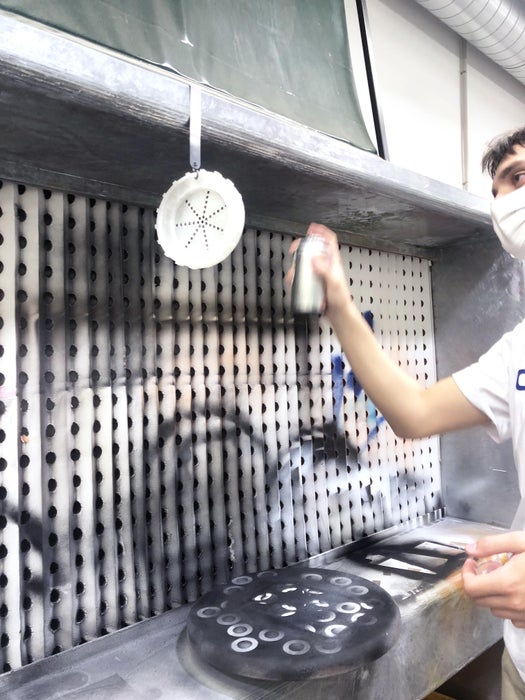
Before soldering, it is important to paint the pieces, since if the paint touches some of the metal terminations of the components the contact could no longer be working properly. We have used metallic-silver paint, water-based, to paint the PLA filament, which is a polymer.
Step 9: Connect the Wires to Their Respective Components and Solder
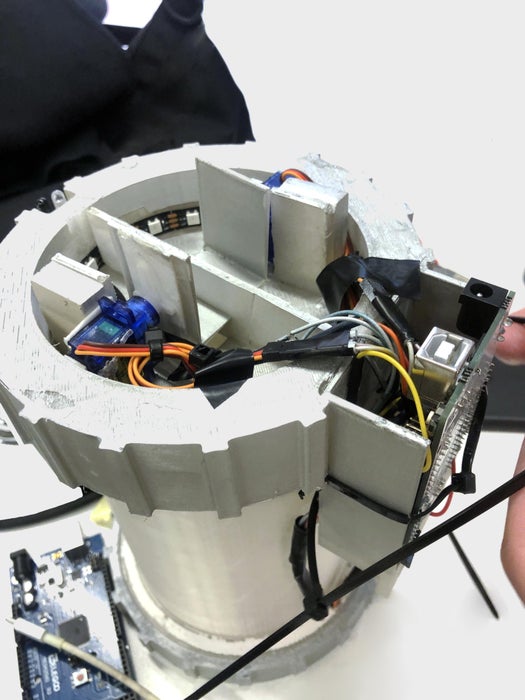
Now that we have the pieces painted, it is time to assemble again all the pieces and finally solder the wires to the electrical components, so the protoboard would no longer be needed. If the wires you have are not long enough, two wires could be soldered together. One important thing to take into account is that the LEDs strip has a soldering direction (indicated with a ▶), which means that soldering it in the wrong direction would lead to errors.
Step 10: Print and Stick the Adhestive Paper
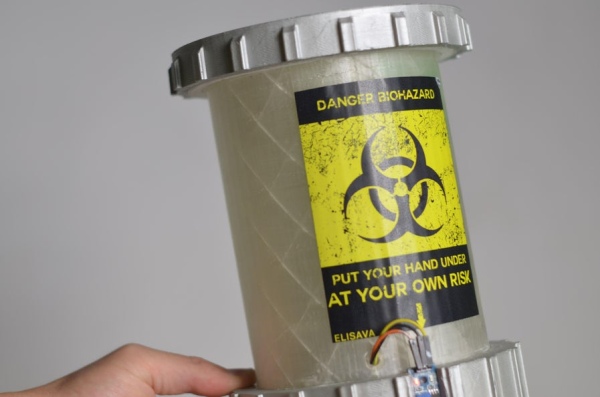
The warning sign has been created with Adobe Illustrator and printed using adhesive paper. The dimensions of it are 800x800mm and it fitted and stuck perfectly to our prototype. We have attached the Illustator file in case you want to use the same template.
Step 11: Final Pictures
The final step was to take some pictures with our Nikon camera in a Photography studio.
Step 12: Enjoy Your Prototype!

Now all you have to do is set up the prototype at your home’s front door to make sure every guest or individual that demands trick or treat candies, gets some without disturbing you!
Step 13: Conclusion
This project has been far more complex than expected, as the mechanism for dispensing candies was controlled by more parameters than the ones we initially thought. With the original 3D printed funnel structure, we caused unwanted blockages when filling the candy tank, which is why we ended up opting for a cylinder. Once all the candies were falling out, we had to keep testing until we found the ideal angle of the servo to let only one or two candies through.
During the programming research, we discovered that there were different options to play a sound: the buzzer, the SD card module and the DFPlayer. The buzzer and the DFPlayer were the most viable for the project, as the SD card module is not prepared to play audio. Moreover, this project allowed us to get to know the Neopixel library, which we have been able to see that it has so many possibilities since it controls the LEDs with much more precision.
Source: Halloween Candy Dispenser
-
How does the machine detect a hand?
The system uses an infrared sensor placed at the lowest part of the prototype to recognize when a hand is placed below. -
Can the dispenser play full audio files instead of musical notes?
Yes, by replacing the buzzers with a DFPlayer mini connected to speakers and an SD card containing MP3 songs. -
What library is required to control the LED strips?
You must install the Neopixel Arduino library to manage the LEDs effectively. -
How are the candies prevented from getting stuck inside the tube?
An inner funnel or thinner tube structure was added to the main tube to prevent blockages during dispensing. -
What programming environment is used for this project?
The system is programmed using CC+ software. -
How many LEDs are placed under the lower part of the machine?
There are 16 circle-shaped LEDs placed under the lower part to create a halo effect. -
What materials can be used if you do not have a 3D printer?
You can reconstruct the parts using cardboard or by laser-cutting wood. -
Why is it important to paint the pieces before soldering?
Painting first prevents paint from touching metal component terminations, which could cause connection failures.