Over the last few articles, we have covered the use of ESP8266 boards for building several WiFi based projects. For today’s tutorial, we will look at it’s recently released successor; the ESP32.
As mentioned in previous tutorials, ESP-12e module popularly referred as the nodeMCU came at a time where makers were struggling with the difficulties around the use of the ESP-01 modules. The ESP-01 modules were not breadboard compatible, had power issues, and could barely be used in a standalone application where more than two GPIOs are required. The NodeMCU solved all these issues adding additional features and it immediately became a darling of the maker community. However, the ESP8266 equally had its own limitations and like every good product, there was a need to improve it. This improvement came in the form of the ESP32.
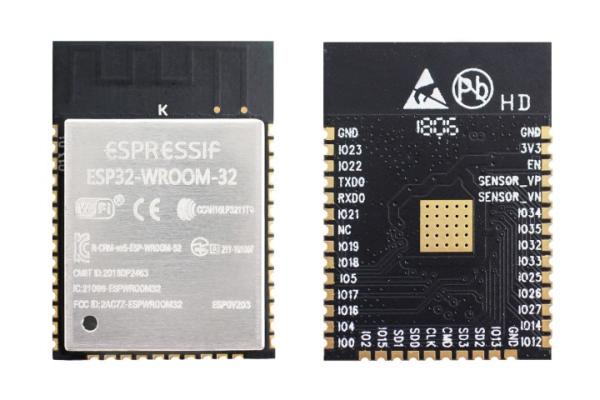
The ESP32 is way advanced compared to the ESP-12e. Among several features, the ESP32 packs a CPU core, a faster Wi-Fi, more GPIOs (especially increased analog pins that we all desired), supports Bluetooth 4.2 and Bluetooth low energy. The board also comes with touch-sensitive pins, alongside a built-in hall effect and temperature sensors. While both boards are quite cheap, the ESP32 ($6 – $12) costs slightly more than the ESP-12e ($3-$6).
The table below provides a more detailed comparison between the two modules.
|
Microcontroller
|
Xtensa Single-core 32-bit L106
|
Xtensa Dual-Core 32-bit LX6 with 600 DMIPS
|
|
Wi-Fi Module
|
HT20
|
HT40
|
|
Bluetooth Support
|
X
|
Bluetooth 4.2 and BLE
|
|
Frequency
|
80 MHz
|
160 MHz
|
|
SRAM Availability
|
X
|
✓
|
|
Flash Availability
|
X
|
✓
|
|
GPIO
|
17
|
36
|
|
Hardware /Software PWM
|
None / 8 channels
|
None / 16 channels
|
|
SPI/I2C/I2S/UART
|
2/1/2/2
|
4/2/2/2
|
|
ADC Resolution
|
10-bit
|
12-bit
|
|
CAN Support
|
X
|
✓
|
|
Ethernet MAC Interface
|
X
|
✓
|
|
Touch Sensor
|
X
|
✓
|
|
Temperature Sensor
|
X
|
✓
|
|
Hall effect sensor
|
X
|
✓
|
|
Working Temperature
|
-40ºC to 125ºC
|
-40ºC to 125ºC
|
Today’s tutorial will not only provide a comparison between these boards, but it will also show you how to put the ESP32 board to use. We will look at setting up the ESP32 module for programming with the Arduino IDE and we will run the Arduino blink example on the board. This will allow you to setup all that is needed for the exciting projects we will build with this new board over the next few tutorials.
Read more: GETTING STARTED WITH ESP32