I started out a little over two years ago on work experience, before going on to become a trainee engineer, having decided that I would like to pursue a career in electronic engineering. At work I get to do a wide variety of things, such as laser cutting, assembling kits and even some prototyping. Over the past two years I’ve spent quite a lot of time learning microcontroller basics, mainly working with Arduino and simple projects.
When I first started out I had very little electronics experience – pretty much just a basic understanding of Ohm’s law. However, I feel like I’ve learned a lot over the past few years and I’m due to start a HND in electrical and electronic engineering this coming September.
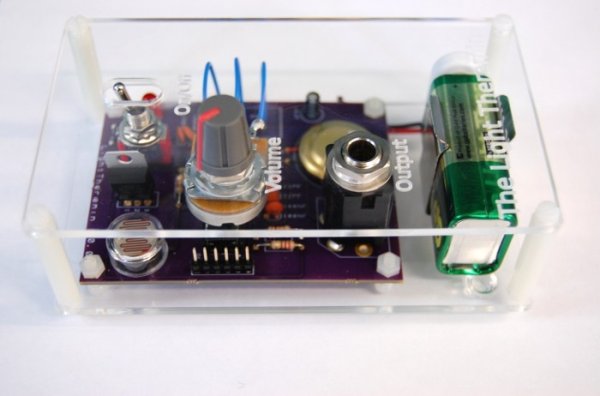
There’s one particular project which follows my progress and it was the very first one I tried my hand at. Over the past two years I’ve returned to this project a number of times, developing it further and finished with a fully working PCB design. This is the evolution of the light theremin.

What is a light theremin and how does it work?
A light theremin is an instrument that makes a sound, the pitch of which changes based on varying light levels falling on a sensor.
My light theremin used a light-dependant resistor (LDR). This changes resistance according to how much light is falling on it, as light intensity increases resistance decreases and vice versa.
In this light theremin a resistor and an LDR form a voltage divider. An ATMEGA328-PU measures the voltage at this point via one of its analogue input pins. The microcontroller generates a tone, the frequency of is which determined by the voltage, and outputs this to a loudspeaker.
A Novice’s Introduction to Arduino
My introduction to Arduino was via the Arduino Starter Kit and I ran through the example projects in the included book – I’d have been completely lost without this.
The sixth project in the book was the first time I had encountered a light theremin. This provided a fantastic tutorial on how to assemble a one on breadboard using an Arduino Uno, 10K resistor, piezo, photoresistor (LDR) and some jumper wires.
Out of all the projects in the Arduino Starter Kit this one jumped out at me and caught my attention the most, so much so that it had a big influence on my following project.
To read more about A Novice’s Introduction to Arduino click here
Making a Light Theremin Instrument
Following my experiences with the Arduino Starter kit I decided that I wanted to have a go at making an improved version of the theremin. This time I used perfboard and a Minimal Shrimp circuit instead of an Arduino, adding some simple improvements also.
Read More: The Evolution of a Light Theremin