Summary of ESP32/ESP8266: Seamless Data Integration with MySQL and PHP
This project builds an IoT system where an ESP32 or ESP8266 sends sensor readings via HTTP POST to a PHP script on a remote server, and the PHP script inserts the data into a MySQL database for storage and web visualization. It covers creating a database and table (SensorData), configuring a PHP receiver (post-esp-data.php) with API key validation, and uploading the script to public_html so the microcontroller can post sensor values for later viewing and analysis.
Parts used in the ESP32/ESP8266 to MySQL Project:
- ESP32 or ESP8266 microcontroller
- Arduino IDE
- WiFi network (router/internet access)
- Web hosting account and domain name (with cPanel)
- MySQL database (created via hosting control panel)
- Database username and password (for PHP access)
- phpMyAdmin (for creating SQL table)
- PHP script file (post-esp-data.php)
- Sensor(s) for readings (temperature, humidity, etc.)
- File manager on hosting control panel (to upload PHP)
This project involves creating a device with either an ESP32 or ESP8266 that can connect with a server from a distance. The gadget will function as an HTTP client by sending POST requests to a PHP script. The aim of these requests is to transmit sensor data (like temperature or humidity readings) to the PHP script. The next step is for the code to add this sensor information into a MySQL database, so the data can be saved in a table for future access or examination. In general, this results in a basic IoT setup where a WiFi-equipped microcontroller records sensor data and sends it to a database stored on a distant web server.
Transform Your IoT Project into a Data-Driven Powerhouse
This project requires developing a gadget with either an ESP32 or ESP8266 that is able to establish a connection with a remote server. The device will act as an HTTP client by submitting POST requests to a PHP script. The purpose of these requests is to send sensor data (such as temperature or humidity readings) to the PHP script. The succeeding action is for the code to insert this sensor data into a MySQL database, enabling the information to be stored in a table for later viewing or analysis. Usually, this leads to a simple IoT configuration where a microcontroller with WiFi capabilities collects data from sensors and transmits it to a database housed on a remote web server.
Harness the Synergy of Hardware and Software
This project uses the ESP32 or ESP8266 microcontroller to gather sensor data and send it to a web server for storage. Next, the PHP script processes the data and adds it to a MySQL database to ensure safe storage.
Unleash the Power of Data Visualization
An intricately designed webpage acts as the central location for visualizing data, presenting sensor data, timestamps, and other important information clearly and concisely. View this webpage on any device, anywhere in the world, to stay updated on how your IoT project is performing.
Embrace Versatility and Adaptability
The code given can be easily adjusted to work with various sensors or multiple ESP32/ESP8266 boards, which makes this project very flexible and customizable to suit your particular requirements.
Embark on Your IoT Journey
To embark on this exciting journey into the world of IoT data integration, you’ll need the following tools and technologies:
- ESP32 or ESP8266 microcontroller and Arduino IDE
- Hosting server and domain name
- PHP script for data insertion and web page development
- MySQL database for data storage
Get ready to transform your IoT project into a data-driven powerhouse with this comprehensive guide!
2. Preparing Your MySQL Database
After signing up for web hosting and buying a domain name, you must log into your hosting control panel, such as cPanel, to start configuring the database system. Sign in to your hosting dashboard and proceed with the following actions:
Set up the MySQL database for storing the sensor data.
Create a database username and password to be utilized by the PHP script for connecting to the database.
Create the layout of the SQL table within the new database for inputting sensor readings as records. This will outline the table columns such as sensor category, time of record, numerical data, etc.
By carrying out these initial database setup tasks via the hosting dashboard, you will establish the necessary backend elements for receiving data uploads from the IoT device and storing them in an orderly fashion for later retrieval and analysis.
Creating a database and user
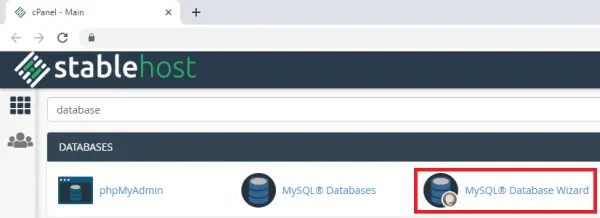
1. Type “database” in the search bar and select “MySQL Database Wizard”.
2. Enter your desired Database name. In my case, the database name is esp_data. Then, press the “Next Step” button:

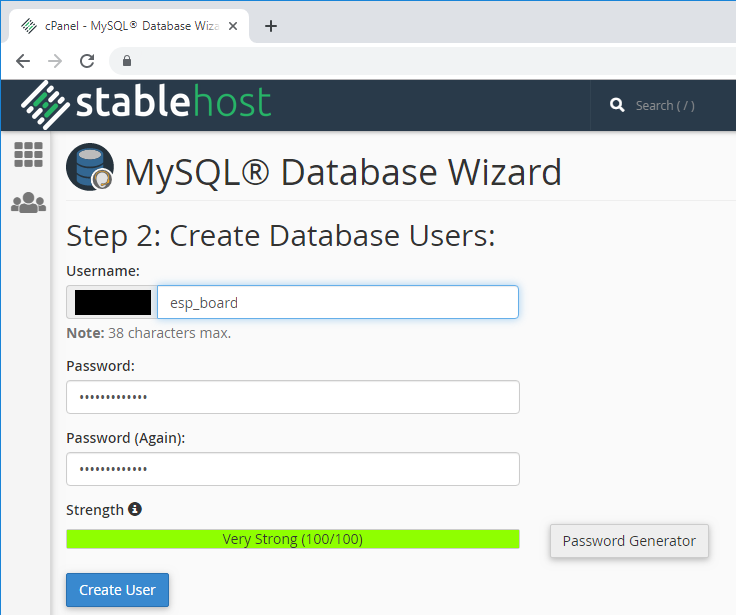
That’s it! Your new database and user were created successfully. Now, save all your details because you’ll need them later:
- Database name: example_esp_data
- Username: example_esp_board
- Password: your password
Creating a SQL table
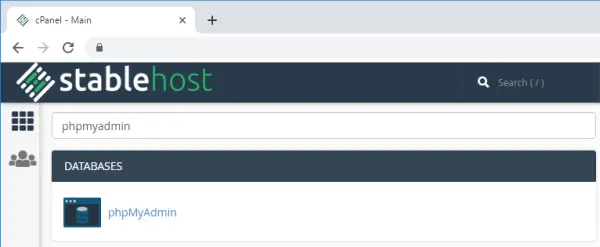
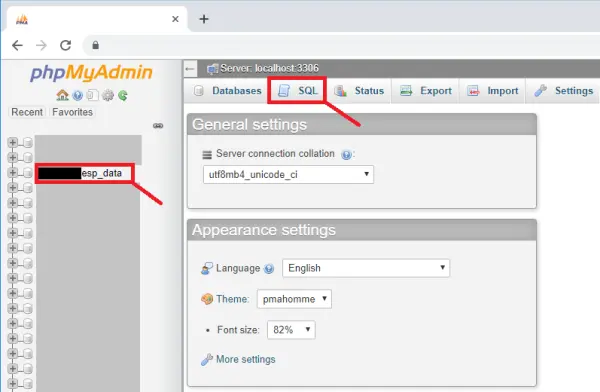
After creating your database and user, go back to cPanel dashboard and search for “phpMyAdmin”.
In the left sidebar, select your database name example_esp_data and open the “SQL” tab.
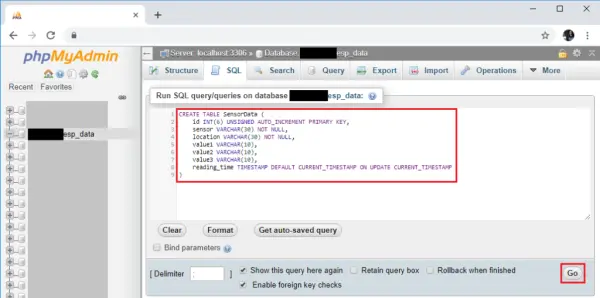
Copy the SQL query in the following snippet:
CREATE TABLE SensorData (
    id INT(6) UNSIGNED AUTO_INCREMENT PRIMARY KEY,
    sensor VARCHAR(30) NOT NULL,
    location VARCHAR(30) NOT NULL,
    value1 VARCHAR(10),
    value2 VARCHAR(10),
    value3 VARCHAR(10),
    reading_time TIMESTAMP DEFAULT CURRENT_TIMESTAMP ON UPDATE CURRENT_TIMESTAMP
)
Paste it in the SQL query field (highlighted with a red rectangle) and press the “Go” button to create your table:
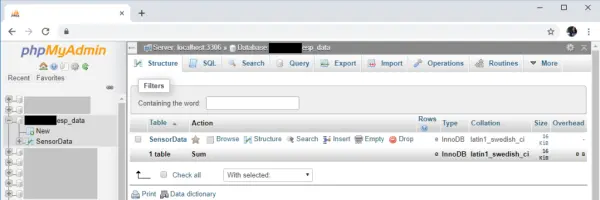
After that, you should see your newly created table called SensorData in the example_esp_data database as shown in the figure below:
3. PHP Script HTTP POST – Insert Data in MySQL Database
In this part of the project, we will develop a PHP script that will serve two key functions:
It will listen for and receive HTTP POST requests containing sensor data sent from the ESP32/ESP8266 device.
It will insert the sensor readings from these requests into the MySQL database that was previously configured.
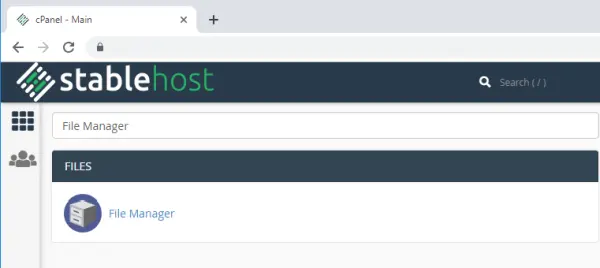
To set up the PHP file, log into your hosting control panel (such as cPanel) and find the file manager tool. This will allow you to upload the PHP script file to your web server. Once in place, the script can then perform the tasks of receiving data uploads from the IoT device and saving them to the database.
By creating this receiving/inserting PHP script, we link together the IoT device portion of the project with the database backend, completing the client-server architecture needed to monitor sensor values remotely through HTTP requests and store the results in the cloud.
Then, select the public_html option and press the “+ File” button to create a new .php file.
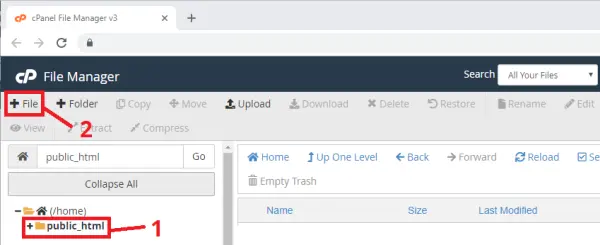
Create a new file in /public_html with this exact name and extension: post-esp-data.php
Edit the newly created file (post-esp-data.php) and copy the following snippet:
<?php

/*
  Rui Santos
  Complete project details at https://RandomNerdTutorials.com/esp32-esp8266-mysql-database-php/

  Permission is hereby granted, free of charge, to any person obtaining a copy
  of this software and associated documentation files.

  The above copyright notice and this permission notice shall be included in all
  copies or substantial portions of the Software.
*/

$servername = "localhost";

// REPLACE with your Database name
$dbname = "REPLACE_WITH_YOUR_DATABASE_NAME";
// REPLACE with Database user
$username = "REPLACE_WITH_YOUR_USERNAME";
// REPLACE with Database user password
$password = "REPLACE_WITH_YOUR_PASSWORD";

// Keep this API Key value to be compatible with the ESP32 code provided in the project page.
// If you change this value, the ESP32 sketch needs to match
$api_key_value = "tPmAT5Ab3j7F9";

$api_key= $sensor = $location = $value1 = $value2 = $value3 = "";

if ($_SERVER["REQUEST_METHOD"] == "POST") {
    $api_key = test_input($_POST["api_key"]);
    if($api_key == $api_key_value) {
        $sensor = test_input($_POST["sensor"]);
        $location = test_input($_POST["location"]);
        $value1 = test_input($_POST["value1"]);
        $value2 = test_input($_POST["value2"]);
        $value3 = test_input($_POST["value3"]);

        // Create connection
        $conn = new mysqli($servername, $username, $password, $dbname);
        // Check connection
        if ($conn->connect_error) {
            die("Connection failed: " . $conn->connect_error);
        }

        $sql = "INSERT INTO SensorData (sensor, location, value1, value2, value3)
        VALUES ('" . $sensor . "', '" . $location . "', '" . $value1 . "', '" . $value2 . "', '" . $value3 . "')";

        if ($conn->query($sql) === TRUE) {
            echo "New record created successfully";
        }
        else {
            echo "Error: " . $sql . "<br>" . $conn->error;
        }

        $conn->close();
    }
    else {
        echo "Wrong API Key provided.";
    }

}
else {
    echo "No data posted with HTTP POST.";
}

function test_input($data) {
    $data = trim($data);
    $data = stripslashes($data);
    $data = htmlspecialchars($data);
    return $data;
}
Before saving the file, you need to modify the $dbname, $username and $password variables with your unique details:
// Your Database name
$dbname = "example_esp_data";
// Your Database user
$username = "example_esp_board";
// Your Database user password
$password = "YOUR_USER_PASSWORD";
After adding the database name, username and password, save the file and continue with this tutorial. If you try to access your domain name in the next URL path, you’ll see the following:
https://example-domain.com/post-esp-data.phpSource: ESP32/ESP8266: Seamless Data Integration with MySQL and PHP
- What microcontrollers can be used for this project?
The project uses either an ESP32 or an ESP8266 as the microcontroller. - How does the device send sensor data to the server?
The device acts as an HTTP client and sends sensor data using HTTP POST requests to a PHP script on the server. - What does the PHP script do with received data?
The PHP script validates an API key, then inserts the posted sensor data into the MySQL SensorData table. - How do I create the database table for sensor data?
Use phpMyAdmin and run the provided CREATE TABLE SQL statement to create the SensorData table in your database. - Where should I place the PHP file on the web server?
Create post-esp-data.php inside the public_html folder of your hosting account. - What credentials are required in the PHP script?
You must set the dbname, username, and password variables in the PHP script to match your MySQL database credentials. - How does the PHP script protect against unauthorized posts?
The script checks a hardcoded API key value and rejects requests with the wrong API key. - What columns does the SensorData table include?
SensorData includes id, sensor, location, value1, value2, value3, and reading_time columns as specified in the SQL snippet.