Summary of Edge 3D Printer 1.0 – an Affordable Open Source 3D Printer!
This article guides readers through building a low-cost DIY 3D printer for approximately $150, designed by a 13-year-old. The project requires basic 3D printing knowledge and utilizes laser-cut acrylic and 3D-printed components. Key features include a 5.5"x6"x6" print bed, Nema 17 motors, and an Arduino Mega with RAMPS board control system.
Parts used in the Low Cost 3D Printer:
- GT2 pulley
- GT2 Belt
- USB type b to type b extender
- DC power socket
- LM8UU Linear Bearing
- Acrylic sheets
- 30mm Fan
- 3d printer wiring pack
- Direct Drive gear
- 608 bearings
- M3 8mm screws
- 5mm to 8mm coupler
- SC8UU linear bearing
- PTFE tube
- Arduino Mega and RAMPS board kit
- Endstops
- Nema 17 motors
- All Metal hotend
- Smooth Rods
- Threaded Rod

Hello everyone! In this instructable I will show you how to make a low cost 3d printer that I designed! It should cost around $150 US dollars or $175 Canadian dollars, if you buy from the links provided in this project (parts are from Aliexpress). You can also buy locally but it will cost more (about $300- $400 instead of $150).
The print bed size is 5.5″x6″x6″.
Update: Version 3.0 will be posted on Feb 8 2016 at 3:00 (PT)
You WILL need to have at least some knowledge in 3d printing to complete this project.
***Please vote for this Instructable in the CNC challenge (upper right corner) ! I’m 13 and I designed and built this myself so please, if you like this instructable favourite, vote and comment. It encouages me to keep doing what I do.***
Step 1: Parts and Tools
Parts:
GT2 pulley x2: http://tinyurl.com/qc4m6ez
GT2 Belt (about 2m): http://tinyurl.com/nr6wn25
USB type b to type b extender x1: http://tinyurl.com/ohcmybf
DC power socket x1: http://tinyurl.com/nwe8lv5
LM8UU Linear Bearing x4: http://tinyurl.com/n98ehwv
Acrylic x2 8″x12″ (You can also buy it from a local plastics shop and it is about the same price as aliexpress): http://tinyurl.com/k4bzjge
30mm Fan x2: http://tinyurl.com/nqxgg8d
3d printer wiring pack: http://tinyurl.com/o8mont4
Direct Drive gear x1: http://tinyurl.com/on5sr2p
608 bearings x1 lot of 5: http://tinyurl.com/kqo2lpg
M3 8mm screws x1 lot of 50: http://tinyurl.com/kz48fcp
5mm to 8mm coupler x1: http://tinyurl.com/pmwtn8r
SC8UU linear bearing x2: http://tinyurl.com/pp9jquw
1m PTFE tube (bowden tube) x1: http://tinyurl.com/lowr6uq
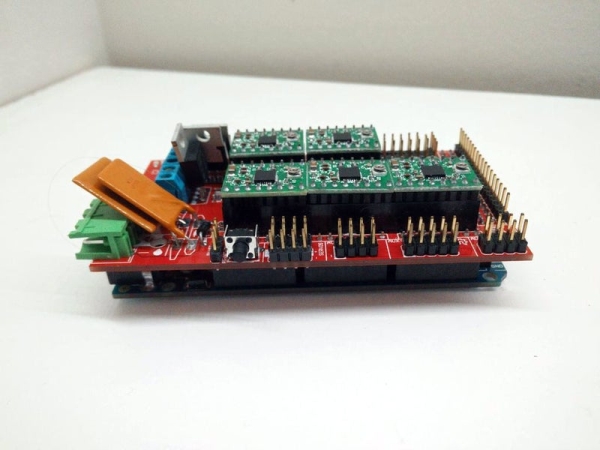
Arduino Mega and RAMPS board kit x1: http://tinyurl.com/lzozwlw
Endstops x3: http://tinyurl.com/q47m5cq
Nema 17 motors x4: http://tinyurl.com/njwgj4l
All Metal hotend: http://tinyurl.com/l5b9xm2 you can also use a ceramic one instead.
Smooth Rods: 1272T38 Mcmaster Carr part #
Threaded Rod: Home depot 5/16 inch threaded rod and a nut that screws onto the rod
Tools:
Laser Cutter
3D Printer and filament or buy the parts from 3dhubs.com
Files
Soldering Iron and Solder
Computer with Arduino IDE, Pronterface, Slicer software
Step 2: Laser Cut and 3D Print Parts
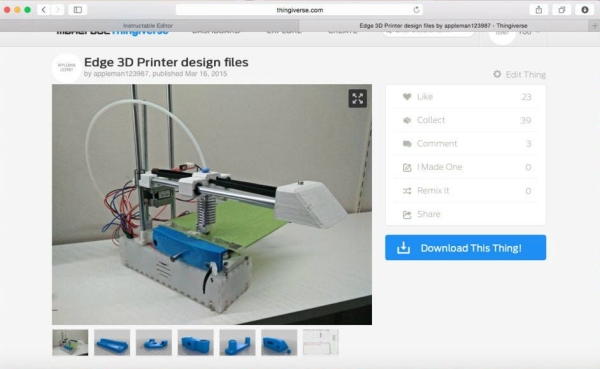
Go to this thingiverse link to download the files: http://www.thingiverse.com/thing:725640
Extruder: http://www.thingiverse.com/thing:215010
Step 3: Mount Motors to Acrylic Parts
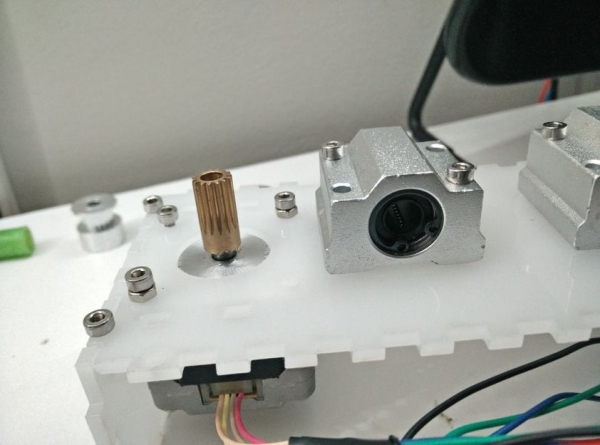
Using the m3 10mm screws mount the nema 17 stepper motor to the main acrylic piece. This is the piece that has the most mounting holes. Do this for both the both the x and z motors.
Step 4: Wire Motors to the RAMPS Board
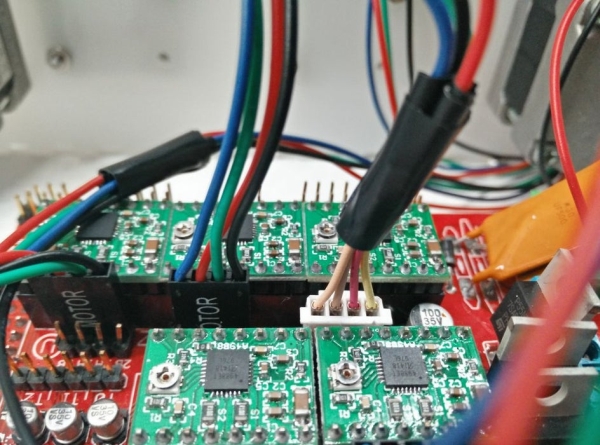
Plug the motor cable into the connector board. On the board, there are headers that you connect the cable to. Don’t worry about polarity: this won’t affect the motor, it will just spin in reverse which you can invert in the firmware.
Step 5: Extend Arduino’s USB Connector
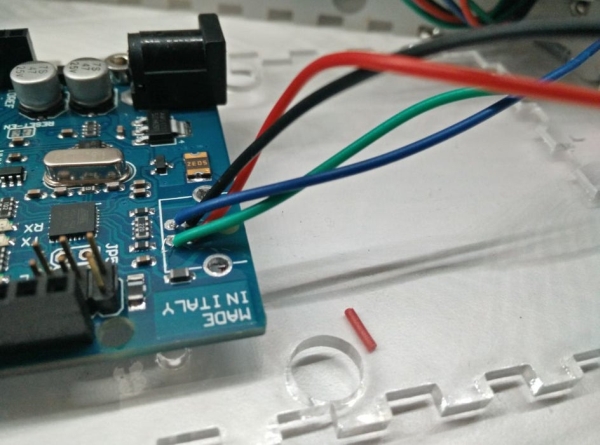
Extend arduino’s USB connector by desoldering the type b connector and just adding wires to each of the pins bringing the wires to the connector. It sounds complicated, but it is really simple.
Read more: Edge 3D Printer 1.0 – an Affordable Open Source 3D Printer!
- How much does this 3D printer cost?
The printer costs around $150 US dollars or $175 Canadian dollars if parts are bought from Aliexpress links. - What is the print bed size of this printer?
The print bed size is 5.5 inches by 6 inches by 6 inches. - Can I buy parts locally instead of online?
Yes, you can buy locally but it will cost more, about $300 to $400 instead of $150. - Does this project require prior experience?
Yes, you will need to have at least some knowledge in 3D printing to complete this project. - What software is needed for the build?
You need a computer with Arduino IDE, Pronterface, and Slicer software. - Where can I download the design files?
The files are available on Thingiverse via the provided link for the main model and extruder. - Does motor polarity matter when wiring?
No, do not worry about polarity as it will just cause the motor to spin in reverse which can be fixed in firmware. - What tools are required to cut the materials?
A laser cutter is required for the acrylic parts. - What is the alternative to the All Metal hotend?
You can use a ceramic hotend instead of the All Metal one. - How many Nema 17 motors are used?
Four Nema 17 motors are used in this project.