Thanks to everyone who supported this project and voted for it in the Arduino Challenge! I was awarded second prize and hope to participate in more Arduino contests in the near future.
This tutorial will explain a simple way to make a password protected bluetooth door lock using your Arduino, which can be unlocked by sending a four digit pin from your Android phone! The hardware setup is quite simple, and the programming side of it is a bit tricky, but should be no problem for any Arduino ameuture.
Step 1: Parts Needed
1. Arduino (I am using the Duemilanove)
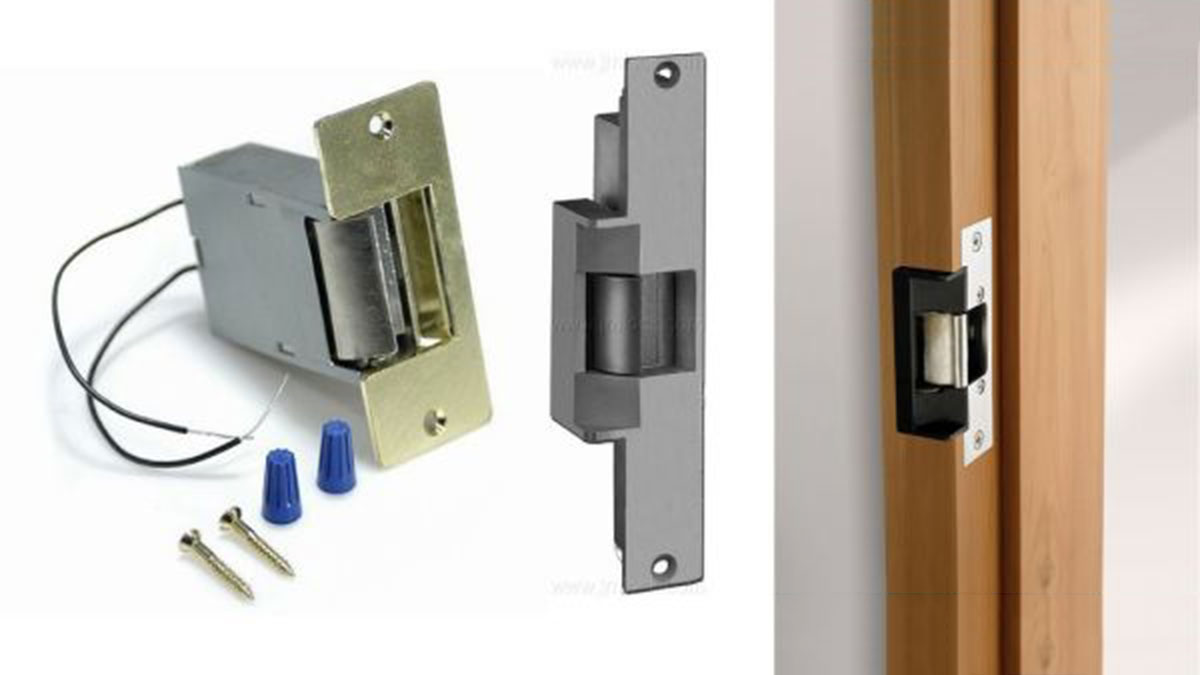
2. Electric Door Strike
3. Bluetooth Module ($9.99)
4. Power Supply (Required voltage and amperage differs among different door strikes/locks)
5. TIP120 Transistor
6. 1N4001 Diode
7. Hookup Wire
8. Solderless Breadboard
9. An Android phone (optional, considering that there are lots of devices you could use to send serial data to our bluetooth modem including Iphones, computers, and other Bluetooth devices)
Step 2: About The Transistor
We’ll start by focusing on one of the main components of the circuit, the transistor. Our transistor will allow us to control a device that requires more current than our Arduino can supply, by sending the transistor different values. The type of transistor we are using (the TIP120) has a base, collector, and an emitter which are labeled here. We will send the signal from pin 9 on the Arduino to the base of the transistor, and depending on the value sent, current will increase or decrease.
Step 3: Assemble The Circuit
The diagram shows how the transistor is wired up in our circuit. As you can see, we have a diode pointed away from ground that is connected to the collector of the transistor as well as the ground of the lock itself. This diode will protect our electronics from any back voltage that might be created when our lock is turned off. At this point you could set pin 9 to high or low to control the lock.
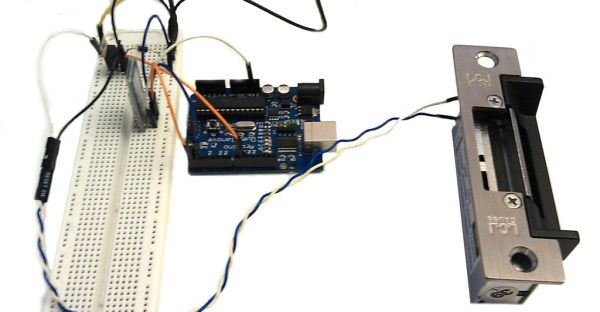
Step 4: Adding Bluetooth
Adding a Bluetooth module to our project is very easy. Simply connect RX on the Bluetooth module to TX on our Arduino board, TX on the module is then connected to RX on the Arduino, GND is obviously connected to ground, and lastly VCC is connected to 3.3 volts or 5 volts depending on your Bluetooth module.
2. Electric Door Strike
3. Bluetooth Module ($9.99)
4. Power Supply (Required voltage and amperage differs among different door strikes/locks)
5. TIP120 Transistor
6. 1N4001 Diode
7. Hookup Wire
8. Solderless Breadboard
9. An Android phone (optional, considering that there are lots of devices you could use to send serial data to our bluetooth modem including Iphones, computers, and other Bluetooth devices)
For more detail: Easy Bluetooth Enabled Door Lock With Arduino + Android