Monitor if the door or the valve gas is open… or if someone opened the cookie jar!
Things used in this project
Story
intro!
the project is simple, a switch connected to the Artik Cloud.
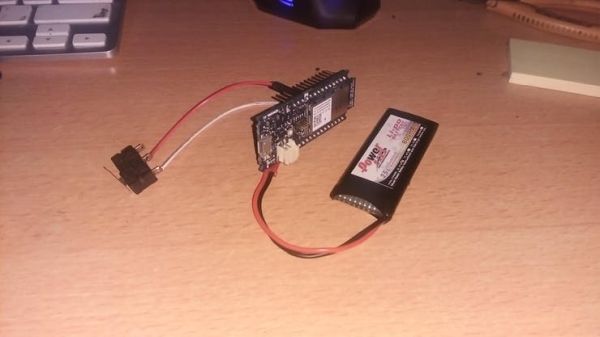
The program running on the genuino MKR1000 check the status of the switch and collect every change for 15 minutes.
The battery must be 700mAh minimum
Algorithm
Every 15 minutes the mkr1000:
- connect to the wifi
- turn on the on board led
- send an update to Artik Cloud with all the changes registered (open/close events)
- disconnect from wifi
- turn off the on board led
- start to register event again
 diagram of the algorithm
There are also another counter I missed in the diagram: failed attempt. This counter is increased every time the device try to send the data over the cloud and it fails.
where can I use it?
I imagined to use the device to monitor:
- a door
- a gas valve
- ..a cookie jar! My preciooous
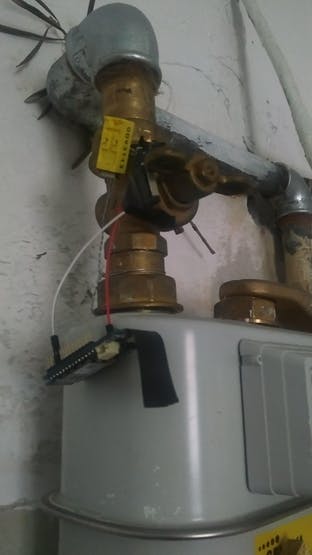 Gas value: valve closed, switch closed
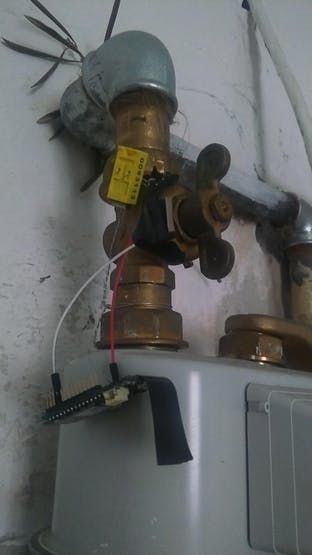 valve open, switch open
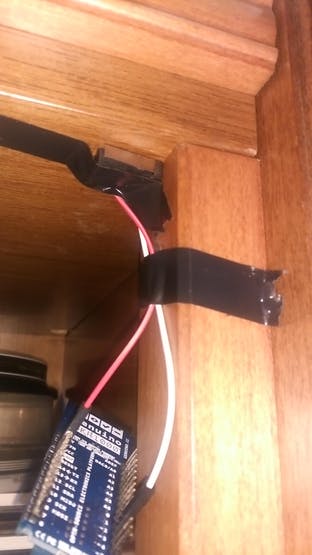 an example of a possible installation for a closet
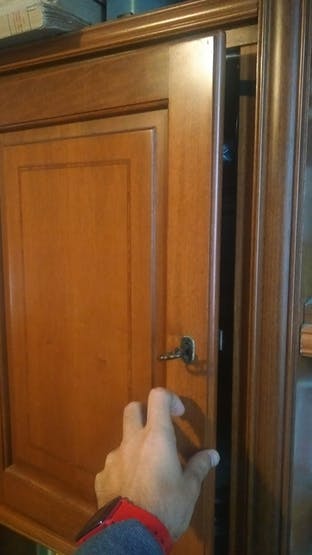 monitor a closet
Video
All the project part are explained in the following video:
a round up of the project 😀
Replicate the project
Part of the following tutorial are adapted from the artik.cloud tutorial, here: https://developer.artik.cloud/documentation/tutorials/
Create the IOT Device
Go to the Developer Dashboard to create a private device type.
- 1. First, sign into the ARTIK Cloud Developer Dashboard, https://developer.artik.cloud/. If you don’t have a Samsung account, you can create one at this step.
- 2. Click “+ New Device Type”.
- 3. Name this device type “Door Sensor” and give it the unique name such as “com.example.iot.doorsensor”.
- 4. Click “Create Device Type”. This creates the device type and takes you to the device types page.
Create a manifest for the “Door Sensor” device type.
- 1. Click “Flame Sensor” in the left column.
- 2. Click “Manifest” and then “+ New Version”.
- 3. Add 3 Fields:
- – “open” type Integer
- – “closed” type Integer
- – “failed” type Integer
- 4. Click “Save” and “Next Actions”.
- 5. Leave actions empty , and click on “Save New Manifest”
Now a new “Door Sensor” Device is available.
- 1. Go to Artik Cloud https://www.artik.cloud/ (sign in, if you are not) and than on the Dashboard click to connect a new device.
- 2. Choose “Door Sensor”: just start typing on the box to filter the search.
- 3. Click on “Connect Device…”. You are taken back to the dashboard.
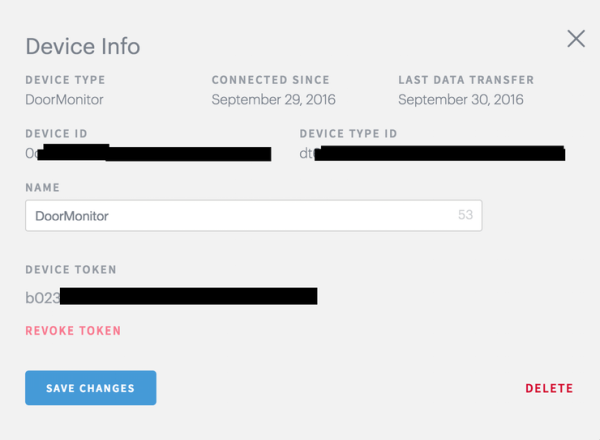
- 4. Click the Settings icon of the device you just added. In the pop-up, click “GENERATE DEVICE TOKEN…”.
- 5. Take note (copy) the device ID and device token on this screen.
Prepare Arduino MKR1000
Install a recent release of the arduino ide (I used the 1.6.8): www.arduino.org .
Launch the ide.
- 1. Go to “Manage boards” and type “MKR1000” in the text field.
- 2. Select “Arduino SAMD Boards ..” and click install.
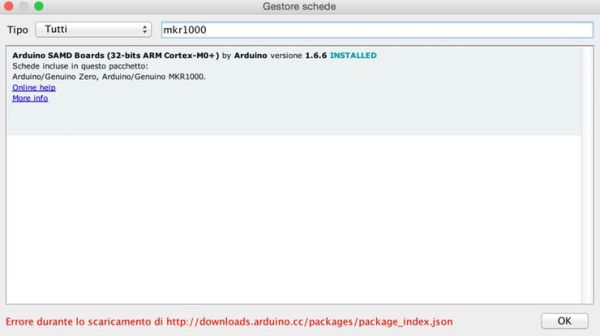
- 3. Close the Arduino IDE.
- 4. Save the sketch ArticDoor.ino available here: https://github.com/crazycoder1999/ArticDoorSensor on your computer and open it in the arduino ide.
- 5. Go to “Sketch” –> “#include Library” and than “Manage Library”. Install “WiFi101” and “ArduinoJson”.
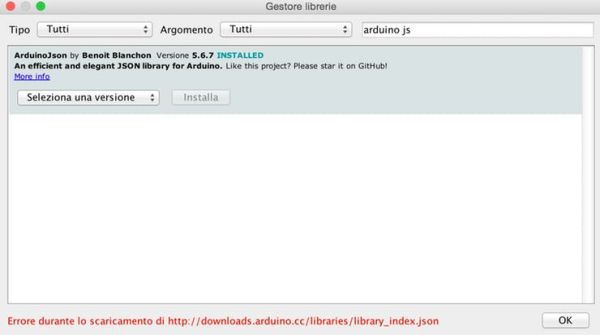
- 6. Edit the code, replacing the following placeholder:
- * <YOURWIFISSID> : replace the string with your wifi network ssid
- * <YOURWIFIPASSWORD> : replace the string with your wifi network password
- * <DEVICE TOKEN> : replace the device token with the one generated previously
- * <DEVICE ID> : replace the device id with the one generated previously
- 7. Compile the code.
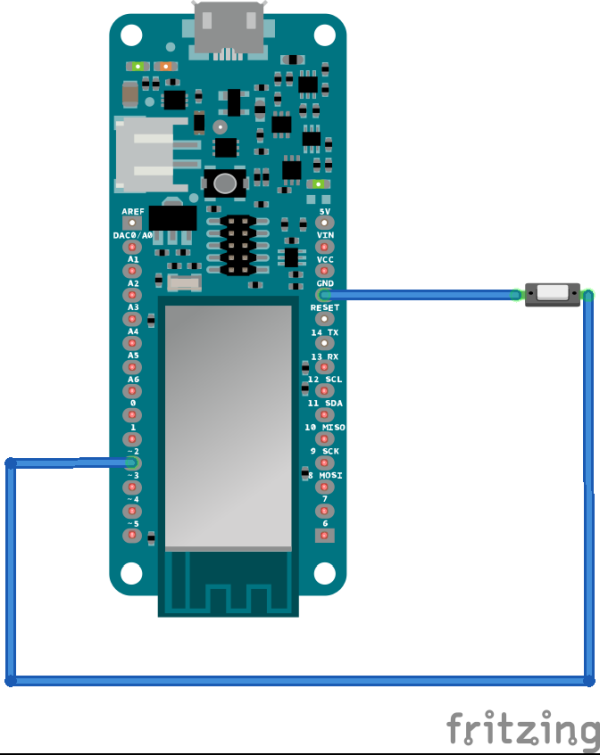
- 8. Prepare the MKR1000 with the switch as in the Fritzing diagram. Connect the MKR1000 to micro USB.
- 9. Run the code on the board.
- 10. Close and open the switch a couple of times.
- 11. Grab a cup of coffee.. and wait 15 minutes.
- 12. Go to Artik Cloud https://www.artik.cloud/ sign in, select your “Door Sensor” device: you should see some data/activity displayed in the graphs.
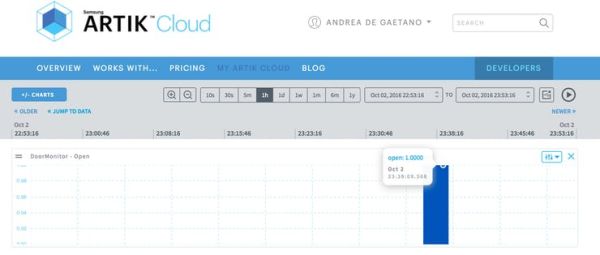
You now have an IOT device compatible with Artik.Cloud!
Note on Battery: Battery is optional for the project. The MKR1000 contains the circuit to charge the battery while it is connected to 5V Micro USB. Once you have finished you can power the project through battery.
Build a WebApp: get the last message from the device
I build the Web App adapting the “Your First Web App” tutorial on Artik Developer website.
The web app allows to get the last status of the device. I used an hosting (netsons) with support of PHP 5.4 and CURL.
Follow these instructions to create an application using the Developer Dashboard.
For this tutorial, select the following:
- 1. Set “Redirect URL” for your application to http://yourwebsite/door/index.php.
- 2. Choose “Client Credentials, auth code, implicit”.
- 3. Under “PERMISSIONS”, click “Add Device Type” button. Choose “Door Sensor” as the device type. Check only “Read” permissions for this device type.
- 4. Make a note of your Client ID. This is your application ID, which you will need later.
- 5. Make a note of the Device ID, you have created previously on artik.cloud.
- 6. Clone or download the project https://github.com/artikcloud/tutorial-php-your-first-webapp and copy them in a “TOUPLOAD” folder.
- 7. In the downloaded code, edit the index.php, change client_id in the following line, replacing xxxxx with the client_id
<p>Please <a href="https://accounts.artik.cloud/authorize?response_type=token&client_id=xxxxx">login</a></p>
- 8. Edit the ArtikCloudProxy.php and change CLIENT_ID and DEVICE_ID to your real client and device IDs.
	<?php
		const CLIENT_ID = "xxxxx";
		const DEVICE_ID = "xxxxx";
	?>
- 9. Replace the hello.php found in the download “tutorial-php-your-first-webapp” with the one here https://github.com/crazycoder1999/ArticDoorSensor
- 10. Create on your website a “door” directory in the webroot folder.
- 11. Upload all the files in the “TOUPLOAD” folder inside the website “door” directory.
Go to http://yourwebsite/door, you should see a page with a login link: click it and log in with your samsung account credential.
Once you complete authentication, you will be redirected to hello.php
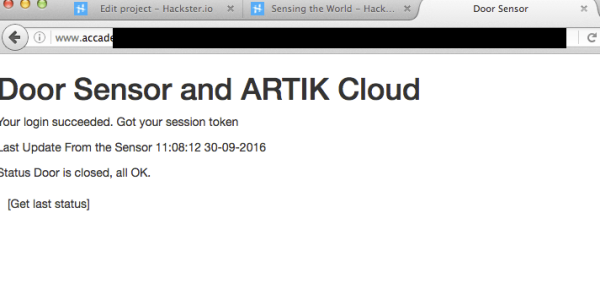
Click “Get Last Status” to get the latest message from your device on ARTIK Cloud.
If your door is closed you should see an image like this:
Give me some Rules!
Rules are a clever way to create a communication between different devices: see this article.
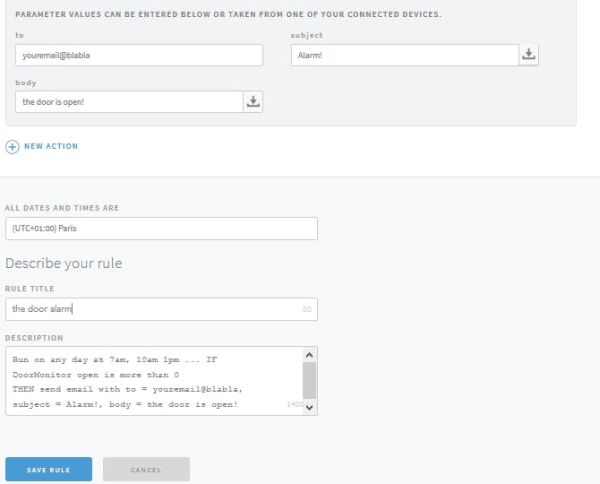
I created a rule to send me an email if at some hours of the day, the device state signal that the door is open.
- Go to Artik.Cloud and sign in.
- Go to Device and select Rules [CONTROLLARE].
- Press “+ New Rule”:
- 1. Schedule a time to run: hour and date.
- 2. In the choose device activity to monitor insert: IF: DoorMonitor open is more than 0
- 3. In the THEN Field, select Send Email.
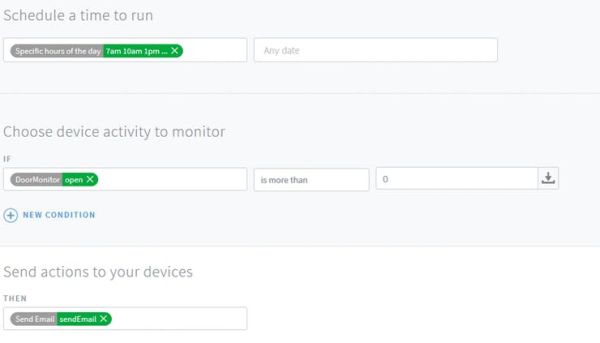
- 4. Fill the other field like in the following image
Done!
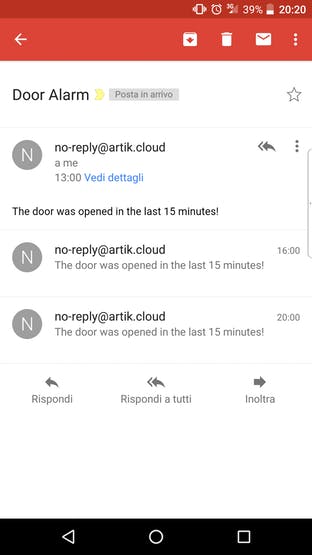
You wil receive email like this one below:
Other possible rule for this project: send an email if “failed” field is more than 0.
Schematics
Code
Source : Door Sensor

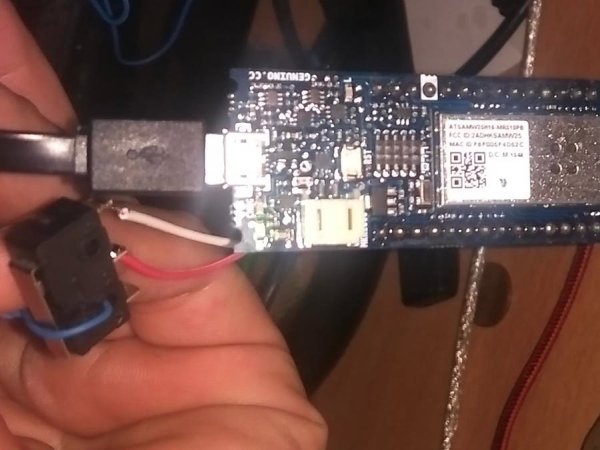


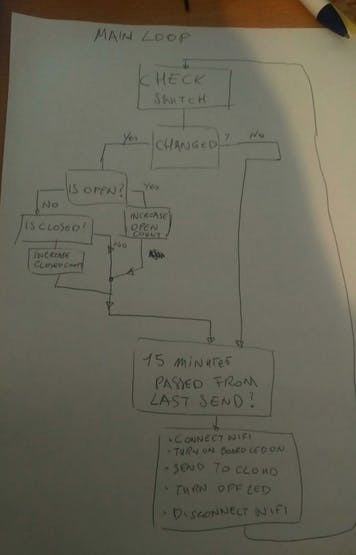 diagram of the algorithm