While cleaning, getting to those nasty little unreachable spaces under the beds, tables, and sofas can be a big pain. Though small but smart vacuum cleaners are now out there, who wants to spend more than 500 bucks on them when you can make one all by yourself at home under 150 bucks!
Yes, you heard us right! It IS possible for you to make your own cute little home cleaner that will scrub your floor and the walls clean with just a few clicks and taps on your Smartphone! Presenting to you the DIY easy to build Smart Cleaning Robot! Cleaning your home just got DIYfied! Happy Cleaning!
Step 1: List of Things You Will Need:
- evive
- Acrylic Part: Base Plate
- HC05 Bluetooth Module
- Dual Shaft BO Motor
- Samsung 3.7V 2600 mAh Lithium Ion Battery
- 30mm M3 (Female to Female)
- Blix Box
- Metal Servo Motor and Accessories
- 12V 3W Water Pump
- Cable Ties
- Male to Female Jumper Cable 20cm
Step 2: Making of the Smartphone Controlled Robot
Firstly, we will be focusing on making the base of the robot first. As we want our robot to be controlled by just the click on your Smartphone, we need to bring Bluetooth Module in the frame too.
So let’s begin with the assembly of the Smartphone Controlled Robot:
First, take the base plate and to it connect the two Motor Mounts using M3 bolts and nuts.
Onto this motor mounts, fix the DC Motors onto them.
To this motor connect the wheels.
As we know, we at least need three points of contact, we’ll add one more by adding the castor wheel.
Onto this plate, we will mount evive.
Finally, mount Bluetooth Module onto the evive. Thus, completing the base assembly.
Step 3: The Floor Cleaner
To assemble the flood Cleaner, we need a stable platform to fix it.
We will start attaching another chassis on top of the robot using Standoffs.
Once done with it, keep the assembly aside.
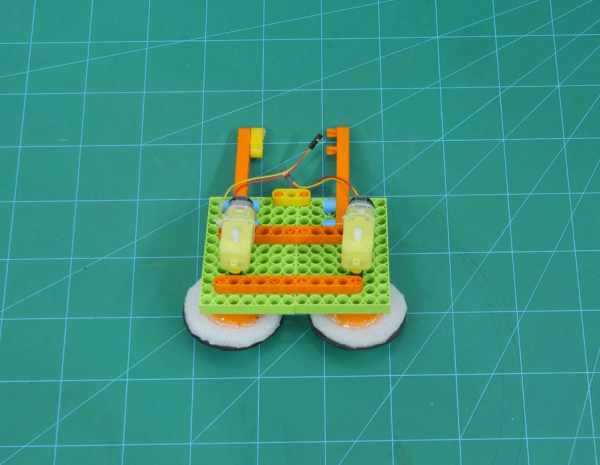
We need comparatively more space to assemble the cleaner, thus we will be combining two big blix pieces using connectors.
Upon these, we will be mounting the cleaners.
Also, we need to connect this assembly with the robot, thus we will be adding one extra elongated assembly.
Next, is assembling DC Motors as we will need to rotate our cleaners.
We have wheels, upon these, we will glue the cloth to the wheels.
Now attach these wheels to the Motor Shaft.
Step 4: Finishing It

Lastly,
Attach a metal servo on the bottom chassis.
And to its head, attach the elongated part of the cleaner assembly.
Step 5: The Secret
Now that we have a cloth that will clean the floor, we also need a mechanism that will spill the water on the floor to clean it.
Thus, onto the chassis attach a bottle filled with water and place a water pump in it.
Now, through what will the water go out.
Thus, we have a 3D printed sprayer. We have attached the sprayer to the blix assembly between the two cloths using Hot glue.
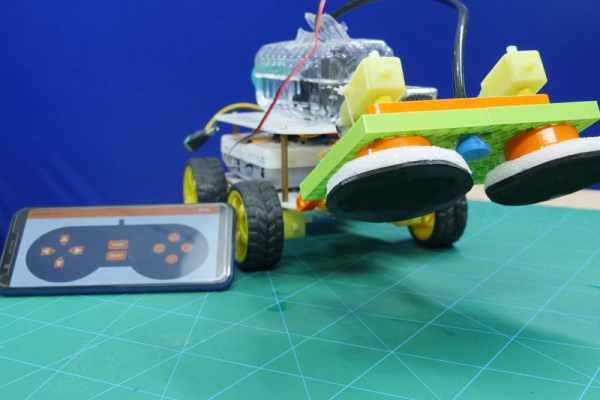
Finally, we have added an external source of the battery which we placed upon the chassis and is connected to evive.The complete assembly looks as below
Step 6: The Schematics and the Code:
Make the connection as shown below:
Our robot is Smartphone Controlled, thus you can control it using the GamePad app.
The robot not only cleans the floor, but it also cleans the walls, adding an advantage to it.
Upload the following code:
Step 7: Conclusion
With this, your DIY Smart Cleaning Robot is now ready to make the floor your mirror on the go!
Source: DIY Floor Cleaning Robot Using Arduino