I have many old CD and DVD writer of PC and laptop.I tear down many of them. These employs highly accurate stepper motor(DVD and lens movement) and simple DC motor (For opening and closing tray). I use it for 3D printer and mini CNC machine. But only part it left is circuit board and DVD lens. So i come with new idea to use it in better way.Lets get started!!
Step 1: Parts and Components:
Old dvd drive lens.
Arduino (any uno, nano, etc)
Light Dependent resistor (LDR).
10K ohm resistor.
1-RGB led
bread-board and jumper wires.
Computer and laptop (With installed arduino IDE).
Step 2: Tear Down DVD Drive

Open all screw of DVD drive and open it. lens driving system mounted on rubber studs with screws on the bottom.
After tearing , you see lens of DVD drive have two lasers but in CD drive there is only one laser. DVD drive has one infrared laser for CD and other red laser for DVD. Tear down lenses insert RGB led in it and LDR on photo detector.
Step 3: Circuit and Coding:
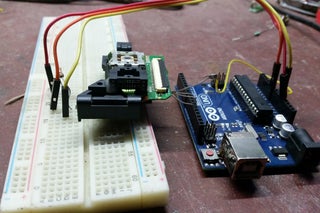
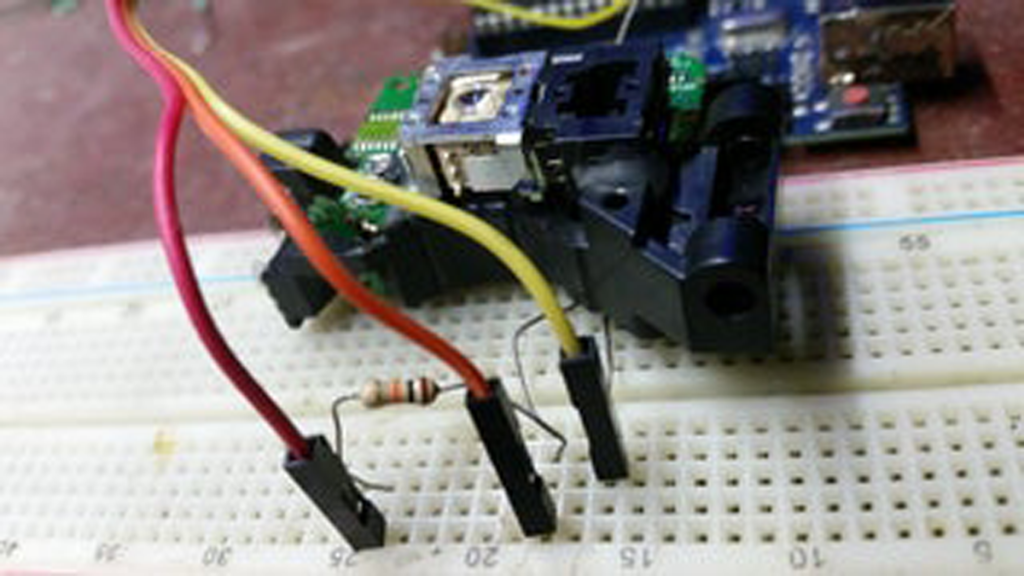
i use common common cathode RGB led so i connect negative to COM and other three terminals to digital pins d2,d3,d4.
on other side LDR and 10K ohm resistor perform voltage driver and convert light to voltage
int R = 2; //red connected to D2
int G = 3; //Green Connect to D3
int B = 4; //BLue conect to D4
int ldr = 14 //LDR is connected to A0 analog pin
void setup() {
int thresh_R, thresh_G, thresh_B;
Serial.begin(9600);
pinMode(R, OUTPUT);
pinMode(G, OUTPUT);
pinMode(B, OUTPUT);
////getting threshold value of red
digitalWrite(R, HIGH);
delay(500);
thresh_R = analogRead(ldr);
delay(500);
///// getting threshold value of Green
digitalWrite(R, LOW);
digitalWrite(G, HIGH);
delay(500);
thresh_G = analogRead(ldr);
delay(500);
/////getting threshold value of blue
digitalWrite(R, LOW);
digitalWrite(G, LOW);
digitalWrite(B, HIGH);
delay(500);
thresh_B = analogRead(ldr);
delay(500);
}
void loop() {
int real_R, real_G, real_B;
digitalWrite(R, HIGH);
delay(50);
real_R = analogRead(ldr);
delay(50);
digitalWrite(R, LOW);
digitalWrite(G, HIGH);
delay(50);
real_G = analogRead(ldr);
delay(50);
digitalWrite(R, LOW);
digitalWrite(G, LOW);
digitalWrite(B, HIGH);
delay(50);
real_B = analogRead(ldr);
delay(50) ;
if ((real_R > thresh_R + 2) && (real_G > thresh_G + 2) && (real_B > thresh_B + 2)
{
Serial.println(“color is white”);
}
else if ((real_R > thresh_R + 2) && (real_G > thresh_G))
{
Serial.println(“color is yellow”);
}
else if (real_R > thresh_R + 2)
{
Serial.println(“color is red”);
}
else if (real_G > thresh_G + 2)
{
Serial.println(“color is green”);
}
else if (real_B > thresh_B + 2)
{
Serial.println(“color is blue”);
}
}
Step 4: How It Works:
Red, Green, Blue light color of led are glow in sequence in regular intervals. but LDR value can vary according to light of surrounding area so instead of giving fix value it take value when you turn on arduino or reset.
When particular light strike on object amount of light depend on color of object for example when red light strike on red object output on red color is maximum so minimum at green and blue. these are three primary color all the color are mixture of it. So each object has its own reflective properties combination of two and more color detected by LDR shows response on serial monitor
Step 5: Precautions:
DVD and CD drive laser have very small wavelength so it is harmful for eyes and skin. So don’t power it or focus on such area..

Source: Using Old DVD Drive Lens As Color Detector