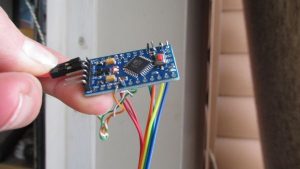
In this instructable I am going to show you how to build a weather station that logs the information that it collects on a sd card.
Step 1: If You Prefer a Video Here It Is
Step 2: Get All the Parts
You need,
1 Arduino board, I used the pro mini
1 dht sensor I used the dht 22
1 10k resistor
1 SD card or micro SD card with matching board
3 feet on wire
3 wire cable (you will use this to connect your dht sensor to the arduino)
if you are using a pro mini you need the stuff to program it, I have a video on how to program one with out a usb to serial adapter you can find it here or you can check out my Instructable on it
Stuff to solder
Step 3: Wire It Up.
connect all the wires as shown in the diagram.
dht sensor Pro mini, Uno & mega.Connect pin 1 (on the left) of the sensor to +5V
NOTE: If using a board with 3.3V logic like an Arduino Due connect pin 1 to 3.3V instead of 5V
Connect pin 2 of the sensor to whatever your DHT PIN is
Connect pin 4 (on the right) of the sensor to GROUND
Connect a 10k resistor from vcc to data pin
For the mega MISO-50 MOSI-51 SCK-52 SS/CS 53
For the uno & pro mini MISO-50 MOSI-51 SCK-52 SS/CS-53.
Step 4: Program the Arduino.
// Created by A Homeschoolers Workbench
// 12/1/2016 #include “DHT.h” #include <sd.h> File myFile; int pinCS = 10; // Pin 53 on Arduino mega 10 on pro mini and uno, this is the SS pin // For the uno and pro mini connect sck-13 miso-12 mosi-11 cs/ss-10 // For mega connect sck-52 miso-50 mosi-51 cs/ss-53 #define DHTPIN 2 // what digital pin we’re connected to // Uncomment whatever type you’re using! //#define DHTTYPE DHT11 // DHT 11 #define DHTTYPE DHT22 // DHT 22 (AM2302), AM2321 I am using the 22 //#define DHTTYPE DHT21 // DHT 21 (AM2301) // Connect pin 1 (on the left) of the sensor to +5V // NOTE: If using a board with 3.3V logic like an Arduino Due connect pin 1 // to 3.3V instead of 5V! // Connect pin 2 of the sensor to whatever your DHTPIN is // Connect pin 4 (on the right) of the sensor to GROUND // Connect a 10k resistor from vcc to data pin // Initialize DHT sensor. DHT dht(DHTPIN, DHTTYPE); void setup() { Serial.begin(9600); // Start the serial pinMode(pinCS, OUTPUT); // SD Card Initialization if (SD.begin()) { Serial.println(“SD card is ready to use.”); } else { Serial.println(“SD card initialization failed”); return; } dht.begin(); } void loop() { // Wait a 60 seconds between measurements. delay(2000); // Reading temperature or humidity takes about 250 milliseconds! float h = dht.readHumidity(); // Read temperature as Fahrenheit (isFahrenheit = true) float f = dht.readTemperature(true); // Check if any reads failed and exit early (to try again). if (isnan(h)||isnan(f)) { return; } // Create/Open file myFile = SD.open(“TH.txt”, FILE_WRITE); // if the file opened okay, write to it if (myFile) { Serial.println(“Writing to file…”); // Write to file myFile.print(h); // print Humidity myFile.print(“,”); // place a divider myFile.println(f); // print the temp and start a new line myFile.close(); // close the file Serial.println(“Done.”); } //if the file didn’t open, print an error: else { Serial.println(“error opening TH.txt”); } }
Step 5: Mount It.
The sensor is placed wherever you want to measure the temp and humidity, you do have to make sure the arduino stays dry.
When you put the sd card into it’s board you must reset the arduino or else it will not record the data.
Read more: DIY Data logging weather station under $15

