
Summary of DIY Arduino domino clock
This article introduces a simplified, tabletop Domino Wall Clock project by Kothe, based on the Carbon Design Group's original. It replaces complex magnetic motors with WS2812B addressable RGB LEDs controlled by an Arduino Nano, making it easier to build and ideal for learning LED control coding. The project includes full instructions, 3D printing designs, and electronic layouts available on Instructables.
Parts used in the Simplified Domino Wall Clock:
- Arduino Nano microcontroller
- WS2812B 5050 Addressable SMD smart RGB LEDs
- 3D printed components (implied by "3D printing designs")
- Electronic layout board
Makers looking for a project to keep them busy this weekend may be interested in a simplified version of the Domino Wall Clock created by the Carbon Design Group. Instructables member Kothe has kindly published full instructions, 3D printing designs and electronic layouts for you to easily build your own simplified version.
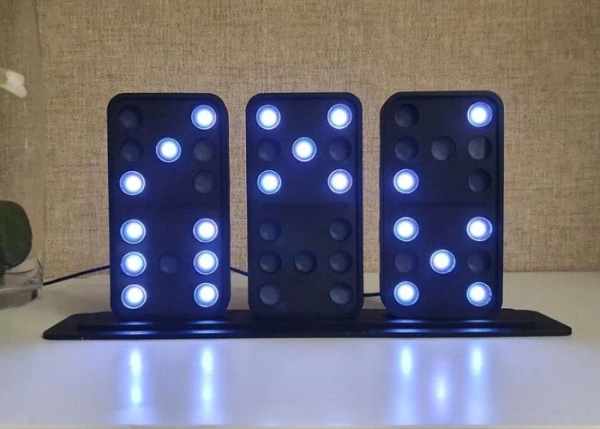
Using an Arduino Nano microcontroller together with addressable RGB LEDs the tabletop version of the wall mounted original Domino clock offers a great way to learn more about controlling LEDs using Arduino coding.
“I have made it smaller to put it on a table or in a shelf and simplified the mechanism that shows the time. Instead of using electronic magnetic coil motors to reveal the white dots; what is if not complicated is tedious and a bit expensive, mine uses WS2812B 5050 Addressable SMD smart RGB Leds to show the time.”
For more information and instructions on how to build your very own Domino clock jump over to the Instructables website by following the link below.
Source: DIY Arduino domino clock
-
What is the main difference between this clock and the original wall-mounted version?
This version is smaller for tables or shelves and uses WS2812B LEDs instead of electronic magnetic coil motors to show time. -
How does the simplified mechanism display the time?
It uses WS2812B 5050 Addressable SMD smart RGB LEDs to reveal the dots that indicate the time. -
Why did the creator choose LEDs over magnetic motors?
The creator found the original magnetic motor mechanism complicated, tedious, and expensive compared to using LEDs. -
Can I get the instructions and designs for this project?
Yes, full instructions, 3D printing designs, and electronic layouts are published by Instructables member Kothe. -
What microcontroller is used to control the LEDs?
An Arduino Nano microcontroller is used together with the addressable RGB LEDs. -
Is this project suitable for beginners interested in coding?
Yes, it offers a great way to learn more about controlling LEDs using Arduino coding. -
Where can I find more information on how to build this clock?
More information and instructions are available on the Instructables website via the provided link.
