
Summary of CUSTOM INSTRUMENT CLUSTER FOR AGING CAR
Modern vehicle electronics have enhanced safety and driving experiences, but aging components like instrument clusters can fail. This project details how [Aravind] replaced a failing LCD display in a Skoda car using an affordable 3.5-inch color screen and an Arduino with a Real-Time Clock (RTC). By interfacing the new hardware with the vehicle's CAN bus, he created a programmable, cost-effective upgrade that avoids expensive OEM parts.
Parts used in the Custom Instrument Cluster Upgrade:
- 3.5 inch color LCD
- Arduino microcontroller
- Real-Time Clock (RTC) module
- Vehicles CAN bus interface port
All of the technological improvements to vehicles over the past few decades have led to cars and trucks that would seem borderline magical to anyone driving something like a Ford Pinto in the 1970s. Not only are cars much safer due to things like crumple zones, anti-lock brakes, air bags, and compulsory seat belt use, but there’s a wide array of sensors, user interfaces, and computers that also improve the driving experience. At least, until it starts wearing out. The electronic technology in our modern cars can be tricky to replace, but [Aravind] at least was able to replace part of the instrument cluster on his aging (yet still modern) Skoda and improve upon it in the process.
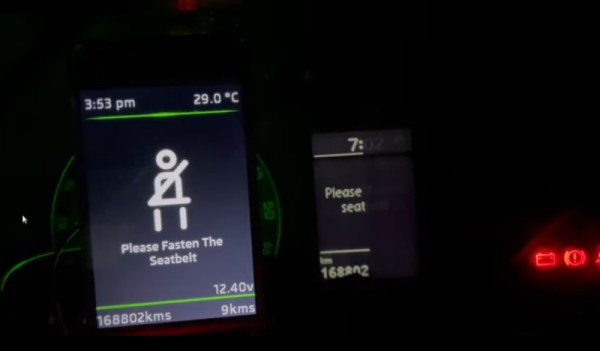
These cars have a recurring problem with the central part of the cluster that includes an LCD display. If replacement parts can even be found, they tend to cost a significant fraction of the value of the car, making them uneconomical for most. [Aravind] found that a 3.5″ color LCD that was already available fit perfectly in the space once the old screen was removed, so from there the next steps were to interface it to the car. These have a CAN bus separated from the main control CAN bus, and the port was easily accessible, so an Arduino with a RTC was obtained to handle the heavy lifting of interfacing with it.
Now, [Aravind] has a new LCD screen in the console that’s fully programmable and potentially longer-lasting than the factory LCD was. There’s also full documentation of the process on the project page as well, for anyone else with a Volkswagen-adjacent car from this era. Either way, it’s a much more economical approach to replacing the module than shelling out the enormous cost of OEM replacement parts. Of course, CAN bus hacks like these are often gateway projects to doing more involved CAN bus projects like turning an entire vehicle into a video game controller.
Source: CUSTOM INSTRUMENT CLUSTER FOR AGING CAR
-
Why replace the factory LCD in this car?
Replacement parts are often too expensive relative to the car's value, making them uneconomical. -
What specific screen was chosen for the replacement?
A 3.5 inch color LCD was selected because it fit perfectly in the existing space. -
How is the new screen connected to the car?
The screen interfaces with the car via the CAN bus, which is separated from the main control CAN bus. -
Which component handles the heavy lifting of the interface?
An Arduino paired with a Real-Time Clock (RTC) manages the data processing and connection. -
Is the new display customizable?
Yes, the new LCD screen is fully programmable by the user. -
Are there documentation resources available for this project?
Full documentation of the process is provided on the project page for similar Volkswagen-adjacent cars.
