Havahart traps are really nice if you have pests to rid your home of but you don’t feel the need to do this through means of killing the animal.
The problem we are faced with is constant monitoring of the trap. If you forget to check back frequently (usually at least once a day), you risk having the animal dying in the cage simply due to shock or anxiety. As a result, you end up being more cruel to the animal than if you had just put it out of it’s misery to begin with.
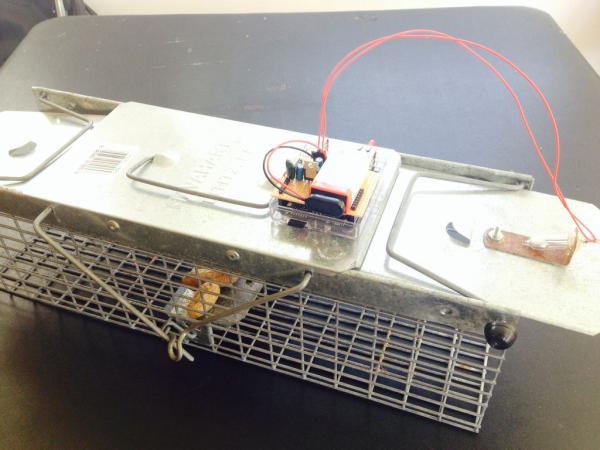
It is this problem that spawned my “Critter Twitter Trap”. The goal is to be notified as soon as the trap is “sprung”, thus we know when to check it. I’m a lazy engineer looking for creative solutions so I can do less work. 😉
I will show you how to make a simple modification to a common pest trap which will send a twitter message when the trap has been sprung. You can see what happens when the trap is sprung by viewing my Critter Trap twitter account here. Most of these posts were tests, but a few were live catches! I then setup my personal twitter account to monitor new tweets from the Critter Trap account and send me a text message if anything new is posted.
This is a very simple solution requiring minimal hardware and electronics aside from a few key components. Most of the work is in the code which I will provide in this Instructable.
Interested? Read on…
Step 1: Gather The Materials
Materials:
- Havahart 1025 Two-Door 18 x 5 x 5-Inch Cage Trap or similar (Amazon)
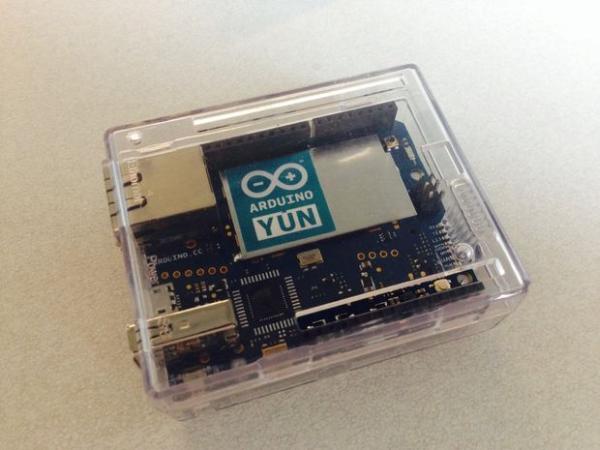
- Arduino Yún microcontroller board (Amazon)
- Tilt Switch (See notes below)
- 9V Battery
- 9V Battery Connector (Amazon)
- Stiff scrap metal or angel bracket (for tilt switch mounting)
- LM7805 Voltage Regulator (Amazon)
- 2 10uF Capacitors (Amazon)
- 1 .01uF Capacitor (Amazon)
Notes:
- As you can see from the pictures, I am using a mercury tilt switch simply because it is what I had on hand. You can find many variations of this on Amazon and from other sources.
- If your particular trap has a vertical sliding door, I would recommend a magnetic switch such as this.
- You will see that I link to “bulk pack” deals on Amazon for items such as the capacitors and voltage regulars. These are very common items for electronics projects and you’re only paying about 3x the amount you would pay at RadioShack for one item. This way you can get 100 capacitors for about 3x the price as ONE.
Step 2: Attach Tilt Switch
The method in which you do this is really up to you, and depends greatly on the type of trap you have and the type of of tilt switch you get. The key is to make sure the switch is in the off position while the trap is “loaded” as seen in the pictures.
Here I used a old scrap L bracket and attached it to the trap. I then used a Dremel tool to cut an oval hole in the bracket. Then I simply used hot glue to secure the switch in place. Very simple assembly!
Step 3: Arduino Yún WiFi Configuration
These detailed step-by-step instructions are for those of you just getting started with a brand new Yún. If you already have a Yún connected to your local WiFi and running, please proceed to the next step OR reset your Yún as follows.
Reset Your Yún
If you want to follow along and reset your Yún to its default state, press the WLAN reset button (shown in picture) for at least 30 seconds (the board must have power through USB or external source). The onboard blue WAN LED should flash consistently during this process. When done, the board reverts to the original settings as if it had been re-flashed or taken out of the box. Among other things, this removes all installed files and network settings.
Getting Started
- Power up your Arduino Yún
- Connect your PC (or mobile device) to the WiFi that will be broadcasting from the Yún. (will look something like: Arduino Yun-90383747IUADA)
- From that PC, pull up http://arduino.local
- Default password is ‘arduino’
- Scroll down to the “Timezone” drop-down and set to your appropriate zone.
- Set your Timezone
- Scroll down to “Detected Wireless Networks” and select your local WiFi network
- Enter password for your local network
- Click the large “Configure & Restart” button
- After a couple minutes, the Yún should reboot and connect to your local network. The admin interface will provide a link saying “Restarted! You’ll find me here”.
- You may need to wait longer than the interface tells you to connect.
- Re-connect your PC (or mobile device) back to your normal WiFi network
- Test by attempting to access http://arduino.local. You should see a screen similar to the one shown (on my mobile device, but could just as easily do from a PC).
- If you can’t connect, start over again with the getting started steps.
For more detail: Critter Twitter Trap using Arduino