Summary of Connected Thermostat
The article describes a DIY smart thermostat project using a NodeMCU with ESP8266 to remotely monitor and control home temperature beyond basic static programming. It addresses limitations like lack of remote access, absence of environmental factors, and manual overrides by integrating sensors and connectivity to a smart home system (eedomus). The system uses temperature sensors, buttons for manual adjustments, and a relay to control heating, with temperature management optimized through smoothing, hysteresis, and debounced button inputs. The program is event-driven using Ticker and AsyncClient for asynchronous HTTP communication.
Parts used in the Connected Thermostat:
- NodeMCU (ESP8266)
- OLED screen 128x32
- DHT-22 temperature and humidity sensor
- 3.3V Relay
- 2 Push buttons
- Resistors (1kΩ to 10kΩ, used 220Ω)
- Prototype board
- Soldering iron
- Soldering wire (0.8mm)
- Soldering flux
- Kynar jump wires or other cables
- Wire ball (for cleaning soldering iron)
- Desoldering wick
Monitoring accurately the temperature in your home is definitely one of the best way to save on your energy bill. At the same time you want to feel well in a warm home during winter time.
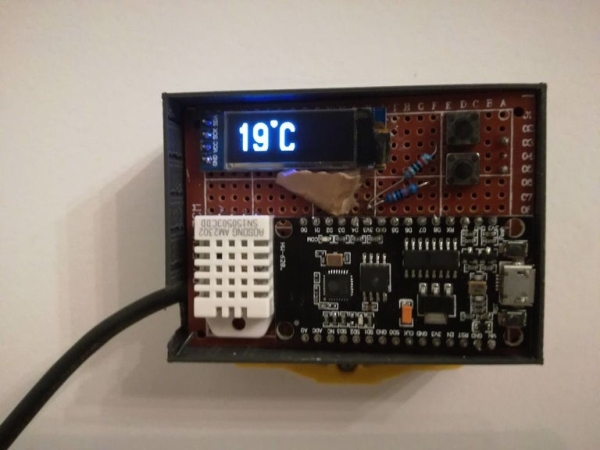
My current thermostat only allows a static programmation:
- I can define a day temperature (around 19°/20° to not heat too much) and a night (or no one at home) temperature (16°)
- For each weekday, I can define time range to apply day temperature and time range to apply night temperature)
- Additionally, I can manually adjust the temperature that will be taken in account until the next time range is reached
Not so bad but
- I cannot monitor the temperature remotely: specially when coming from vacation, I am not able to warm the home before we arrive.
- I cannot stop heating automatically when there is no one at home.
- I cannot take in account other parameters that impacts home temperature like sunshine during the day (warming home), winds (cooling home)…
- I cannot have control on temperature set by my wife, overheating all day at 25°C
- …
Step 1: Step 0 – Prerequisites
- You know how to use Arduino IDE
- You have installed ESP8266 board manager: http://arduino.esp8266.com/stable/package_esp8266com_index.json
- Thus you are able to upload some code on the NodeMCU and to run it
- You have installed the following libraries
- U8g2lib – OLED display
- DHTesp – DHT for ESP
- ESPAsyncTCP – Manage asynchronous HTTP request, install from github
- ArduinoJson – process JSON response from HTTP request
- ESP8266WiFi – included in ESP8266 board
- Ticker- included in ESP8266 board
- You have some device or software like a smart home box that will allow to monitor and interact with this thermostat (in my case, I own an eedomus box but you can easily adapt the code to suit your needs)
- You know how to solder
Step 2: Step1 – Bill of Materials
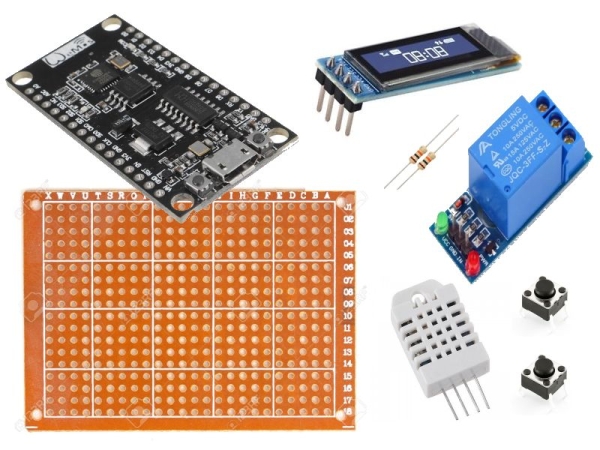
- NodeMCU – 2€
- OLED screen 128×32 -1.50€
- DHT-22 – 2.50€
- Relay 3.3V – 1.40€
- 2 push buttons – 2×0.02€
- 2 resistors 1kΩ to 10kΩ (I used 220Ω) 2×0.01€
- Prototype board – 0.16€
Total = 7.62€
All prices are based on AliExpress with free delivery.
Additionally we need materials to solder:
- Soldering iron
- Soldering wire – I use 0.8mm
- Soldering flux – I use it to solder NodeMCU pins
- Kynar jump wire or other cable to wire the components on the prototype board
- Wire ball – to clean iron
- Desoldering wick – Useful to remove soldering when you messed up
Step 3: Step 3 – Cabling
Step 4: Step 4 – Principles for the Program
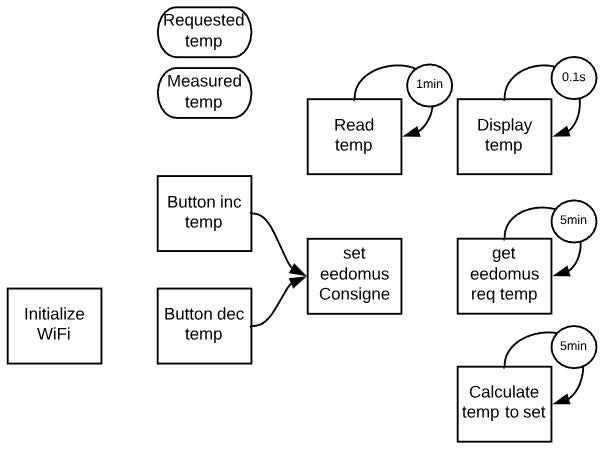
The principles of the program are quite simple and are drawn on the first picture.
- We have two variables to hold the requested temperature and the measured temperature
- Regularly we read the measured temperature and we display it on the display
- We also read the requested temperature from our smart home box (eedomus)
- According to these 2 temperatures we compute if we should heat or not
- Additionally the user could use the buttons to adjust the requested temperature
Additionally we need:
- Manage conflicts between requested temp adjusted by buttons and requested temp adjusted by reading from eedomus
- Make sure we do not adjust heating to often. The heater may not appreciate and it heats more efficiently when heating on a rather long period. As a rule of thumb we decided to not adjust heating more often than each 15 min
- Need to debounce the reading from the buttons. See arduino examples: Digital → Debounce
- Smooth the reading of the measured temperature: The raw reading alternate with a gap of over 1°C making single readings hard to rely on
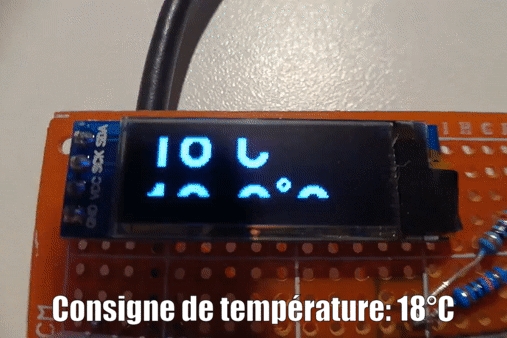
- Calculate an hysteresis in order to keep the temperature as stable as possible. A home has an inertia that implies that temperature will continue to rise shortly after we cut the heating. On the other hand the temperature will continue to decrease even after we started heating. Thus we have to anticipate the point when we cut heating or we start heating. This is shown in the second picture.
Step 5: Step 5 – Arduino Code
I just put in production my thermostat. My current code is messy and contains a lot of messages for debugging. I plan to rewrite a clean program shortly. I will update as soon as available and validated on my thermostat.
- Ticker are the procedures that are repeated regularly
- We use many global variables because we cannot pass parameters to ticker procedures
- The AsyncClient allows to handle asynchronous HTTP request
- We attach interrupt procedure to handle the press to the buttons
- All the code is event driven, the Arduino loop is empty
- displayTemp – Manage the display of the requested temperature on 2 digits and the measured temperature with on 2 digits plus one 1 digit after decimal point. The display moves up when heating, moves down when not heating and bouncing up and down when both temp are equal (in this case not heating)
- getMeasuredTemp – We read the temp every minute and calculate an average of every 5 readings. We then keep an history of 5 average reading to calculate the vector of the curve which allows to estimate the next reading.
- getRequestedTemp – Read value defined in our smart home box.
- incTemp/decTemp – procedure called by interrupt when buttons are pressed
- setHeating – Turn on/off the relay to monitor the heater. In our case the relay is put to HIGH when no heating and to LOW for heating. Maybe this is weird but we made this choice because there is a red LED that is turned on when the relay is closed (set to HIGH).
Source: Connected Thermostat
