Summary of Building a ChatGPT client with Arduino
This article guides users in building an interactive ChatGPT client using the Arduino Giga R1 WiFi and its display shield. It details the necessary hardware specifications, including the dual-core STM32H747XI microcontroller and wireless capabilities, alongside essential software like the Arduino IDE, `WiFiNINA`, and `ArduinoJson` libraries. The project enables voice-activated assistants or smart advice systems by connecting the microcontroller to the ChatGPT API for real-time communication.
Parts used in the Arduino ChatGPT Client:
- Arduino Giga R1 WiFi
- Giga R1 Display Shield
- Arduino Integrated Development Environment (IDE)
- WiFiNINA library
- ArduinoJson library
- ChatGPT API
Dive into the fascinating world where hardware meets artificial intelligence by creating a ChatGPT client using the Arduino Giga R1 WiFi. This project is perfect for those who love to tinker with technology and are eager to explore new ways to interact with AI. By following this guide, you’ll learn how to combine the power of the Arduino platform with the intelligence of ChatGPT to build something truly interactive.
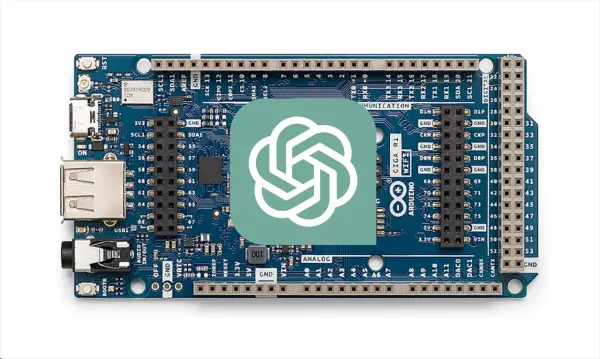
The Arduino Giga R1 WiFi is a powerful microcontroller that’s designed for projects needing both WiFi and advanced processing power. When you add the Giga R1 display shield to it, you get a visual interface that makes it easier to interact with your projects. This combination is ideal for creating a ChatGPT client that can communicate with you and provide responses.
Arduino ChatGPT client
To start integrating ChatGPT with your Arduino, you’ll need to go through several steps. First, make sure your Arduino Giga R1 WiFi is set up correctly. Then, gather the software and libraries that allow your device to communicate over the internet and handle data in the JSON format. These are crucial for connecting with the ChatGPT API.
You’ll need to install the Arduino Integrated Development Environment (IDE) on your computer. This is where you’ll write and upload your code to the Arduino board. Within the IDE, you’ll add the `WiFiNINA` library for internet connectivity and the `ArduinoJson` library for parsing JSON data. These are essential for the functionality of your ChatGPT client.
Once your Arduino is ready to connect to the internet, you’ll set up the Giga R1 display shield. This involves physically attaching the shield to your Arduino and programming it to display messages from ChatGPT and receive your input. You’ll create functions that handle this interaction, allowing for a smooth conversation with the AI.
Arduino GIGA R1 WiFi features
- Microcontroller (STM32H747XI): The board is equipped with a dual-core 32-bit STM32H747XI microcontroller. This includes a Cortex®-M7 running at 480 MHz and a Cortex®-M4 at 240 MHz. This dual-core setup allows for simultaneous running of micropython and Arduino, offering versatility in programming and application.
- Wireless Communication (Murata 1DX): It supports both Wi-Fi® and Bluetooth® for wireless connectivity. This feature enables easy connection to the Arduino IoT Cloud, allowing for remote monitoring and control of projects. The onboard ATECC608A ensures secure communication.
- Hardware Ports and Communication: The GIGA R1 WiFi includes:
- 4 UARTs (hardware serial ports)
- 3 I2C ports (1 more than its predecessors)
- 2 SPI ports (1 more than its predecessors)
- 1 FDCAN
These ports facilitate a wide range of communication options with various peripherals.
- GPIOs and Extra Pins: The board maintains the form factor of the Mega and Due for compatibility with custom shields. It offers 76 GPIO pins, accessible from underneath for easy project expansion. Notably, it operates at 3.3V. Additional pins include a VRTC for RTC battery connection and an OFF pin for powering down the board.
- Connectors: The GIGA R1 WiFi is equipped with:
- A USB-A connector for hosting USB sticks, mass storage devices, and HID devices like keyboards or mice.
- A 3.5mm input-output jack connected to DAC0, DAC1, and A7.
- A USB-C® connector for power, programming, and simulating HID devices.
- A JTAG connector (2×5 1.27mm) for debugging.
- A 20-pin Arducam camera connector.
- Higher Voltage Support: Unlike its predecessors, which support up to 12 volts, the GIGA R1 WiFi can handle a voltage range of 6 to 24 volts, making it suitable for a wider range of applications.
The potential uses for your new ChatGPT client are limited only by your imagination. Imagine creating a voice-activated assistant for your home or a smart system that gives you advice on how to care for your plants. The capabilities of the ChatGPT model and your creativity define the boundaries of what you can achieve.
By building a ChatGPT client with the Arduino Giga R1 WiFi and the Giga R1 display shield, you’re embarking on a project that not only lets you interact with AI but also opens up opportunities for innovative applications in various fields. This guide will help you create a device that’s both engaging and potentially useful in creating new solutions. For more details on the project jump over to the official Arduino website.
Source: Building a ChatGPT client with Arduino
- What is the primary purpose of this project?
To create an interactive ChatGPT client that combines hardware with artificial intelligence. - Which microcontroller is used in the Arduino Giga R1 WiFi?
The board uses a dual-core 32-bit STM32H747XI microcontroller. - Can the Arduino Giga R1 WiFi connect to the internet?
Yes, it supports Wi-Fi and Bluetooth via the Murata 1DX module. - How do I handle JSON data for the ChatGPT connection?
You must install the ArduinoJson library within the IDE to parse JSON data. - What voltage range does the Giga R1 WiFi support?
It handles a voltage range of 6 to 24 volts. - Are there specific ports for camera connectivity?
Yes, it includes a 20-pin Arducam camera connector. - Can I use USB devices with this board?
Yes, it has a USB-A connector for hosting storage devices and HID peripherals. - What programming languages can run simultaneously on this board?
The dual-core setup allows simultaneous running of micropython and Arduino.