
Summary of How to build an Arduino Robocar Part 1
This article details the initial planning and coding for a DIY Arduino Robocar. The project utilizes an Uno, motor shield, 3D printer, and microswitches to create a four-wheeled vehicle that drives forward until bumping into obstacles, then reverses and turns 90 degrees before proceeding again. The author shares basic code logic to control a motor via a pin input, marking a transition from using Arduinos as ISPs to fully embracing the ecosystem.
Parts used in the Arduino Robocar:
- Arduino Uno
- Motor Shield
- 3D Printer
- Microswitches
- Semi-conductors (semis)
- Adafruit Motor Shield Library
I’ve been meaning to put some content on here for a while and recently I got around to getting an Uno and motor shield. Given I also have access to a 3d printer and have a shedload of microswitches, semis and other goodies knocking around – Robocar is an obvious choice!
I’ve had a few Arduino’s in the past but have always used them as an ISP to write to AVR instead of just embracing the Arduino eco-system. I’m over that nonsense now and will be learning as I go.
The plan
A four-wheeled car type thingy which drives two rear wheels and steers with two front wheels.
For starters, I want to make it go forward until it hits an obstacle detected by a front-left & front-right µswitch-bumper system. At that point, it will reverse/turn around 90 degrees and go forward again.
The parts
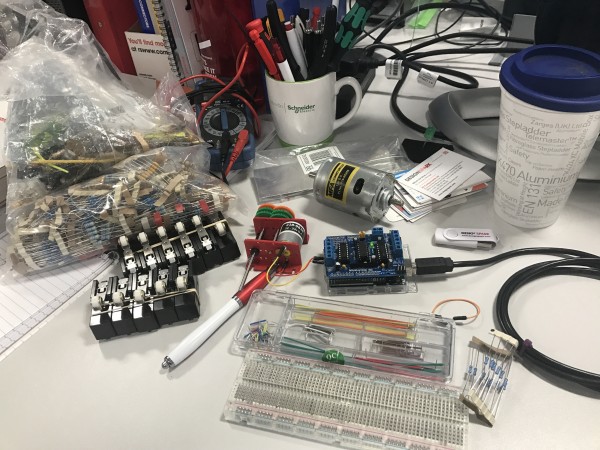
The code
I’ve hacked together some of the example sketches from the Arduino IDE to get a small motor to run when input A5 on the Uno goes high.
// Adafruit Motor shield library
// copyright Adafruit Industries LLC, 2009
// this code is public domain, enjoy!
#include <AFMotor.h>

AF_DCMotor motor(4);
const int buttonPin = A5;     // the number of the pushbutton pin

// variables will change:
int buttonState = 0;         // variable for reading the pushbutton status

void setup() {

  // initialize the pushbutton pin as an input:
  pinMode(buttonPin, INPUT);}


void loop() {
  // read the state of the pushbutton value:
  buttonState = digitalRead(buttonPin);

  // check if the pushbutton is pressed.
  // if it is, the buttonState is HIGH:
  if (buttonState == HIGH) {
 // turn on motor
  motor.setSpeed(200);

  motor.run(FORWARD);}
else {
  motor.setSpeed(0);

  motor.run(RELEASE);
  }
}
Read More: How to build a Arduino Robocar
-
What is the primary function of the Robocar?
The car drives two rear wheels and steers with two front wheels, moving forward until it hits an obstacle detected by a bumper system. -
How does the car react when it detects an obstacle?
Upon hitting an obstacle, the car will reverse, turn around 90 degrees, and go forward again. -
Which sensors are used to detect obstacles?
A front-left and front-right microswitch-bumper system is used to detect obstacles. -
Can I use this code to run a small motor with a pushbutton?
Yes, the provided code runs a small motor when input A5 on the Uno goes high, simulating a pushbutton press. -
What library is included in the provided code?
The code includes the Adafruit Motor shield library. -
What happens to the motor if the button state is not HIGH?
If the button state is not HIGH, the motor speed is set to zero and the motor is released. -
Why did the author decide to start this project?
The author had access to a 3D printer and many microswitches, making a Robocar an obvious choice.
