The breathalyzer microphone is a system for the inconscpicuous collection of blood-alcohol content level data sets. In other words, you can measure a person’s sobriety with a device, that for all intents and purposes, looks no different than a standard microphone. This tool adds new dimensions of truthiness to any standard interview. It can also easily be adapted for karaoke.
Don’t be intimated by the number of steps. It’s one of the least complicated projects I’ve ever made.
This project was initially developed with the love and support of the Eyebeam OpenLab.
Step 1: Go get stuff
You will need:
– A MQ-3 Alcohol Sensor (available via Futurlec. Allow a few weeks for shipping from Thailand. Be warned! Ordering anything else from Futurlec may place your order on backorder and leave you waiting a long, long, time without being notified).
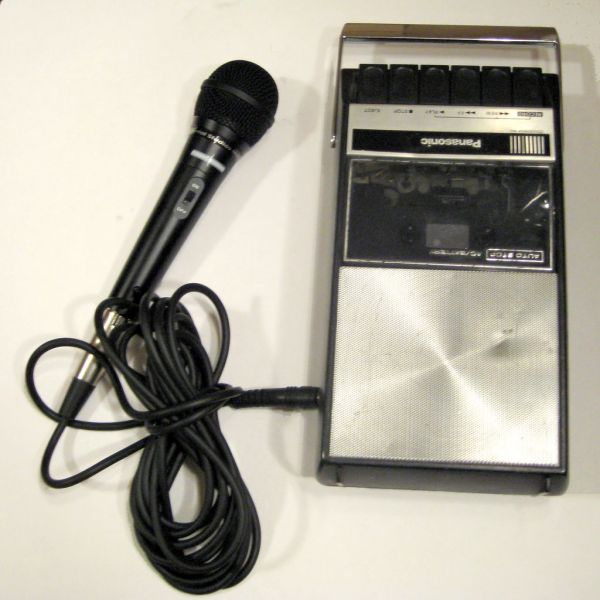
– An XLR microphone (you can pick up cheap dynamic XLR microphones intended for karaoke all over the internet)
– An Arduino Decimilla
– Logomatic Data Logger (via Sparkfun)
– An SD Card (can get a cheap 256MB card at Radioshack)
– An SD Card reader
– XLR to 1/4″ stereo plug
– A professional-looking audio device (working or not)
– resistors (100K, 10K, 1K)
– a schottky diode
– Acrylic or cardboard
– glue
– solid hookup wire
– 9V battery plug
– 9V battery
– isopropyl rubbing alcohol
– a 12 pack and some friends
(other stuff for interfacing Arduino and data logger?)
Tools:
Soldering iron
Wire cutters
Mini screwdriver set
Needle nose pliers
multimeter
Power drill or other rotary tool
Scissors, saw and/or laser cutter (see step 15)
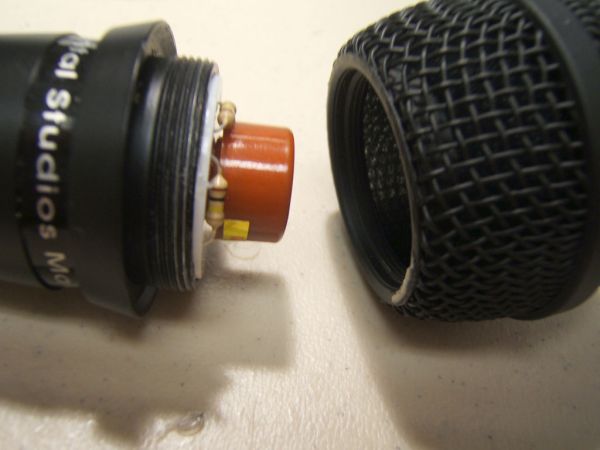
Step 2: Remove the wind screen
Simply twist the windscreen counter clockwise and it should unscrew right off.
Step 3: Loosen the Mic
Loosen the mic from the casing by twisting them apart gently. That means that you need to simultaneously pull and twist to separate the two. The mic is usually glued in, but never well enough that can’t be defeated by some gentle force.
Step 4: Take out the switch
To remove the switch from the casing, the on off label has to be carefully peeled up. Be careful not to bend or destroy it, since you will be putting it back in place later. The best way to removed it is with a small flathead screwdriver or a safety pin.
Once the label is removed, there should be two screws. Unscrew these screws to free the switch from the case.
Set aside the label and screws for reassembly later. If you lose these, you won’t be able to reassemble this easily.
Step 5: Remove the XLR plug
Locate the screw at the bottom of the casing. This is holding the XLR plug in place. Unscrew this screw as well to free the XLR plug. Once you are done, set this screw aside.
– Logomatic Data Logger
– An SD Card
For more detail: Breathalyzer Microphone using an Arduino