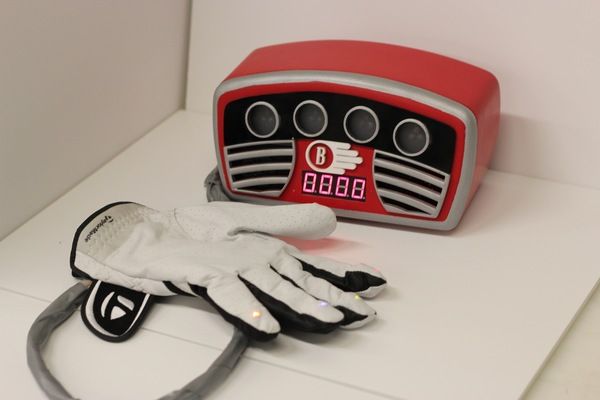
I built this project at at uni as a 3rd year project (with a couple of classmates) at the University of Technology, Sydney.It is aimed at Baby Boomers and targets a skill and level based memory and fine motor skills exercise game. The form is based on Arduino microcontrollers and hardwired with a randomised sequence of lights to test memory skills. It works by presenting a randomised sequence (with visual and aural notes) which must be mimicked on the glove in the same order (each finger has a different colour on it, that corresponds to the lights on the device). It’s based on levels, so it gets harder and harder each time.
The form was Rapid prototyped at our school using PLA from a Solidworks .stl file and finished off with car body paint and polished to a high quality finish. We also laser cut the black front piece for extra visual flare (using our school’s laser cutter)
It also features tactile feedback in the fingers (when they are pressed to respond to the sequence) vibration feedback on victory or failure(small vibration motor wired into the palm of the glove) as well as aural and visual feedback to stimulate memory cognition (provided by the main “box”)

From our initial idea concept, I think the end result turned out pretty well! It works well, looks pretty good and does indeed make exercising the hand for fine motor skills a little more fun and challenging! The only thing that I found with this is that it gets really…really hard. I couldn’t get past about 5 levels or so, check the video in the last step to see what I mean!
Step 1: Idea gen
We wanted to find a fix for fine motor skills and memory exercise, so we set about doing some sketches for the form and overall idea.
Step 2: 3d CAD modelling
I then chose a final design and produced a CAD model in Solidworks.
Step 3: Wiring and Code
We then had to write the code and wire the device properly
Step 4: 3d printing body + paint
We had to then get our 3d model printed using 3d printing, and then prepare and paint it
Step 5: Assembling device
Once the body was done, we had to put all of the electronics inside the shell. This was harder than we first thought…things kept shorting and we had a lot of trouble, but we finally got it done!


