This was a 2 hour project I whipped up in order to learn how to use a new Bluetooth LE 4.0 module I picked up at redbearlab.com, called a BLE Mini.
I’ve since thought of several much simpler ways (and more dependable) to accomplish the same thing, such as simply lighting 3 LEDs behind weather icon cut-out masks instead of the whole servo thing… but again, I wanted to learn to run the servo too. So there it is.
Step 1: The Dirty Bits
Before we dig in, a parts list, for those who like lists:
1. One Arduino “Whatever” (Uno, Mega, Leonardo, Lovitz, etc).
2. One small bread board (included in above kit)
3. One BLE Mini Bluetooth module from redbearlab.com
4. One Philips 12 volt 3 watt LED porcelain bulb
5. One small servo
6. One 12 volt power supply (at least 1 amp)
6. One lamp with shade
7. Assorted: aluminum sheet (soda can), wire, cardboard, tape, blade/scissors, zip ties
8. Lastly, you’ll need an iPhone and an Apple developer account, or some other method of communicating with the Bluetooth module.
I’d release the app I’ve modified onto the app store, but honestly, I’m afraid it would get poor reviews. 😉
Step 2: Down to the Wires
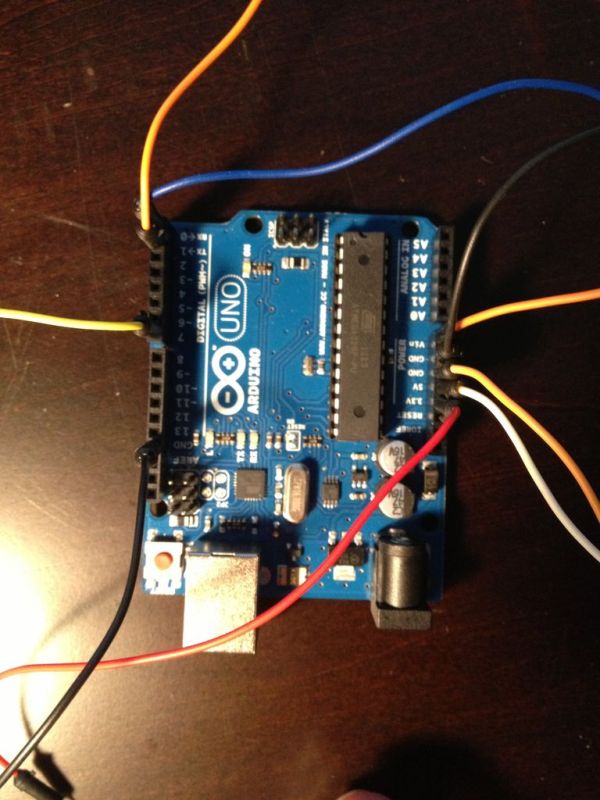
I’ll apologize now for the poor manor in which I describe the wiring and connections. Eventually I’ll learn to use some nice schematic software. Also, my wire color choices are horrible, but this was a fast prototype. I know ground should be cauliflower blue…
From my count, you’ll need 9 wires. Mouse over each in the picture for a description of where they are going to end up.
Step 3: Blue Teeth, Like Violet Beauregarde. Huh?
I don’t get the title either. Moving on.
Plug the BLE Mini module into the bread board (or solder it somewhere nice if you’re fancy at heart).
Connect the 4 wires as shown in the picture, please.
This Bluetooth module will be responsible for getting info from your iPhone and telling the Arduino what to do (like Dorothy told Sophia what to do). Notice it has an “RX” and a “TX” pin. These should be connected to the opposite pins on the Arduino (i.e. RX connects to TX and TX to RX). The other two wires are for power. Simple.
Step 4: Servo Me a Drinko
Now this title, I get.
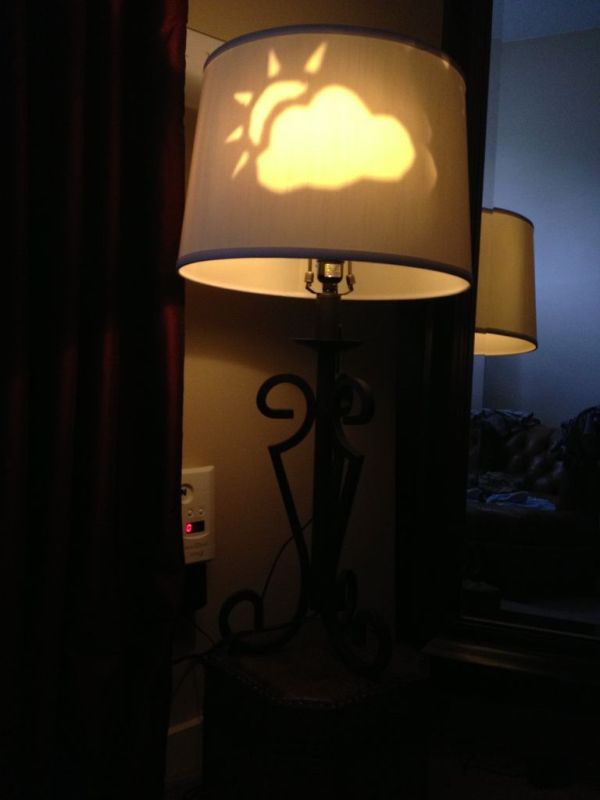
The servo will be responsible for rotating the weather icon mask in front of the LED light source. The Arduino program (pasted at end of Instructable) is always listening to the Bluetooth module. When your iPhone app sends it new commands, the servo moves to a new position.
Step 5: Porcelain Wrapped in Aluminum… mmmm…
I’ll chalk this one up to poor part selection (and a rushed lunch hour).
Ideally, you’ll find a nice high brightness single LED, but I had to make do.
If I let all three LEDs shine on, I’d get triple silhouettes being projected into my lamp shade. Not desired. I already see double typically, so that would make sixal… what?
I bend a piece of aluminum to fit over two of the LEDs so just one does the shadow casting magic. I thought to redirect the other two to illuminate the back side of the lamp shade, but alas… I am lazy.
WARNING:
Don’t use paper or plastic. While they are LEDs, they do get very hot while running, including the porcelain enclosure.
Step 6: Let There Be Light!
The 12 volt LED bulb has two pins, which happen to fit perfectly into the bread board holes! Happy day!
Plug ‘er in and connect the “GND” and “VIn” wires from Arduino to it. The bulb is reversible, so the polarity doesn’t matter (nice touch, Philips).
Point the light out the side of the bread board (or your fancy pants custom PCB, if that’s what you’re into, fancy pants).
WARNING:
Select two rows on the bread board which DO NOT connect to any other components! If you inject 12 volts into the bluetooth module or servo, you’ll fry them!
Step 7: Make Yourself a Breadboard Sandwich
Take your two slices of whole grain technology and smoosh them together, back to back. The Arduino Uno sits beautifully on the small breadboard. A couple of zip ties will hold them nicely.
Step 8: Stick a servo on that sucker!
I found that my mini servo fit perfectly and snug between the pins of the Arduino, so I zip tied it there. The servo shaft should protrude past the edge of the bread board so that the shadow mask disc will clear everything comfortably.
Step 9: Get Crafty
Sketch yourself a few weathery icons and cut them out from cardboard or card stock. They should be about an inch wide each.
Cut out a disc about 3-4 inches wide and attach the masks to it (or save some hassle and just cut them out of the disc to begin with).
Mark the center of the disc and attach a servo arm to it. My servo came with a bunch of the them.
Attach the disc to the servo and align it so the LED bulb can shine through the mask icons.
For more detail: Bluetooth Weather Lamp