Summary of BLC Using Arduino Emulator
Binary Logical Calculator (BLC) is an Arduino Uno R3 project that performs basic computations for lab and homework use. The developer built and tested the design using Proteus V7 (with Arduino library) and Arduino IDE, simulated components and breadboard connections in Proteus, wrote and loaded Arduino code (HEX) into the Arduino, and produced a working prototype with USB programming and reset. PDF files with circuits and full code are provided.
Parts used in the Binary Logical Calculator (BLC):
- Arduino Uno R3
- Proteus V7 with Arduino library (software)
- Arduino IDE (software)
- Breadboard (for prototyping)
- Wiring/jumpers
- USB cable (for programming/dumping code)
- Reset switch
- Electronic components shown in project schematics (as per provided circuit images and PDFs)
What is this BLC?
Ans: Binary logical Calculator using Arduino Uno R3.
Formally we are doing Arduino project which is real-time application in introductory labs and other places. This is all about how to create Arduino Uno project which does some basic computation for our regular labs and homeworks.
Again with new concept and new topics hitting to my mind, So today I did one more project using Proteus V7 and Arduino IDE. Let’s start …….!
This is one of the simple design as concerned to circuits and product. But in case of Coding it it quite complex. Now what I’m going to share with you is, All about the procedure that I used to do this. Hope you Like it.
Step 1: Setup : Proteus Emulator and Arduino IDE.
We need to have both the software when we are doing with this project, because we need to test our code every time which is not good habit with practical board.
So let me arrange Proteus and Arduino IDE installed !!!!!
Yes , I’m Done ..!
Step 2: Pic and Place the Components in Emulator.
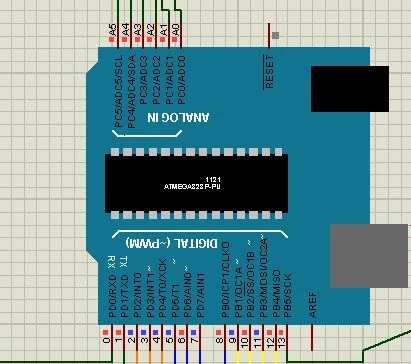
Here we have Emulator Proteus V7, which is updated with Arduino Library.
If you want to add this library then please do ask me by sending email, I will send you procedure and files.
So what next after pic and place of parts is all about connection, Use the given Images to understand the components and their placements.
Step 3: Circuits and Schematics.
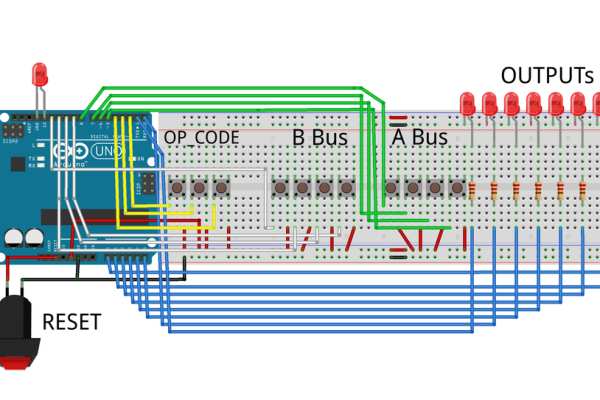
Here the circuits and schematics are given, Please refer them properly and connect the circuit as per that.
BreadBoard connections are also given in the Image, If you want you can cross verify this by doing it on BreadBoard.
Use maximum possible simplex way of the tracks to avoid the debugging errors.
after this we need to load the Hex file into Arduino using Edit property option.
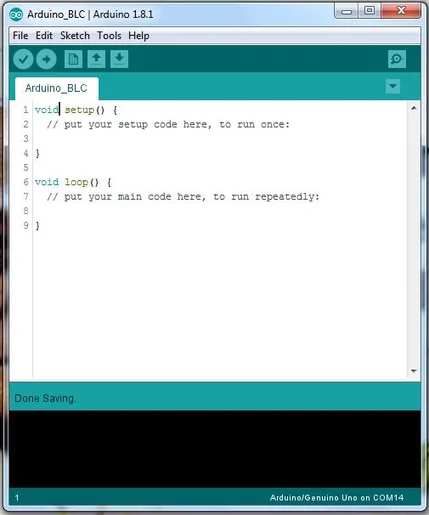
Step 4: Arduino Coding and Editing.

Coding is the biggest part of this circuit and product. So we need to concentrate on the Arduino coding more than circuit design and Product development.
So here Arduino software which is need to start, So i did all the coding from beginning to the end.
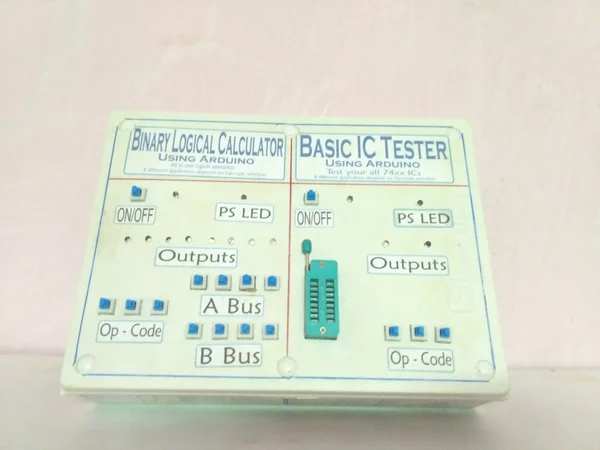
Step 5: Final Product and Design
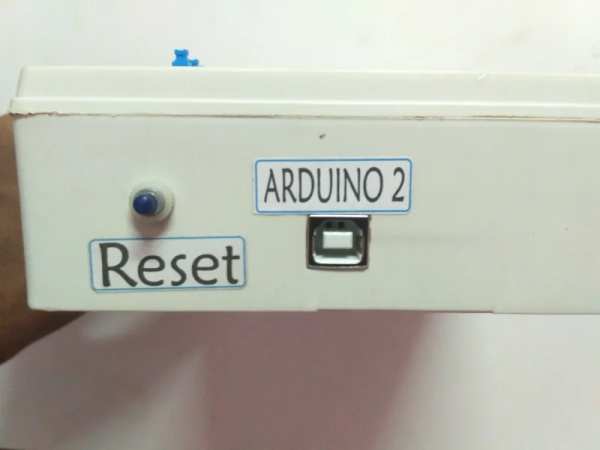
After so many days of this project began, I had done with first level prototyping design which is shown here.
So this is final project and working one, If we need to dump the code again, then it is also possible which is through USB cable. Reset provided because to restart whenever problem occurs.
Hope this is one of my best design and product. I’m looking forward for this to manufacture in mass, If anyone interested to be a part of this , You can ask and drop mail to me :
Step 6: PDF Files for More Information.
These PDF content are included with Circuitry and Code. The code given is full and you can use it directly.
Source: BLC Using Arduino Emulator
- What is BLC?
BLC is a Binary Logical Calculator implemented using Arduino Uno R3. - What software is required to build and test the BLC?
The project uses Proteus V7 with the Arduino library and the Arduino IDE. - Can I simulate the circuit before using a real board?
Yes, the project is tested in Proteus emulator prior to using the physical board. - How is the Arduino code loaded into the emulator Arduino?
The Hex file is loaded into the Arduino component using the Edit property option in Proteus. - Does the prototype support reprogramming via USB?
Yes, the final prototype can have code dumped again through a USB cable. - Are circuit diagrams and code provided?
Yes, PDFs containing circuitry and full code are included with the project. - Is a reset option provided on the prototype?
Yes, a reset is provided to restart the system when problems occur. - Can I build the circuit on a breadboard?
Yes, breadboard connections are given in the project images and can be used for verification.