This is the first bicycle accessory gadget I made with Arduino.
It’s a pattern-based backlight attached to the back-bag mounted on the bicycle luggage compartment.
I’m riding an electric bicycle which can speed up around 24km/h at maximum.
But I had fallen already three times and one of the incidents makes me go to the hospital for checking possible fractures.
After the unpleasant experience, I’m riding the bicycle at a safer speed around 10km/h.
But this time, usually I’m hearing honking from the backside by other bicycle riders as my speed is a little slow.
Therefore, I made this moving arrow pattern of the backlight which tells other bicycle riders to overtake me if they want to go faster.
Step 1: Shape and Operation Concept
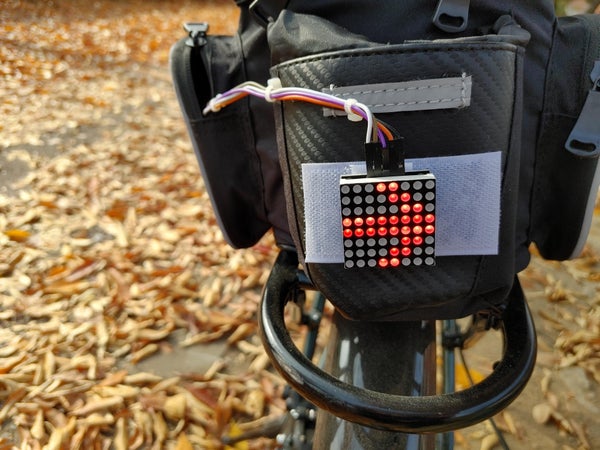
This is the exterior appearance of the backlight circuit including everything.
For using this one day and night, a relatively bright 8×8 LED matrix display is used.
When the brightness is set at its maximum, you can see a moving arrow even under daylight.
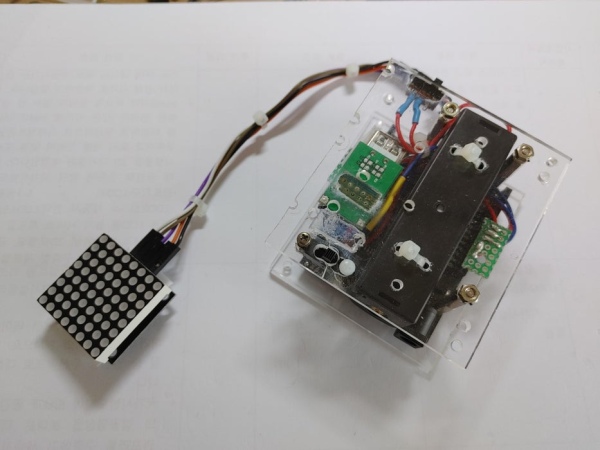
Arduino Uno is used for showing moving arrow patterns on the LED matrix.
To support portability, a 2000mAh of 18650 type of battery is included along with a 5V voltage booster regulator circuit.
You can see the video of the backlight circuit operation in the attached file below.
Let’s look at more details of the backlight circuit sub-components.
Step 2: Parts
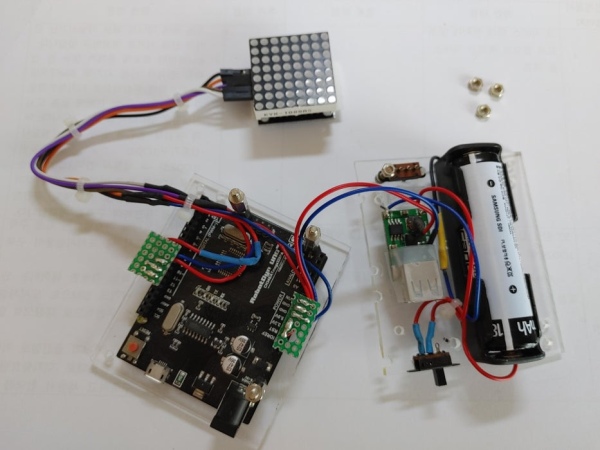
As functionality is very simple, a few sub-components are used for making the backlight circuit.
The following are used parts for making the backlight.
– Arduino Uno (Compatible board made by Chinese manufacturer)
– 5V voltage boost break-out board (Step-up voltage from 3.7V to 5V)
– 18650 type 2000mAh battery (3.7V) with holder
– 8×8 LED matrix display with MAX7219 controller
– Pin header, wires, DuPont jumper wire, and SPST switch
– Acrylic boards (WxH: 8cm x 7cm), metal PCB supporter x 3, nuts (3.5mm)
I had soldered the male side of DuPont jumper wire to universal PCB and pin-header for plugging terminal end firmly to the female socket of Arduino.
When you are using the default male pinhead socket of DuPont wire, a relatively weak connection can’t stand shocks and vibrations caused by bicycle riding.
Step 3: Schematics
As just one break-out board needs to be integrated with Arduino Uno, I enclosed everything into single acrylic boards of transparent chassis.
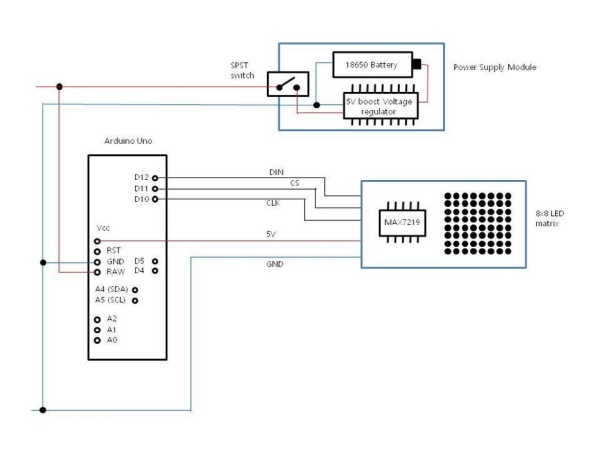
Overall wiring is very simple as Uno is connected with just two external boards as follows.
– 3.7V output from 18650 battery firstly fed to voltage booster regulator circuit
– 5V output from booster regulator is connected to Vin and GND pins of Arduino Uno for powering up the micro-processor
– For controlling 8×8 LED matrix, only three pins are required to be interconnected between Uno and LED matrix such as DIN to PIN 12, CS to PIN 11, and CLK to PIN 10.
– Power of 8×8 matrix can be connected to Vcc (5V) and GND pins of Uno
Step 4: Sketch Program
Luckily I found this sketch program on the Internet.
I can’t remember the web page or any information about the author of this program.
But I guess the original author of this program is very expert in making such kind of code.
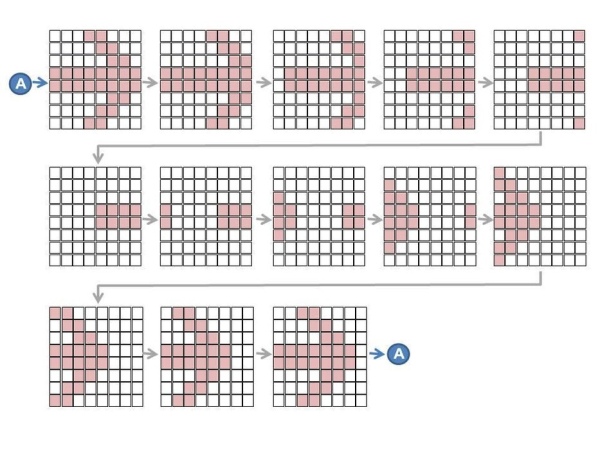
When you look at the code as attached in the file below, arrow pattern moving is supported with a few of C++ codes.
As program logic is so compactly made with high efficiency, depicting the arrow pattern sequentially at each stage will be more comprehensive than the flowchart.
Step 5: Conclusion
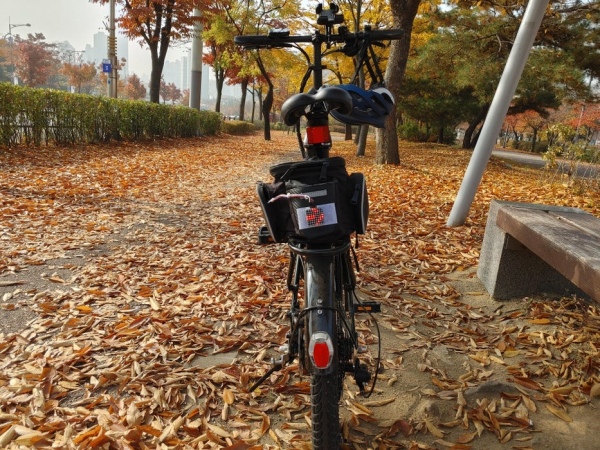
Arduino and battery containing chassis is stored inside the pocket of the back-bag.
As a result of using this backlight, I’m hearing less honking sound from other riders even I’m riding this bicycle at a turtle moving speed such as less than 10km/h.
November is the late fall season in Korea and you can see lovely roads covered with fallen leaves.
I hope you also enjoy bicycle riding before snow falls and become too much cold to ride a bicycle.
And if you preparing such kind of accessory gadget, you will have less hustle while riding a bicycle as your style and tastes.
Thank you for reading this story.
Source: Bicycle Backlight With Arduino