Summary of B-Safe, the Portable Safe
The B-Safe is a portable, PIN-protected security box designed to protect beach essentials like phones and keys from theft. It utilizes an accelerometer to detect movement; if the box is moved without authorization, it triggers a loud alarm until the correct code is entered. The project involves 3D printing a custom enclosure, soldering electronic components including an Arduino Leonardo, and programming the logic for motion detection and user input.
Parts used in the B-Safe:
- Arduino Leonardo (without pins)
- Headerpins male 40 pins metal 90 degrees
- Multiple jumpercables female/female
- Switch Rocker Snap-in On/off rectangular black
- Wire 1x0,2mm2 multicore flexible core black
- Wire 1x0,2mm2 multicore flexible core red
- Wire 1x0,2mm2 multicore flexible core yellow
- Heat shrink tubes
- LED 5mm red
- LED 5mm green
- Speaker 3-24V
- 9V battery
- 9V battery connector
- Resistor 120 Ohm 1/4w 5%
- Resistor 100 Ohm 1/4w 5%
- 3D printed box
- 4x4 Keyboard
- Small piece of PCB board
- Small lock
- 3-axis accelerometer MPU6050
- Screws from small left-over electronics
- M3 screws
- Glue for the LED's
The problem
Imagine this:
You wake up one morning and the weather is real good. You want to go to the beach.
Because you don’t live too close to the beach, you take your car. To pay for the parking
at the beach, you use your phone.
This means that you go to the beach carrying (at least) the following items:
- Car keys
- Drivers License
- Phone
- Towel
What do you do with these items when you want to go for a swim?
You leave them unattended at your towel? Hmmm. This problem needs a solution …
The solution
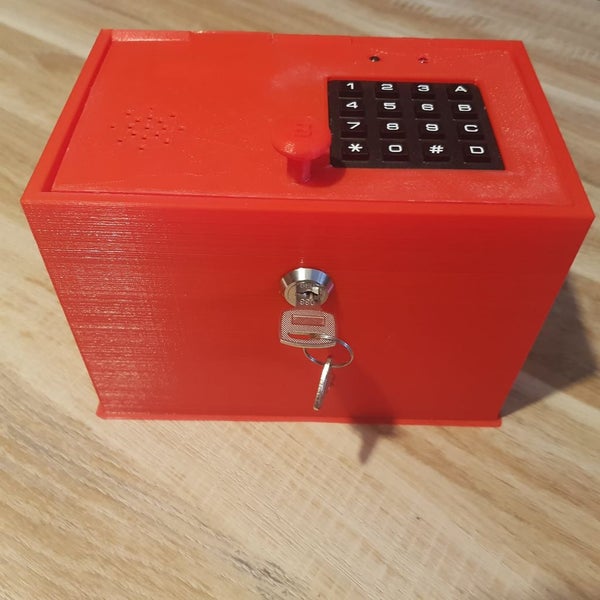
For the problem as described above, I created a portable safe. The B-Safe, where
the B stands for beach or for my name, Bastiaan. It’s pronounced as Be Safe.
How does it work?
Each B-Safe has an own personal pincode programmed into it. When the B-Safe is off,
it’s open. You put your important stuff, like keys, license and phone, inside the box,
flip the switch to turn it on, close and lock it and enter your personal pin.
The B-Safe is now armed and locked.
Whenever someone takes your box, one of the LED’s will lit up for a few seconds.
If, after these few seconds, there is still movement, a loud alarm will sound. This will not
stop until you enter the right pincode again. But if you do enter the right pincode within
the moment of movement, the B-Safe disarms.
It is not recommended that you use the B-Safe on an empty beach. The idea is that when
someone walks or runs over the beach with a very noisy box, bystanders stop him / her.
To create this yourself, you only need to follow steps 3, 4, 5 and 6
Supplies:
Used supplies:
- Arduino Leonardo (without pins)
- Headerpins male 40 pins metal 90 degrees
- Multiple jumpercables female/female
- Switch Rocker Snap-in On/off rectangular black
- Wire 1×0,2mm2 multicore flexible core black
- Wire 1×0,2mm2 multicore flexible core red
- Wire 1×0,2mm2 multicore flexible core yellow
- a little piece of heat shrink tubes
- LED 5mm red
- LED 5mm green
- speaker 3-24V
- 9V battery
- 9V battery connector
- Resistor 120 Ohm 1/4w 5%
- Resistor 100 Ohm 1/4w 5%
- 3D printed box
- 4×4 Keyboard
- small piece of PCB board
- small lock (I took one out of a safe box from Action)
- 3-axis accelerometer MPU6050
- some used screws from small “left-over” electronics like television remotes
- several M3 screws
- a little glue for the LED’s
- a lot of beer
Step 1: Prototype and Testing
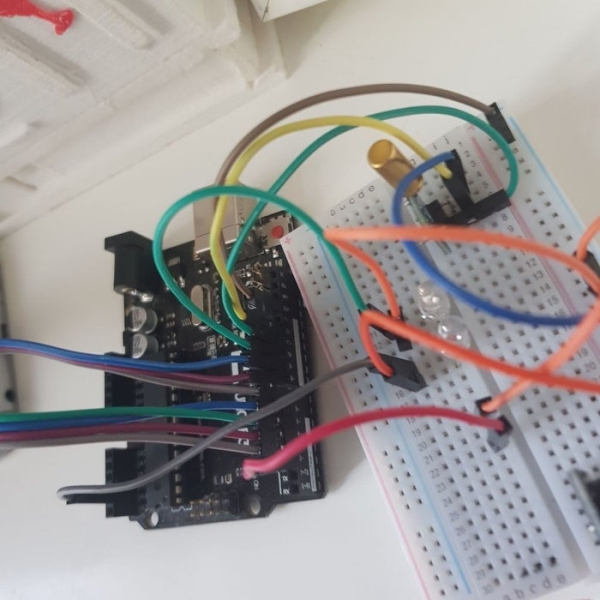
For my prototype, I used a breadbord and some “plug-wires”
With everything connected, I started to create the Arduino code and tested, tested and tested it.
Connect everything different, re-write the code and tested it again.
Right until I was satisfactory and everything worked exactly the way I wanted it to.
Step 2: Wiring Schematics
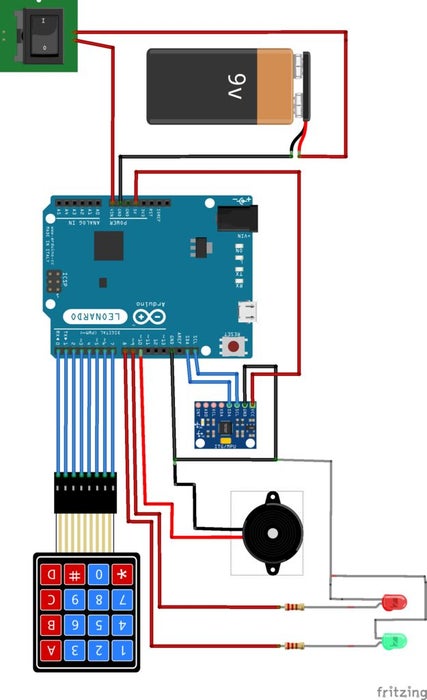
The wiring is quite simple. Just use the schematics to wire everything.
Just try to use as short cables as possible, so everything will fit in the lid perfectly.
Step 3: Soldering
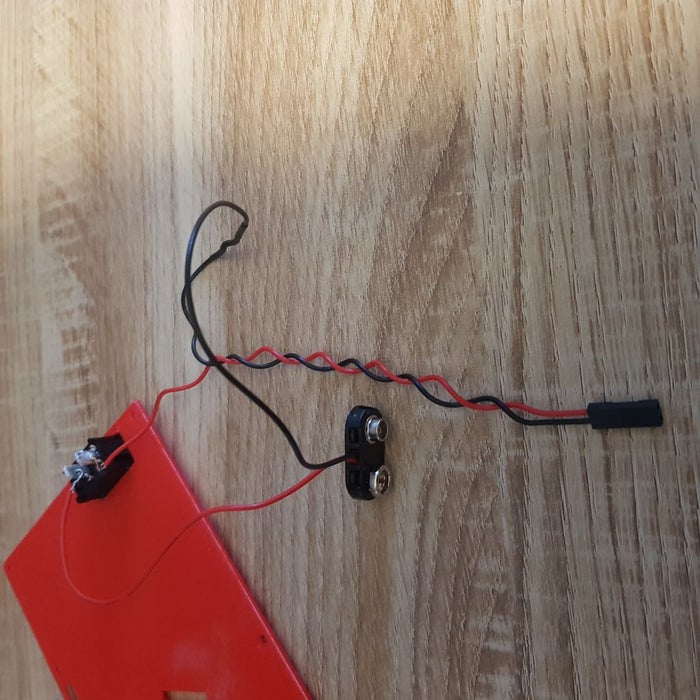
I measure all the wires so that they are not too long, cut them and strip the end. Then, I connect all the wires to the parts using a soldering iron. I also use heat shrink tubes. Make sure you put them (loose) on the cable before connecting the cable to a part.
The parts that I soldered are:
- 90 degree angle connector pins on Arduino
- 90 degree angle connector pins on keypad
- wire to LED’s
- resistors on PCB
- wire from speaker to PCB
- power button
Step 4: 3D Print All Parts
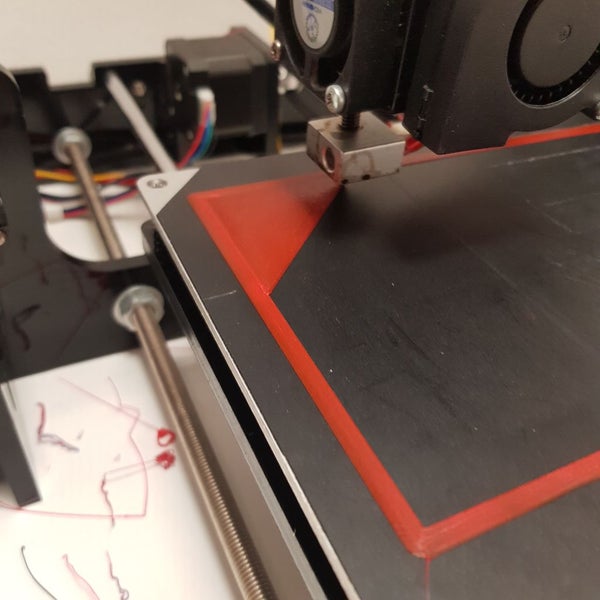
I designed the whole box and everyhing with it in Autodesk Fusion 360. This took me a very long time because I wanted everything to be perfectly right how I wanted it. My first design had the Arduino on the bottom, but this final design has everything inside the lid. Inside the lid there are pre-made holes for securing everyhing with (M3) screws.
To print the parts, I use a Tronxy P802M (similar to a Prusa i3) with a bed of 200 x 200 x 220. I sliced the STL’s using Ultimaker Cura. I made an export of the settings I used for Cura. You can download my Cura profile here.
I also uploaded my STL’s here. There are four, the box itself, the lid, the lid cover and the knob on the lid.
Be aware: the box itself took me more than 24 hours to print !
Read more: B-Safe, the Portable Safe
- What is the B-Safe?
The B-Safe is a portable safe created to protect items like keys, licenses, and phones while at the beach. - How does the B-Safe lock mechanism work?
You put items inside, flip the switch to turn it on, close it, and enter your personal PIN to arm it. - Does the B-Safe sound an alarm when moved?
Yes, if someone takes the box, an LED lights up and if movement continues, a loud alarm sounds until the correct PIN is entered. - Can you disarm the B-Safe during movement?
Yes, entering the right PIN within the moment of movement disarms the device immediately. - Is it recommended to use the B-Safe on an empty beach?
No, it is not recommended because the noisy alarm relies on bystanders stopping a thief. - What microcontroller is used in this project?
The project uses an Arduino Leonardo without pins. - Which sensor detects movement in the B-Safe?
A 3-axis accelerometer MPU6050 is used to detect movement. - What software was used to design the 3D printed parts?
Autodesk Fusion 360 was used to design the box and all internal components. - What printer settings were used for the 3D print?
The author used Ultimaker Cura with a specific profile exported for a Tronxy P802M printer.