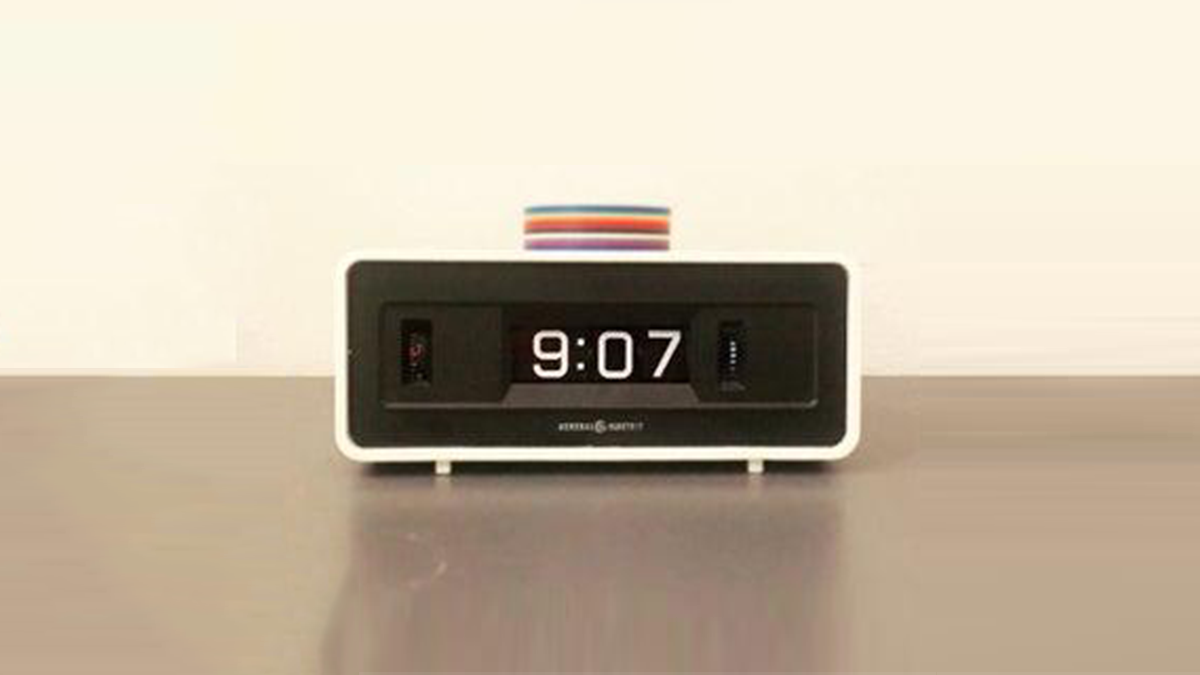
Hoping to reduce my late-night smartphone use, I got a vintage alarm clock for next to my bed. This beautiful mechanical flip clock has just one problem: a truly horrifying alarm sound. (Witness the first video above.)
It’s no wonder what this clock isn’t being used anymore – it’s basically unusable as an alarm; it sound like a piece of metal crying out in anguish.
It seemed like a terrible waste to cast it off complete, so I decided to see if I could replace the alarm sound with something better. It took a bit of sleuthing, but I found that it was actually pretty easy!
If you have an old mechanical clock that you love to see but not hear, follow these steps to see how you can swap out the sound for your own custom alarm sound.
Step 1: Tools & Materials
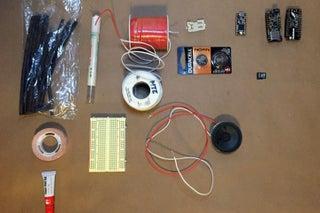
Materials:
- 3V Micro controller (such as Pro Micro 3V or Adafruit Feather)
- MP3 shield for micro-controller. (Optional – for playing real audio)
- Wifi enabled backpack or wing. (Optional – for smart alarm. Note that the Adafruit feather has WIFI built-in, so no extra shield needed if you have that.)
- Speaker
- Custom Switch (tactile button, lever switch, pressure sensor, magnetic reed switch, tilt sensor – see next step for more info about this)
- Coin Battery Holder
- 3v Coin Battery
- Extra wires, heat shrink, solder
- Super glue, mounting tape and small clamps for
Tools:
- For basic wiring: Wire cutters, soldering iron, heat gun, helping hands
- For enclosure: Drill and Drill Bits for Plastic
- For safety when soldering and drilling: Goggles and Respirator
- For programming your micro-controller: Arduino Software, USB
Step 2: Investigate Your Alarm Sound
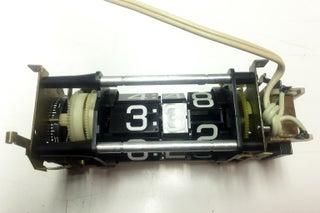
Check to make sure your alarm clock is unplugged. (In fact, double-check!) You’ll be opening up the alarm case, which might have exposed electrical currents, so definitely un-plug it first.
Determine where your alarm sound is coming from. Is it a speaker or buzzer? Is it a mechanical trigger? Older alarms will be more likely to have a mechanical trigger, like the one I’m using in my example.
If you have a speaker or a buzzer, then when the alarm is triggered, you’ll be able to read a signal coming through on the speaker line. (I’m not going to go over this approach in this Instructable, but if there is an awesome YouTube video that outlines the approach you would take in this scenario here.)
If you have a mechanical trigger like in my case, you’re looking for a place to intercept the physical trigger and replace (or combine) it with your own switch.
After lots of investigation, I’m able to see that the alarm in my clock is triggered by a notch perpendicular to a gear releases a spring, which causes a god-awful buzzing noise that is considered the alarm. You’re mechanism might be the same or slightly different, so look at it closely and be patient.
Now that you’ve identified where the alarm is triggered, it’s time to determine what kind of trigger to use to intercept it. A couple options are: simple push button switches, tactile switches, tilt switches, magnetic reed switches, or perhaps even a proximity sensor. This is uniquely creative step in this project: there is no right or wrong answer. Here are a couple switches to think about as possibilities:
- Tactile Switch: This is a very small push button switch.
- Lever Switch: This is similar to a tactile switch, but with a larger area to press.
- Tilt Switch: This switch engages when it is perfectly upright, and disengages when it is tilted at an angle.
- Magnetic Reed Switch: This switch engages when a magnet comes in close proximity.
- Pressure Sensor: This sensor returns a variable pressure applied to the sensor.
- Short Range Proximity Sensor: This sensor returns a variable distance between 4cm and 31cm.
I recommend buying a few different switch types and trying them out, since your first instinct may not work. For example, I had hoped that a tactile or lever switch would work for my alarm, but found that it wasn’t sensitive enough. Instead I used a magnetic reed switch, which works slightly for the distance and forces and I’m working with.
Step 3: Test Your Trigger
Now that you’ve determined how an alarm is physically triggered, and how you can intercept it, it’s time to test it.
Hook up your sensor to your multi-meter on the continuity setting so that when the sensor is engaged, it will trigger a noise on your multi-meter.
Hold or tape your switch in place in the alarm clock so that when the alarm is engaged, it triggers your switch. This is where having multiple switch types will come in handy.
You should determine a good place to mount your switch so that it is triggered when the alarm goes off, and silenced when you silence your alarm.
I tried a few different button types — tactile, level, and tilt, but I found the magnetic to be the most reliable for my application.
Step 4: Create Your Own Alarm With Simple Sound
Now get out your micro-controller, speaker and laptop to start working on your custom alarm sound. Hook up the negative side of the speaker to a ground pin on your micro-controller. Hook up the positive side of the speaker to a PWM pin on your micro-controller. (Every micro-controller is different, so refer to the Pinout digagram from the manufacturer to see which pins are PWM and what the number is.) Note the number associated with the PWM pin.
If you haven’t already, install Arduino, and configure it to work with your micro-controller board. (Every micro-controller is different, so refer to the instructions from the manufacturer to see how to download the proper board drivers to work with Arduino.)
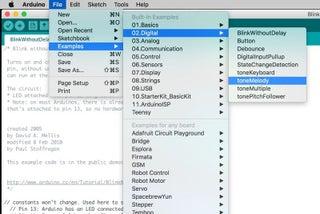
Arduino comes with an example digital audio script called “toneMelody.” Open the toneMelody script by going to Examples -> Digital -> toneMelody. In this example, replace the number 8 on lines 37 and 44 with the number of your PWM pin.
Now upload the script and test it out. You should be hearing audio through your speaker!
————————
Next we’ll customize the melody to be something completely different. For me, I like to wake up to a nice, gentle sound, so I’m going to use the notes from Gymnopedie no. 1.
Google the music chart for the song you want to use, and we’ll turn these into code notes. If you need a basic introduction to reading the notes in a bar chart, check out this tutorial.
Edit the “melody” array on line 22 and the noteDurations array on line 27 to customize your alarm sound. For each note in your song from the bar chart, determine the corresponding note in the pitches.h file, as shown in the screenshot above. Add this note to the “melody” array, and the duration of the node in the “noteDurations” array, and increase the total number of notes on line 32.
You should now have your custom alarm playing through the speakers!
Here is an example sketch for playing this very rough melody.
Step 5: Create Your Own Alarm With MP3 Sound
I wouldn’t blame you if you listened to the example in the last step and thought — “that doesn’t really sound much better.” In this next step we’ll take this a step further and add our own MP3 audio file alarm.
To play high-fidelity audio files, you’re going to need a higher-powered micro-controller that can play back real audio files. I’ll be the Adafruit Music Maker feather wing, but of course you can use any micro-controller that can play mp3 audio.
Similar to the previous step, plug your positive and negative speaker pins into the pins on your microcontroller. If you’re using the Adafruit Music Maker feather wing, you can access an easy audio example by opening File -> Examples -> Adafruit VS1053 Library -> feather_player. (Note that there are a few special steps for installing these custom library examples, which you can reference here.)
Now upload the script and test it out. You should be hearing fancy MP3 audio through your speaker!
Here is an example sketch for playing an MP3 alarm with the Adafruit Music Maker Feather Wing.
Step 6: Mount Your Speaker
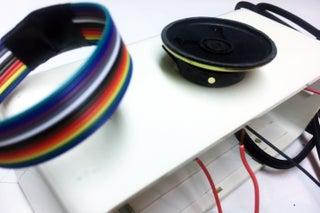
Now determine where on your alarm you can fit the new speaker. Maybe you want to mount it to the back or the side?
In my case I mounted it to the top, like a little hat. I kind of regret that, so definitely give this some thought before you start drilling.
Once you determine where to mount the speaker, mark the spots where you will drill, and carefully drill the holes using a drill bit made for plastic. You don’t have to use a drill bit made for plastic, but I have found that it works must better for delicate plastics and will help keep the case from cracking.
Step 7: Finalize the Circuit
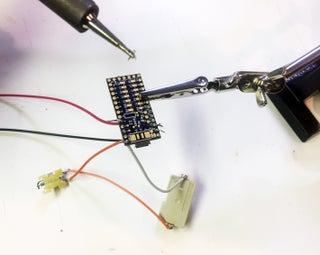
So far we’ve just been testing the switch and speaker independently, but now it’s time to put it together as a complete circuit.
- Solder the speaker wires on to your board. (Negative to ground, and positive to the PWM pin)
- Solder the negative side of the battery to the ground on your board.
- Solder the positive side of the batter to one side of your switch.
- Solder the other side of the switch into the power pin on your board. (Every board is different, so check your board’s documentation to see which pin is used to power the board.)
As always — use proper ventilation and a respirator when soldering!
Now when your switch is engaged, you should hear the alarm sound coming out of the speakers!
Source: Awful to Awesome: Replace a Mechanical Alarm Sound
