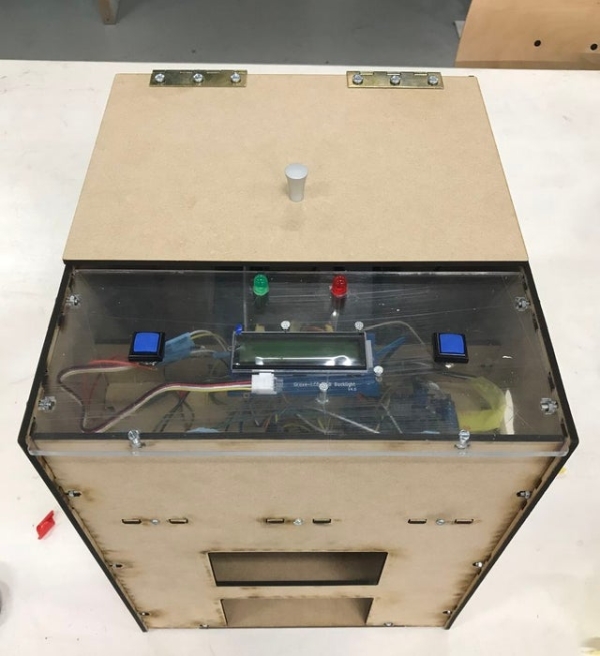
This is a pill dispenser robot able to provide the patient the correct amount and type of medicine pills. The dosing of the pill is performed automatically at the correct time of the day, preceded by an alarm. When empty, the machine is easily refilled by the user. The dispensing and refilling mechanism is controlled by means of an application connected via Bluetooth to the robot and by means of two buttons.
Bruface Mechatronics Project Group 2
Team members:
Federico ghezzi
Andrea Molino
Giulia Ietro
Mohammad Fakih
Mouhamad Lakkis
Step 1: Shopping List
- Adafruit Motor Shield v2.3 (assembly kit) – Motor/Stepper/Servo Shield for Arduino
- Kwmobile humidity temperature sensor
- AZDelivery Carte for Arduino PCM2704 KY-006 Buzzer Passive
- AZDelivery Real Time Clock,RTC DS3231 I2C, Rasperry Pi
- 2. 28byj of 48 DC 5 V 4 Phase of fil de 5 Micro Step with ULN2003 module for Arduino
- AZDelivery Prototypage Prototype Shield for Arduino UNO R3
- AZDelivery PAQUET HD44780 LCD 1602, 2X16 characters + l’interface I2C
- OfficeTree® 20 Mini magnets OfficeTree® 20 6×2 mm
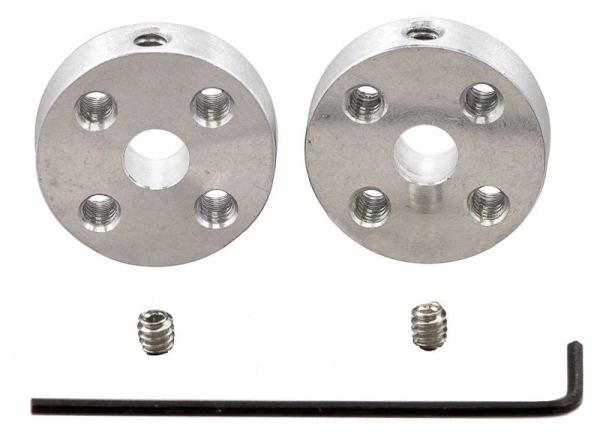
- SHAFT COUPLER POLOLU-1203 UNIVERSAL MOUNTIBG HUB
- 40 Pins 30 cm Male To Female Jumper Wire
- Solderless Breadboard – 830 Holes
- USB 2.0 A – B M/M 1.80M
- Pir Motion Sensor for Arduino
- Set of AWG Breadboard Jumper Wires One Pin
- R18-25b Push Switch 1p Off-(on)
- L-793id LED 8mm Red Diffused 20mcd
- L-793gd LED 8mm Green Diffused 20mcd
- 2 x Poussoir Mtallique Carr+Avec Capuchon Bleu
- Tactile switch 6x6mm
- 2 charn 70×40 mm
- greep plast wit 64 mm
- knop aluminium 12 mm
- ultragel 3gr
- 50 nagels 2×35
- LCD rgb backround light
- 2 ball bearings 6.4 mm shaft
- 2 full mdf sheet for laser cutting
- 1 piece of plexiglass for laser cutting
- 1 potentiometer
- Arduino uno
Step 2: Technical Hints on the Choice of the Components
The mechanisms of dispensing and of refilling require great precision and little movements of the wheels that contain the pills. For this reason, we decide to use two stepper motors.
Stepper Motors are stables, can drive a wide range of frictional and inertial loads, don’t need feedback. The motor is also a position trasducer: sensors of position and speed are not required. Moreover, they have excellent repeatability and return to the same location accurately.
A Motor Shield drives the two stepper motors. It contains 4 H-Bridge that allow to control both direction and speed of the motors. Using a motor shield, we increase the number of free pins.
To be sure that pills are always in good conditions, a Humidity and Temperature sensors measures costantly the temperature and humidity inside the dispenser.
To notify to the user that it is time to take his therapy we built an alarm with a Buzzer and a Real-Time Clock. The RTC module runs on a battery and can keep track of the time even if we reprogram the microcontroller or disconnect the main power.
Two Buttons and a RGB Liquid Crystal Display permit to the user to interact with the dispenser. The user can also set his therapy and the dispensing time through an App for smarphone. He can link his personal device via Bluetooth connection (a Bluetooth module is connected to Arduino).
A PIR sensor detects a movement if the user takes his medicine and gives a feedback of the correct work of the dispenser. Because of its great sensibility and its wide range of detection, it is intentionally obstacled in some directions to avoid useless measurements.
Step 3: Manufacturing Part
In the following, a detailed list of the parts which are produced either by 3D printer or by Laser cutter is provided. All dimensions and geometrical aspects are chosen in order to have a proper matching between all the parts with strong connections as well as a good looking design.
However, dimensions and geometrical aspect may be changed according to the different purposes. In the next sections it is possible to find the CAD of all the components listed here.
In particular, the initial idea for the project was creating a pill dispenser with more wheels so as to dispense the highest amount and the highest variety of pills. For the scope of the course, we limited our attention only to 2 of them, but with little modification on the design, more wheels can be added and reach the goal. That’s why we let you the possibility to modify our design freely so that, in case you like it, you are able to change it and to adapt it to whatever personal taste.
Here is the list of all the 3d printed and laser cutted parts with the thickness in between parenthesis:
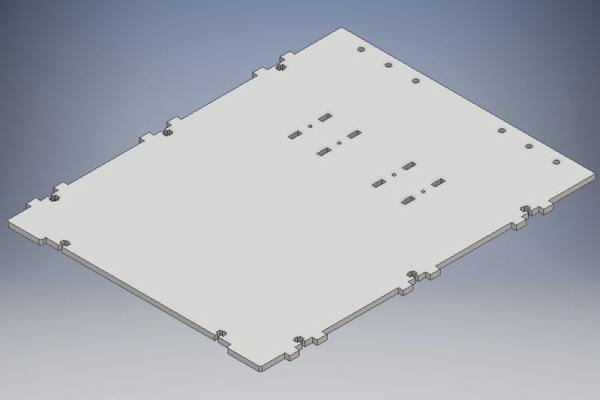
- back plate (mdf 4 mm) x1
- base plate (mdf 4 mm) x1
- frontal plate (mdf 4 mm) x1
- lateral plate_no hole (mdf 4 mm) x1
- lateral plate_hole (mdf 4 mm) x1
- arduino plate (mdf 4 mm) x1
- plate for vertical sustain (mdf 4 mm) x1
- connector plate (mdf 4 mm) x1
- plate for the cap of the wheel (mdf 4 mm) x2
- plate for the wheel (mdf 4 mm) x2
- top plate (plexiglass 4 mm) x1
- opening plate (mdf 4 mm) x1
- bearing holder (3d printed) x2
- cap wheel (3d printed) x2
- funnel (3d printed) x1
- funnel foot (3d printed) x2
- PIR holder (3d printed) x1
- plug for the wheel cap (3d printed) x2
- wheel (3d printed) x2
Step 4: Technical Drawings for Laser Cutting
The assembly of the box is design in order to avoid the use of glue. This allow to realize a cleaner work and, if needed, disassembly can be done to fix some issues.
In particular, the assembly is performed by means of bolts and nuts. In a hole of a proper geometry, a bolt from one side, and a nut from the other side, perfectly fit in in order to have a strong connection between all the mdf plates. In particular for what regards the various plates:
- The lateral plate has a hole positioned in order to let the cable passing through so as to have a connection between the Arduino and the computer.
- The frontal plate has 2 apertures. The lowest one is intended to be used when the person has to take the glass where the pill has been dispensed. The other one is used when it’s time for refill. In this particular situation there is a plug (see later the design) that can close the aperture on the cap of the wheel from below. The positioning of this cap is indeed performed by exploiting this second aperture. Once the plug is positioned, using the buttons or the app, the person can let the wheel rotate one section at a time and place a pill in each section.
- The sustain plate is positioned in order to have a vertical support for the rails where the wheel and the cap are positioned so as to have a more reliable and stiff structure.
- The opening plate is designed as the word says in order to facilitate the refilling mechanism by the user
- The top plate, as can be seen from the picture, is done in plexiglass in order to enable from outside the vision of what’s happening inside.
All the other plates have no special purposes, they are designed in order to enable all the parts to match perfectly together.Some parts can present particular holes with different dimension and geometry in order to let all the electronic stuff (like Arduino and motors) or the 3d printed stuff (like the funnel and the PIR holder) to be connected in a proper way.
Source: AUTOMATIC PILL DISPENSER