Summary of Automatic Gate Slider Under $100
This article details a DIY project where the author built a reliable automatic sliding gate system for under $100, bypassing expensive commercial options. The process involved planning around an existing metal gate, selecting a repurposed car windshield wiper motor for high torque, and using a motorcycle chain for translation. Key steps included testing the motor's power with a combat robot, designing a removable steel mount to ensure safety and ease of maintenance, and installing sprockets to guide the chain.
Parts used in the Automatic Gate Slider:
- Heavy all-metal sliding gate
- Motorcycle chain
- Car windshield wiper motor
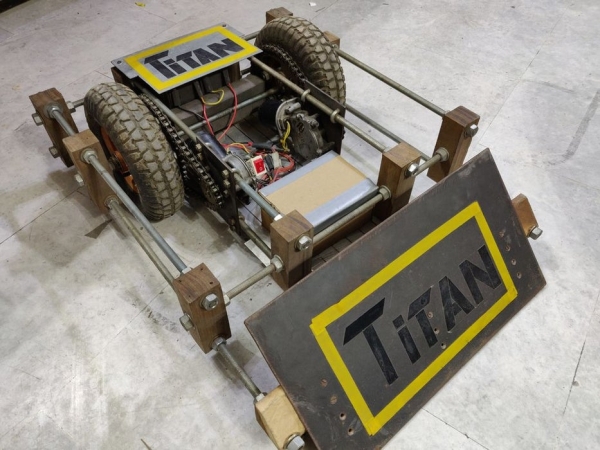
- Combat robot (used for testing)
- Steel sheet
- Angle iron pieces
- Sprocket for the motor
- Guide sprockets
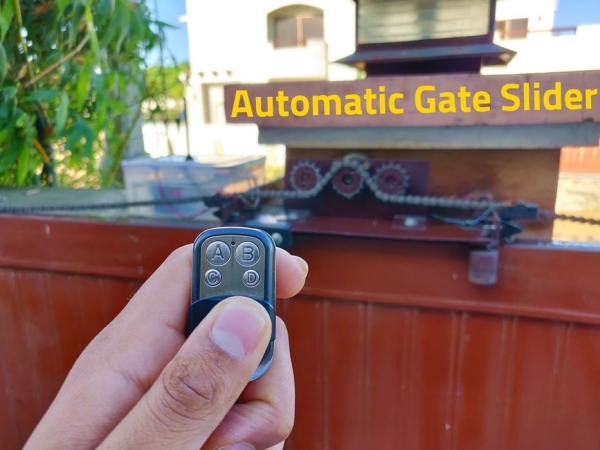
Over the summer, my dad motivated me to look into buying a gate automation system and setting it up. So I started my research and looked into package solutions on AliExpress and local vendors. The local vendors were offering complete solutions including installation for > $1000. These were Italian systems and were supposed to be very high quality. But the price was way out of our budget. The systems on AliExpress were also pretty expensive, the cheapest one being $500 before taxes. I pretty much gave up on the idea of buying a complete system and looked into some DIY approaches.
After my initial research, I concluded that it will be very difficult and time consuming to build it from scratch. That too using limited resources. But then I took it as a challenge and started putting a rough plan together.
It took me a lot of trial and error, and a lot of hard work but I was able to set up a reliable system for a price point that no other system can beat.
If you are looking into building something like this, I would encourage you to do so as I explain all the problems that I encountered during my build process. Hopefully you will be able to get some insight and avoid the mistakes that I made.
If you like what I have made and explained, please consider giving me a vote. Any support is highly appreciated. _________________________________________________________________________
Also follow me on other platforms as I share my progress in between projects.
Facebook: Badar’s Workshop
Instagram: Badar’s Workshop
Youtube: Badar’s Workshop
Step 1: The Plan
I started thinking about how I would go about it. There are many ways that such a project can be tackled, each with its own advantages and drawbacks.
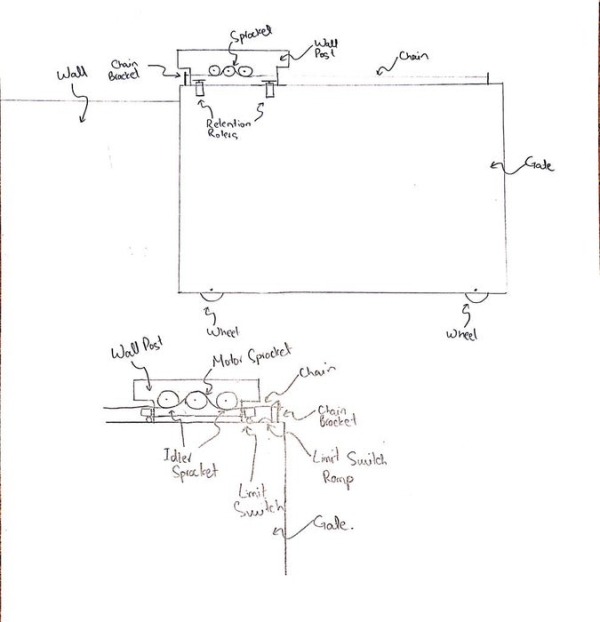
The first thing I did was understand the existing system I was working with. For me this meant my heavy, all metal, sliding gate. For you it might mean something else and I would recommend you to first fully understand your system before settling on a strategy.
I realized that my gate was not built very well and had some variations in its motion. So whatever my translation method was going to be, would have to cater for that variation. That got me thinking about using motorcycle chain. I have used them before so I was familiar with their working. The are cheap and widely available. And their big sections mean minor misalignment will not matter much. The mounting of the chain on the top edge worked well for me since I had a bracket on the top to mount the motor assembly so everything could sit neatly at the top of the gate.
Next came the motor selection. I was shooting for low cost so I dug into my left over parts bin and found a car windshield wiper motor from my combat robot build. I remembered that this motor had a lot of torque and was very well built. So I was confident it would have enough power to drive the gate.
For now I had all the plan that I needed. The electronics and control are whole different story and they will come later on.
Step 2: Testing the Motor “Accurately”
So I was confident that the motor will be able to move the gate but I was not going to build the entire thing and then be proven wrong. So I did what engineers are supposed to do. Testing.
Well I think they are supposed to do calculations first but I didn’t have any values to calculate from. So I dusted my old combat robot and tied it to the gate. The combat robot uses two windshield wiper motors to drive it. And it was the closest thing I was able to set up quickly in the name of testing.
I gave the robot full throttle and what do you know, the gate started moving. Despite the lack of traction, the robot was able to move the gate. That was good enough for me so I proceeded.
Step 3: Making the Motor Mount
From a past accident, I knew that these motors are no joke. And if you get your finger in the sprocket, you can kiss it good buy. I had a near finger loosing incident when I was building the combat robot so I speak from experience.
Based on that experience, I wanted the assembly to be as tucked away as possible. So I decided to mount it on the bracket that was holding the gate in place.
I first attached a steel sheet between the two angle iron pieces. This was so I can mount my motor assembly on top, without having to worry about having a sturdy base.
I decided to make the motor assemble removable from the main gate base because I might want to work on it separately. Taking the motor off would have been very difficult especially because I was working in a tight space. This paid off later as I took the motor assembly off multiple times to work on it.
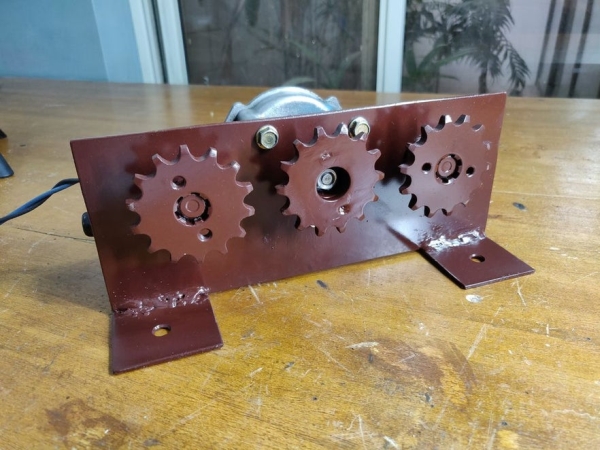
As you can see, I attached the motor to the motor assembly. I also attached the sprocket on the motor and a couple of sprockets on either side to guide the chain onto the motor sprocket and not allow it to slip under load.
Read more: Automatic Gate Slider Under $100
- How did the author solve the budget issue?
The author chose a DIY approach using leftover parts like a car windshield wiper motor instead of buying expensive Italian systems or AliExpress packages. - What method was chosen to move the heavy gate?
A motorcycle chain was selected because it is cheap, widely available, and its big sections tolerate minor misalignment well. - Why was a car windshield wiper motor used?
The author found this motor in their left over parts bin and knew it had high torque and was well-built from previous combat robot builds. - How was the motor tested before final installation?
The author tied the motor to the gate using an old combat robot that uses two such motors to verify it could move the gate. - Where was the motor assembly mounted?
The assembly was mounted on the bracket holding the gate in place, using a steel sheet attached between angle iron pieces for a sturdy base. - Why was the motor assembly designed to be removable?
It was made removable to allow work on the motor separately without struggling to take it off in the tight space of the main gate base. - What safety feature was added to the chain setup?
A couple of guide sprockets were attached on either side to prevent the chain from slipping under load.