Step 1: What You’ll need
A linux web-server with PHP, an arduino, a relay and some other components.
Step 2: Upload your code to the arduino
Upload the following code to your arduino:
void setup(){
Serial.begin(9600);
}void loop()
{
if (Serial.available() > 0) {char inByte = Serial.read();
if(inByte == ‘1’){
digitalWrite(13,HIGH);
}
else if(inByte == ‘0’){
digitalWrite(13,LOW);
}
}
}

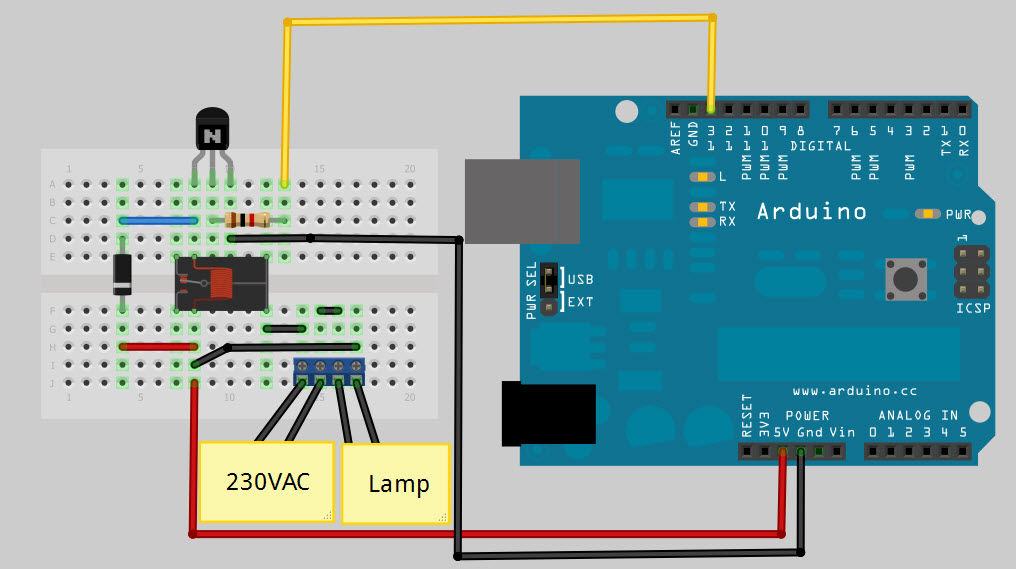
Step 3: The circuit
Connect everything as shown in the image.
Connect the base of the transistor to the pin used in the code I used pin 13Connect your light bulb in series with switching contacts of the relay.And connect your arduino to your server.
Connect the base of the transistor to the pin used in the code I used pin 13Connect your light bulb in series with switching contacts of the relay.And connect your arduino to your server.
Step 4: The webpage
php_serial.class.php = Serial libraryexample.php = The code
make sure you put the path of your arduino on the following line:
$serial->deviceSet(“/dev/ttyUSB0”);Upload this two files to your server in the same directory.
make sure you put the path of your arduino on the following line:
$serial->deviceSet(“/dev/ttyUSB0”);Upload this two files to your server in the same directory.
For more detail: Arduino Internet Controlled Desk Lamp