The DIY industry is booming, despite the desperate blackmailing of society by finance capitalists. Companies like Adafruit and Makerbot are grossing well over a million dollars a year, and Evil Mad Science Laboratories just recently dedicated themselves to running a full-time kit business. Making kits is fun, but starting a business can be scary. If you already enjoy making gadgets and want to take the plunge into selling your own kits online, this article is for you.
First, have no illusions. You probably won’t make much money off of your kits for a while. Accept it. Know it is true. Okay, now that you have your mind right, we can start learning how to design an Arduino shield! You can sell whatever type of kit you want, but Arduino shields are particularly marketable and easy to make.

Step 1 Arduino Shields with Fritzing
Luckily, the open source gods at Fritzing have included an Arduino shield pattern in the Fritzing parts library. If you are new to Fritzing, check out this tutorial for beginners.
Navigate to the PCB view tab. Click on the green PCB rectangle to select it and bring your mouse to the bottom-right of the screen. Go to the shape scroll-down menu and select Arduino shield instead of rectangle. If you are making prototypes at home with single-sided copper-clad boards, be sure to select “single-sided” from the layers drop-down menu.
There we go… one Arduino Shield ready for components!
Notice that the shield template even has indicators for header placement.
Now that we have the shape, it is time to add functionality. You can put whatever you want on your Arduino shield, but to be a shield it will have to at least have long lead female headers on the sides. These are the pins that are plugged in when the shield is sandwiched onto the Arduino board.
Select the header component from the “connections” parts menu and drag it onto the work area. Use the customization menu on the bottom-right of the screen to make your component 8 headers long.
Right-click your headers and rotate them 90 degrees clockwise. Place them in indicator boxes on the bottom and top of the Arduino. Do this until you have a header for each Arduino socket.
A quick way to tell it your headers are lined up is to drag an Arduino board from the components menu and try to line up the component holes. Below, I have dragged an Arduino board directly over my header pins. They all line up except the ones on the lower left.
Perfect! Your Arduino may have more or fewer pins depending on what version you have. The UNO has some extra pins. All shields are compatible with both kinds of Arduino, so don’t worry.
Once everything is aligned, remove the Arduino from the work area and start wiring up your parts!
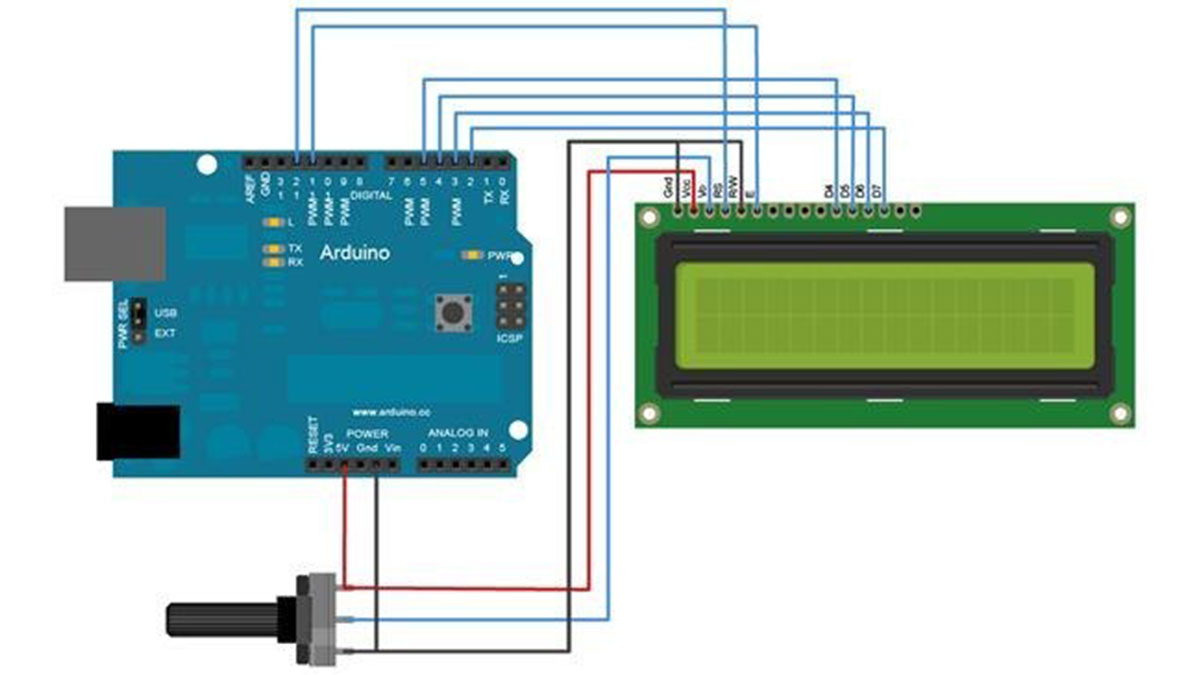
I decided to make an LCD shield to make interfacing with a screen easier. LCDs require a bunch of Arduino pins and having a pre-made shield will cut down a lot on prototyping time.
Drag your components over the board and orient them.
Now, start wiring it up! You can do this in the breadboard, schematic, or PCB tab, but I find it is easiest to just stay in the PCB tab for this step. I used this wiring diagram from the official Arduino website to hook up my screen.
Make connections by clicking and dragging from one lead on the board to another until all of the connections have been made. It doesn’t have to look pretty.
Click “Autoroute” and let the computer sort out the rat’s nest.
Now you can go in and clean up the design. Depending on how many traces you have, you may be forced to use a jumper wire somewhere in your circuit. The light blue line above is a jumper wire for a trace the computer could not fit onto the board.
Here is the board after I manually tweaked the trace placement:
Make sure the trace widths are to your liking and click “Export For PCB” at the bottom of your screen. There you go! A perfect pattern for etching your first prototype shields! Etch, solder, and test your new shield to see if it will work for your future customers.
Remember that when you get the boards professionally made, the silk screen layer will look awesome! Label everything with silk screen including the Arduino pins on your shield.
Step 2 Professional PCB Orders
DIY is sufficient for all of your personal needs, but when it comes to selling kits, you’re going to want the best board quality possible.
There are innumerable PCB factories you can choose from. Here are the two cheapest and most reliable services I am aware of:
- BatchPCB: Run by SparkFun Electronics, BatchPCB is a place to order custom boards, as well as buy and sell other’s board designs. BatchPCB gives you the option of 2- or 4-layer boards, which means you can get some really complex circuits going on! The price is reasonable and SparkFun is great to do business with.
- DorkbotPDX: Similar to BatchPCB, Dorkbot offers a service whereby many board designs are accumulated and sent into the manufacturer as one giant order. They cost a dollar more per square-inch than BatchPCB, but there is no setup fee. I have heard many people say they were pleased with the final product. All the boards are purple, so keep that in mind.
Step 3 Kits
Your PCBs are just one part of the kit that you’ll eventually sell. Put together a practice kit of all the components needed for your gadget. Try different kinds of switches, knobs, LEDs, etc. to see what works best in your project.
Once you have a finalized parts list, gift a kit to a friend and see if they have any trouble putting it together. Revise the parts and if needed, include a website URL with directions for assembling your kit. Repeat until your friend can assemble your kit without any help from you. Now you are ready to think about the uncomfortable part—business.
For more detail: Get Into the Kit Business: How to Build and Sell Your Own Arduino Shields