Summary of Arduino Homebot Robot Setup in CSC 230 Robot Construction
Summary: The article describes assembling an Arduino Homebot robot by mounting power, breadboard, and Arduino Uno into a chassis using nonpermanent methods, secure mounting, and neat wiring. It covers wiring strategies (ganged ribbon cables, double power/ground rails, short flat jumpers), mounting techniques (Velcro or #2 screws with spacers, paper template for precise holes), basic programming guidance, and optional sensors (whisker switches, IR long- and short-range) to improve reliability, modularity, and troubleshooting.
Parts used in the Arduino Homebot Robot Setup:
- Arduino Uno
- Breadboard
- Battery box
- 6-inch jumpers
- Short, flat jumpers
- Ganged ribbon cables
- Velcro tape
- #2 screws
- Mat-board base
- Ice pick (for hole punching template)
- Resistors
- LEDs
- Piano-wire whisker
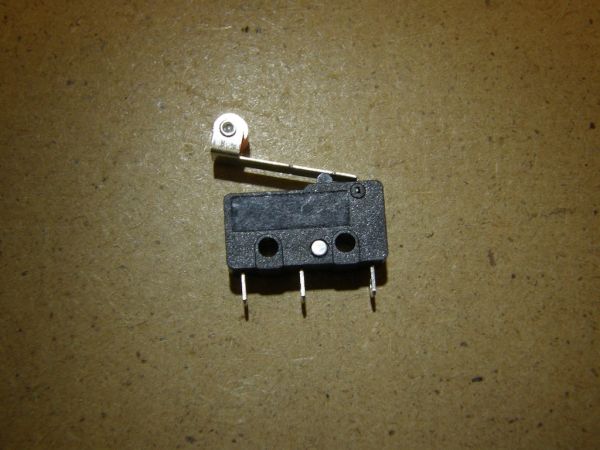
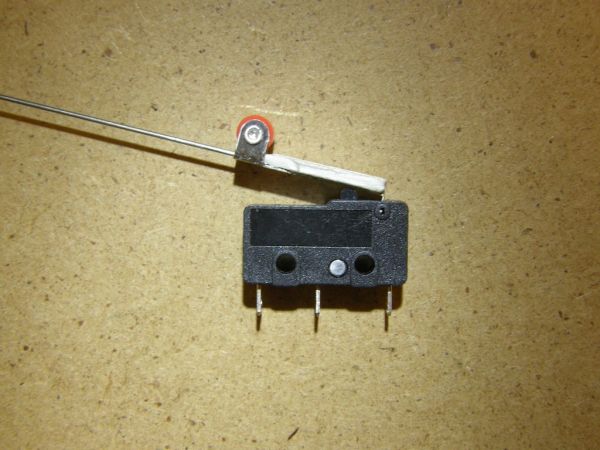
- Mini-switch (whisker switch)
- Grooved matboard strip
- Superglue (for whisker assembly)
- IR long-range distance sensor
- IR short-range distance sensor
Homebot
Within the integration unit, core systems—power, control, and prototyping of the robot—are being converged as part of the Arduino Homebot Robot Setup. Short, flat jumpers improve breadboard wiring by keeping connections secure, tidy, and less prone to short circuits. Laying components like resistors and LEDs flat boosts durability and creates a more reliable, low-maintenance circuit.
Component Placement
This section briefly describes the basic assembly of a robotic project by mounting battery boxes, a breadboard, and an Arduino Uno into the chassis. With proper positioning, one can easily wire using 6-inch jumpers and ribbon cables, thereby forming a solid base for future connections and simple troubleshooting.
Using non-permanent attachment methods is crucial in the project. Avoiding glue allows flexibility during development, making it easier to reposition or replace components. The breadboard and battery units should be mounted with Velcro tape for easy removal without any damage. This design option thus enhances ease of troubleshooting and allows for modular upgrades, keeping the project open for future configurations.
This section explains how to mount the Arduino Uno while protecting its underside pins safely. While Velcro is a quick option, using #2 screws with a mat-board base offers better stability. Careful handling and optional spacers help prevent damage, ensuring long-term reliability of the project.
A precise method for the Arduino Homebot Robot Setup involves creating custom holes for mounting the Arduino Uno. Using a paper template made from the actual pin layout of the board, users may punch accurate holes in the mounting surface with an ice pick. This guarantees a flush and tidy fit, protects the sensitive pins from damage, and reduces the risk of shorting. All in all, this improves project reliability, establishing a firmer ground to mount the Arduino on.
Wiring Strategies
Breadboard wiring in the project is explained using an image as a general guide. It highlights the use of ganged ribbon cables for connecting to the Arduino and an efficient layout. This approach ensures stable and controllable connections, increases reliability, maintains wiring organization, and makes assembly and troubleshooting easier.
Key power distribution practices in the project include using double power and ground lines to improve connection stability. Keeping the power rails for the motors and the Arduino separate avoids voltage drops from motor surges that could reset the Arduino. Connecting all grounds ensures correct signal reference and circuit operation, improving overall reliability.
Using short, flat jumpers improves breadboard wiring by securing connections, reducing clutter, and minimizing disconnection or short-circuit risks. Trimming components like resistors and LEDs to lie flat adds durability and results in a more reliable, easier-to-maintain circuit.

An image shows ganged ribbon jumpers used to connect multiple Arduino pins in the Arduino Homebot Robot Setup. This organized wiring method simplifies setup, improves connection reliability, and makes troubleshooting easier by keeping everything neat and traceable.

Programming
Changing the boilerplate demo code is one of the first tasks I recommend students do in any project, and it allows students to get hands-on experience changing existing code. Though the demo code references components like whisker switches and a piezo speaker, it can be modified to run a simple power-up sequence. This helps users build core programming skills and become familiar with the code, laying the groundwork for more complex behaviors later in the project.
Port assignments in the project are flexible, not fixed. You can change suggested combinations, such as those for ganged ribbon jumpers, to match available components or your preferred layout.
This adaptability allows users to customize wiring based on their needs, making the project more accessible and versatile without affecting functionality.
Sensors
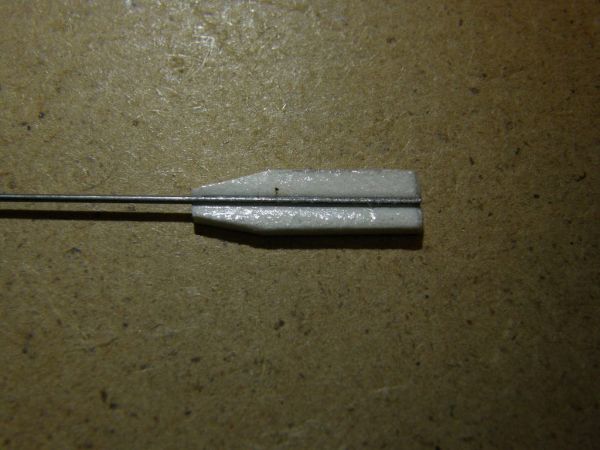
This section gives step-by-step guidance for assembling whisker switches, an optional but useful sensor for the project. It explains how to secure a piano-wire whisker to a mini-switch using a grooved matboard strip and superglue, with roughening for better adhesion. This process ensures a strong, responsive sensor that supports interactive functions and reliable navigation.
This paragraph explains the optional IR distance sensors and their roles in the project. The long-range sensor detects obstacles ahead or around the robot, aiding navigation, while the short-range sensor angled downwards detects drop-offs to prevent falls. These sensors enhance the robot’s environmental awareness, safety, and functionality.

Read more: Arduino Homebot Robot Setup in CSC 230 Robot Construction
- How should the Arduino Uno be mounted?
Mount with Velcro for easy removal or use #2 screws with a mat-board base and optional spacers for greater stability. - Can components be attached non-permanently?
Yes; the article recommends using Velcro tape to allow repositioning and easy removal during development. - What wiring method improves organization and reliability?
Using ganged ribbon cables and short, flat jumpers improves organization and connection reliability. - How are power distribution and grounds handled?
Use double power and ground lines and keep motor and Arduino power rails separate while connecting all grounds. - How do you protect the Arduino underside pins?
Create precise mounting holes using a paper template and punch holes with an ice pick to ensure a flush fit and protect pins. - Can port assignments be changed?
Yes; port assignments are flexible and can be modified to match available components or preferred layouts. - How are whisker switches assembled?
Secure a piano-wire whisker to a mini-switch using a grooved matboard strip and superglue, roughening surfaces for better adhesion. - What roles do the IR sensors play?
The long-range IR sensor detects obstacles around the robot and the short-range IR sensor angled downward detects drop-offs. - Should components like resistors and LEDs be trimmed?
Yes; trimming and laying them flat increases durability and creates a more reliable, low-maintenance circuit.